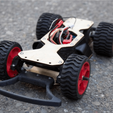
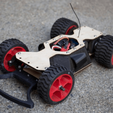
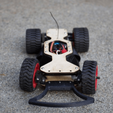
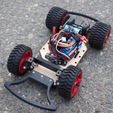
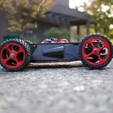
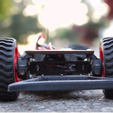
We are finally proud to introduce the high performance RC Street Car V1! Designed with a lesson plan in mind, this is the ultimate one week project for any classroom or hobbyist. Though all the parts to get this car driving are included in this post, we've created Onshape CAD tutorials to teach YOU how to design most parts of this car as it was a key project of the Inventing Reality Summer 2017 summer program. If you're looking for even more Onshape and Tinkercad classroom tutorials, projects, and lessons, check out our Inventing Reality 2017 lesson folder.
Regarding the car itself, it's SUPER FAST, durable, and fun to both build and drive. All parts of the frame can be completely 3D printed, even the tires and gear! Therefore, it's super easy to fix and modify since all parts can be made with the click of a button. It is known to be able to do the "super doughnut" meaning that it does doughnuts so intense that it spins at a 45 degree angle when it does them. (explanatory youtube video coming soon)
Non 3D Printed Parts List:
-2430 7200kv 4P Brushless Motor & 25A ESC
-GoolRC TG3 3 Channel Transmitter & Receiver
-RioRand 9g Metal Gear Servo
-GNB 850mah 2s LiPo
-JST Connector Kit (the ESC comes with a T plug which will need to be replaced with a JST for the battery)
-14T 2mm Pinion Gear
-M5x150mm Bolt (for rear axle)
-M5 Nuts
-M5 Lock Nuts
-M5x40 Bolts (For front axles)
-M3 Lock Nuts
-M3 Bolt Assortment
-M2.5 Bolt Assortment
-625zz Bearings
-High Strength Threadlocker
3D Printed Parts
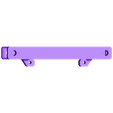
-Rear Axle Ruler: This part is simply a measurement device. Place it at the end of your M5x150mm rear axle bolt to measure how far to screw in your right rear wheel
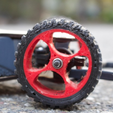
-Rear Wheel Simple/Front Wheel Simple (PLA and TPU): these are the simple versions of the rear wheel. Instead of a complex tread pattern, they consist simply of rectangular flaps. These work surprisingly well as the tread flaps function like suspension which the car otherwise lacks. Note that all wheels need to be printed with TPU treads. For optimal results, print treads with ultraflexible Ninjaflex TPU. The center of the wheel should be printed in PLA for best results also. All wheels are mounted to their respective axles by two M5 nuts. A standard M5 nut should be installed on the inside of the wheel while a lock nut should be installed on the outside of the wheel. For the rear right wheel, add a dot of red loctite to both bolts to ensure it doesn't unscrew.
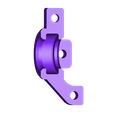
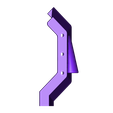
-Front Wheel Axle Mounts (sides 1 & 2): These mounts sandwich together to hold your front 625ZZ bearings to hold your front M5x40 bolts. You want to print these in the strongest material possible at 100% infill and at least 3 shells as they take most of the shock from bumps. Printing them in solid PLA will do just fine though.
-5mm Flange Spacer: Sandwich these on either side of your 3D printed rear axle drive gear ensure it stays straight and doesn't move. Make sure that the flanged part faces toward the gear!
-15mm Spacer: Install this spacer on the left side of your car's rear axle to space the left wheel from the body.
-9g Servo Mount: This simply bolts into the bottom of your frame and holds a 9g metal gear servo.
-Steering Rack: This connects to both sets of your motor mounts to allow your wheels to turn. Connect this rack to your servo arm with some thin music wire or a very stiff paper clip.
-ESC Mount: Mount these on either side of your ESC to keep it tightly locked down to your frame.
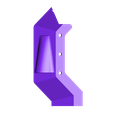
-Right & Left Side Guard Air Intakes: These optional side pieces pop into the M3 bolt holes on your bottom plate and can then be fastened to the top plate with M3x8 bolts. These not only help contain all of your wires, but also keep all sorts of dirt and grime out. Also, the air intakes direct airflow onto the ESC heatsink and motor to keep them cool.
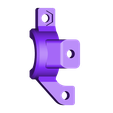
-2430 Motor Mount: As the name implies, this allows you to mount your 2430 motor with M2.5 bolts. Additionally, both of your rear axle bearings pop into the side of this mount to be held in place. It simply bolts down to your bottom plate to be installed.
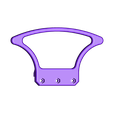
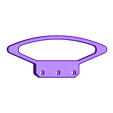
-Front & Rear Bumper: These bumpers will save you a lot of suffering and unnecessary printing. For optimal strength, print these bumpers in a very stiff TPU or nylon filament so that they flex a little bit but not too much. The front bumper is an essential piece for protecting your front steering mechanism which can break during a hard crash. These bumpers simply screw down to your bottom plate.
-Rear Drive Gear: This super simple 3D printed gear connects to your rear axle with a M5 nut. The gear should be printed in PLA with 100% infill and 3 shells for maximum strength. Surprisingly, this gear will last a very long time before finally wearing out! To install your gear, simply pound a M5 lock nut or regular nut into the gear with a mallet. Screw it onto the rear axle and fasten it with a dot of red loctite.
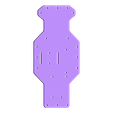
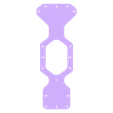
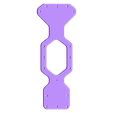
Base Plate: At the heart of your car, there's the base plate. We've included .STL and .SVG files so you 3D print, laser cut, water jet, or cnc your base plate in any material you want! For optimal results, laser cut it in some cheap 1/8" ply.
Upper Plate: To hold everything together and make this car even stronger, there's the upper plate. This screws onto the top of your front wheel axle mounts and onto the top of the rear motor mount. The side air intakes also screw onto the top plate. Just like the top plate, we've included both STL and SVG files so it can be cut/printed out of just about any material you like.
How I Designed This
Onshape
If you're looking for an easy remix, don't hesitate to make a copy of our public document and you're set!
Overview and Background
Have you ever wanted to design your very own high performance RC vehicle? Are you interested in 3D printing and modeling and want a fun, easy way to learn? Our comprehensive tutorial slide decks from the Inventing Reality summer program 2017 covers everything from the history of 3D printing to designing, printing, and laser cutting your very own RC race car!
Lesson Plan and Activity
Inventing Reality Summer Program 2017 Onshape Tutorial
During our summer program, this project was taught to students from 6-12th grade. For the first day, we introduced the project to students and distributed boxes of parts. Returning students immediately began designing the car from the comprehensive slide decks. We then introduced the basics of MCAD, Onshape, and 3D printing to newer students or those who wanted a refresher. Each morning of the week, we would give a short, 20 minute lesson on an important topic/idea of 3D printing or Onshape before students set to work on their projects again. By the end of the week, all students of all ages successfully completed the project with time to spare for races. Since everybody works at a different pace, students that finished early set up a miniature race course and obstacle course to test their cars on. With only a week to complete this project, we decided to give students certain parts which took us months to perfect to save them time and ensure everybody could go home with a functional car by the end of the week. We gave them: the rear drive gear, bottom plate, front wheel axle mounts, the 2430 Motor Mount, and the front steering rack. If time permits, we highly suggest having students design all parts from scratch.
Things we suggest encouraging to students:
Always triple check your design before submitting it for printing or cutting, but never expect to get everything perfect the first time. 3D printers are powerful because they allow rapid prototyping and make improving your design much much easier!
Only use the tutorials as a bare outline and guide. Try different things and see what works and doesn't work! This is what will make your car unique!
3D Print and Laser Cut Submission
When students are ready to submit their designs for printing or cutting, we created two simple submission forms which fed into a google spreadsheet for them to upload their files to and choose their print and cut settings.
3D print submission form example
Laser cut submission form example
Materials Needed
Non 3D Printed Parts List
-2430 7200kv 4P Brushless Motor & 25A ESC
-GoolRC TG3 3 Channel Transmitter & Receiver
-RioRand 9g Metal Gear Servo
-GNB 850mah 2s LiPo
-JST Connector Kit (the ESC comes with a T plug which will need to be replaced with a JST for the battery)
-14T 2mm Pinion Gear
-M5x150mm Bolt (for rear axle)
-M5 Nuts
-M5 Lock Nuts
-M5x40 Bolts (For front axles)
-M3 Lock Nuts
-M3 Bolt Assortment
-M2.5 Bolt Assortment
-625zz Bearings
-High Strength Threadlocker
Skills Learned
3D printing
Laser cutting
Onshape
RC mechanics
Voltage
Amperage
Duration of Lesson
1-2 weeks depending on what parts students choose design

/https://fbi.cults3d.com/uploaders/13474583/illustration-file/9fca590c-0e33-4533-b863-a7fce6b5b855/Capture%20d%E2%80%99e%CC%81cran%202018-03-02%20a%CC%80%2014.20.54.png)


