Skip to content

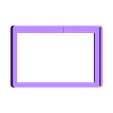
Pi 3 Case for 5 Inch Touch screen

Advertising
Advertising
?
Creation quality: 4.8/5 (2 votes)
Evaluation of members on the printability, utility, level of detail, etc.

  • 13k views
  • 14 likes
  • 387 downloads
  • 1 collection
  • 1 comment
  • 1 make

License
3D design format
STL Folder details Close
  • Pi_3_Case_5_inch_TS_v2.stl
  • Pi_Case_5inch_screen-Bottom.stl
  • Pi_Case_5inch_screen-Bottom_v3-MicroSD_Slot.stl
  • Pi_Case_5inch_screen-Top.stl
  • Pi_Case_5inch_screen-Top_v3-MicroSD_Slot.stl

Learn more about the formats

Publication date 2018-03-20 at 16:36
Design number 22822

3D printer file info

3D model description

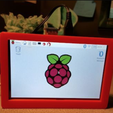
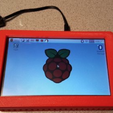
I looked around for a Pi 3 case that would support a 5" screen but was unable to find one (lots of 3.5" and 7" screen models). So, I decided to make my own.

I used the original design from "Raspberry Pi Display Case" for my basis. I recreated it from scratch with the exception of the original cutouts for the power/HDMI/audio ports and the cutout for the ethernet/usb ports. Everything else was created from scratch using Sketchup.

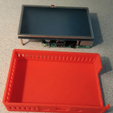
I did not create an access door for the microSD card, so I designed the top to fit snugly but it does not "lock" onto the bottom case.

Here is the screen I purchased/used:
https://www.amazon.com/Kuman-Resistive-800x480-Display-Raspberry/dp/B01F3EKJIA/ref=sr_1_1?ie=UTF8&qid=1470006672&sr=8-1&keywords=kuman+5%22+touch+screen

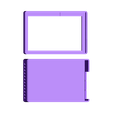
UPDATE: I just uploaded v2 (top and bottom are in the same file). This version has a lip on the top and bottom which allows the two pieces to fit together better than the original version.

I have also added top and bottom v3 (with a place for the MicroSD extension, so that the MicroSD card can be accessed from outside the case (near the USB ports. I purchased an MicroSD extension from Amazon (see below). The only drawback to using this extension is it comes with a real long ribbon cable. There should be room on the same side of the case as the extension mount to place the cable and keep it out of the way. I carefully removed the black plastic housing that came with the cable and created a slot that it will fit in snugly.

https://www.amazon.com/gp/product/B01D9J8KQE/ref=oh_aui_detailpage_o00_s00?ie=UTF8&psc=1

3D printing settings

Printer:

Hictop Prusa i3

Rafts:

No

Supports:

Yes

Resolution:

2

Infill:

20%

Notes:
I used Cura to slice it and left supports everywhere turned on. The only support it added was for the lower HDMI and power cutouts.

Print time for the bottom was about 4 hours and 1.5 hours for the top.

Advertising


Issue with this design? Report a problem.

Would you like to support Cults?

You like Cults and you want to help us continue the adventure independently? Please note that we are a small team of 3 people, therefore it is very simple to support us to maintain the activity and create future developments. Here are 4 solutions accessible to all:

  • ADVERTISING: Disable your banner blocker (AdBlock, …) and click on our banner ads.

  • AFFILIATION: Make your purchases online by clicking on our affiliate links here Amazon.

  • DONATE: If you want, you can make a donation via Ko-Fi 💜.

  • WORD OF MOUTH: Invite your friends to come, discover the platform and the magnificent 3D files shared by the community!


Sharing and downloading on Cults3D guarantees that designs remain in makers community hands! And not in the hands of the 3D printing or software giants who own the competing platforms and exploit the designs for their own commercial interests.

Cults3D is an independent, self-financed site that is not accountable to any investor or brand. Almost all of the site's revenues are paid back to the platform's makers. The content published on the site serves only the interests of its authors and not those of 3D printer brands who also wish to control the 3D modeling market.

100% secure payment by credit card, PayPal, Apple Pay, Google Pay, etc.
View all payment options.