Skip to content

Mini Crossbow

Advertising
Advertising
?
Creation quality: 2.8/5 (3 votes)
Evaluation of members on the printability, utility, level of detail, etc.

  • 12.4k views
  • 30 likes
  • 612 downloads
  • 1 collection
  • 1 make

License
3D design format
STL Folder details Close
  • Bow.STL
  • Bow_V4.STL
  • Main_Body.STL
  • Regular_Bolt.STL
  • Trigger.STL
  • Trigger_Hinge3.STL
  • Trigger_Hinge_Cap.STL
  • Trigger_Spacer3.STL

Learn more about the formats

Last update 2018-05-16 at 04:10
Publication date 2018-04-25 at 10:20
Design number 24498

3D printer file info

3D model description

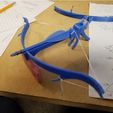
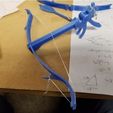
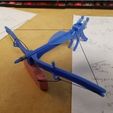
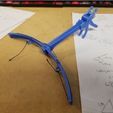
Have you ever had the sudden urge to siege castles and overthrow empires? Well, now you can with this mini crossbow! Actually the only castles you could put a dent in with this thing are made of sand. This is a fun little weekend project I've had that will launch a bolt (arrow) across the room and wow your friends (if you have any).

The crossbow is printed in several parts. The trigger spacer and trigger files must be printed twice. Refer to the exploded view for assembly. Once put together, stretch a small rubber band from the back part of the trigger to the hook on the back of the main body as seen in the pictures (I used braces rubber bands). The trigger kind of snaps together, but it will eventually fall apart so it's a good idea to glue the two trigger spacers to the two trigger pieces and the hinge cap to the inside of the hinge together. Gluing the bow into the main body is up to you. It's a pretty snug fit and allows you to take the bow out for easier carry.

I included two different bow files, each with different draw weights (I don't know what they are). I think PETG is the best filament to use for the bow because of its flexibility. Print the bow at 100% infill. The hardest part of the build was stringing the bow. It's best to find a thin string and have lots of patience, at least if you have big hands like me. Once you have it all together, pull it back and fire the bolt. You might have to lightly hold down the bolt to the main body if you use the stronger bow. I found that the string has a good tendency to slide around the bolt and not launch it. Do not do a dry fire!!! If you don't know, dry firing is shooting the crossbow with nothing loaded. It will probably break the bow and you'll have to print a new one and string it all over again (like me).

Happy castle sieging!!

Advertising


Issue with this design? Report a problem.

Would you like to support Cults?

You like Cults and you want to help us continue the adventure independently? Please note that we are a small team of 3 people, therefore it is very simple to support us to maintain the activity and create future developments. Here are 4 solutions accessible to all:

  • ADVERTISING: Disable your banner blocker (AdBlock, …) and click on our banner ads.

  • AFFILIATION: Make your purchases online by clicking on our affiliate links here Amazon.

  • DONATE: If you want, you can make a donation via Ko-Fi πŸ’œ.

  • WORD OF MOUTH: Invite your friends to come, discover the platform and the magnificent 3D files shared by the community!


Sharing and downloading on Cults3D guarantees that designs remain in makers community hands! And not in the hands of the 3D printing or software giants who own the competing platforms and exploit the designs for their own commercial interests.

Cults3D is an independent, self-financed site that is not accountable to any investor or brand. Almost all of the site's revenues are paid back to the platform's makers. The content published on the site serves only the interests of its authors and not those of 3D printer brands who also wish to control the 3D modeling market.

100% secure payment by credit card, PayPal, Apple Pay, Google Pay, etc.
View all payment options.