3D model description
"How can I find the darn 9/64 drill bit in this mess?"
If you are controlled-chaos DIY like me then you probably know what it means to have an ever growing jar full of hopelessly unsorted drill bits. And you know how long it takes to find the right one especially in the confusing world of fractional imperial sizes. Yes because we all know by heart what 17/64 looks like!
Yes I do have a nice set box with compartment for each size but who has time to put them neatly back in the heat of the DIY creativity? I would rather buy a new sorted set than trying to sort through the mess with calipers or magnifying glass.
So how to sort drill bits like a ninja?
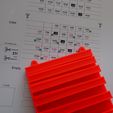
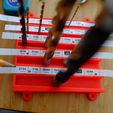
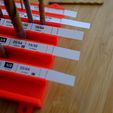
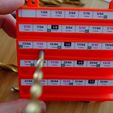
This is the absolutely best way: A precisely made sorter of my own design. All you need to do is to slide the drill bit to the grove from the right and where it stops - that's the size. Less than a second and exact reading.
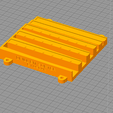
There are two files, both are the same. One has tabs so it can be attached to a wall or workbench for one hand operation.
There is included ZIP file with paper template (either PDF or PNG), that you need to print on paper (make sure it is 100%, no fit to page etc..). The PDF should be the one you use as it prints in correct size on Letter paper, but in a case I am also including PNG - but then you need to figure out to print it exact size from some software. There is a calibration 1 inch square on the printout.
Cut the strips, then use some known size drill bits to "calibrate" your 3d print. Trim and insert.
The steps are:
Print the sorter in 3D. Don't scale it by accident.
Grab the paper template PDF and print it on some harder paper. Make sure it is 100% so be sure no "fit to page" or "scale" or other clever settings the PDF viewer will try to sneak into the print option dialog are used.
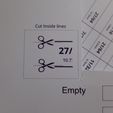
Cut the strips. They are designed so you need to cut inside the lines, not on them, not outside; so they will fit to the tabs in the sorter. Just make sure you don't see the lines on the strips after you cut them.
Now the calibration. The strips are designed longer so you need to mark where to cut them on sides.
Get some known size drill bits of various sizes. You can measure them with calipers if you can't read the numbers on the bits, but make sure you don't use fractional inch settings in calipers - I found out the hard way that many calipers may round up the fraction in wrong direction - so for example instead 9/64 the caliper will round to 5/32 and then you will calibrate it badly. Best is to use in fact mm settings and then look at the mm settings on the strip under each fraction.
So you slide couple of those known size bits until they stop and then position the strips so they align with the bits. Then mark the ends with pencil so you know where to cut.
After cutting you can then insert the strips into the tabs. You may try to slide them there from right but actually the easiest way is to put the bottom under the bottom tab and with your fingernail force the top under the top tab.
Since each 3D printer may be calibrated bit differently in some cases you may need to shim the grove if it is just a hair too wide and the strips go too far left. Put a layer or two of scotch tape or electrical tape to make the groves tighter. On my creality cr-10 everything was within good tolerance.
The same design can be used for metric drill bits but you will need to design the strips by yourself - or just put clear paper and pencil the numbers down.
I hope you like it.
I totally do - it really works for me as designed.
3D printing settings
Standard 0.2 layer with 0.4 nozzle, 20% infill, no support. Make sure you don't resize it by accident.
The two STL files are the same but one has TABS so it can be attached to a workbench with screws so it can be used with a single hand.
As for paper to print the strips, I used a heavy photo glossy paper in my inkjet and the strips sit well and stay put. If you use lighter paper for example with office laser printer, you may want to put a touch of glue under the strips. A white glue is enough to hold the strips.

/https://fbi.cults3d.com/uploaders/13366578/illustration-file/e05e02da-4ad0-4784-bd9a-5a7bb1dede2f/title.jpg)


