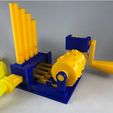
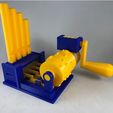
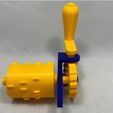
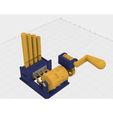
How I Printed and Assembled Four Whistles
Purchase, Print and Prepare the Parts.
As previously mentioned, you will need to purchase at least one "punch balloon", a roll of .7mm thick rubber electrical tape (I used Scotch 2242), a bottle of "thick" cyanoacrylate glue and clear silicone caulk to complete this model. All of these items are available on line, in party supply stores (punch balloons), in hardware stores (rubber electrical tape, silicone caulk and thick cyanoacrylate glue), and in hobby shops (thick cyanoacrylate glue).
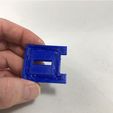
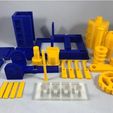
This is a challenging print and build and as such requires a clean and level build plate (to eliminate warping) and trimming, filing and/or sanding (to remove edge oozing). Prior to assembly, test fit and trim, file, sand, etc. all parts as necessary for smooth movement of moving surfaces, and tight fit for non moving surfaces. Depending on the colors you chose and your printer settings, more or less trimming, filing and/or sanding may be required. Carefully file all edges that contacted the build plate to make absolutely sure that all build plate "ooze" is removed and that all edges are smooth. I used a flat jewelers file and plenty of patience to perform this step. To minimize filing, printing with the slicer "brim" or "raft" is an option. Also, when printing the taller, narrow base parts ("Pipes.stl", "Axle Arm Cylinder.stl", "Knob.stl" and "Axle Knob.stl") I used the slicer brim option in order to provide additional stability (a photograph of most of the yellow printed parts using the brim option is included).
I printed all parts on an Ultimaker 2+ Extended and an Ultimaker 3 Extended at .1mm vertical resolution, with 100% infill and .1mm initial layer height (more on this setting follows) for "Valve Plate 3 Degree Preload.stl" and .1mm vertical resolution, 50% infill and .27mm initial layer height for the remaining parts.
Also, I printed "Base.stl" and "Valve Body.stl" with supports as they required much less clean up with supports than without.
"Valve Plate.stl" contains the valves necessary to control air flow through the whistles. "Valve Plate.stl" is one of four components ("Valve Plate.stl", "Valve Body.stl", "End Cap Balloon.stl" and "End Cap.stl") that make up the "valve box assembly". This assembly needs to be as air tight as possible to minimize air loss and maximize play time. In order to accomplish this, I designed "Valve Plate.stl" using a .3mm membrane with 1mm torsion bars to function as the valve "axle", allowing the valve arms to pivot the valves on this "axle" with virtually zero air loss. To successfully print "Valve Plate.stl", it needs to be printed at 100% infill, with .1mm layer height, and with a .1mm initial layer height (with the .1mm initial layer height, and .1mm subsequent layer heights, the 3D printer prints the membrane in 3 levels, for a total of .3mm thick, which is enough to create the air tight membrane). My printers default to a .26mm and .27mm initial layer height, so I have to manually adjust this setting to .1mm to print this part.
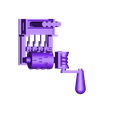
Study "Assembly.stl", the cad output of Autodesk Fusion 360 and the photographs carefully noting the locations and positions of the various components as assembly proceeds.
Assemble the Valve Plate.
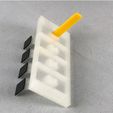
Start by cutting a 76.2 mm (three inch) strip of the .7mm thick rubber electrical tape, then carefully position it on "Valve Plate.stl" valve surfaces as shown. This tape will become the valve gaskets.
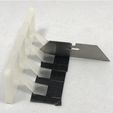
Next, I used a single bevel safety razor blade to cut the excess tape away from the valve surfaces. First I positioned the valve plate as shown with the tape against a cutting surface. Next I carefully positioned the flat side of the blade against the edge of a valve surface I wanted to trim away, then pressed straight down into the cutting surface. I recommend this "guillotine" approach over the "slicing / dragging" approach as it doesn't tend to pull the tape off the valve surface during cutting. Once all cuts were completed, I carefully removed the excess tape. If a cut wasn't complete, cut it again, do not try to "pull" the cut away as the tape will stretch and/or pull away from the valve surface.
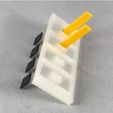
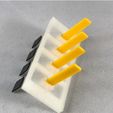
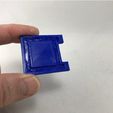
When the valve gaskets are complete, install the valve arms into the valve plate. Note at one end of each valve arm, there is a 3 degree downturn that is 4mm long. This downturn is pressed into each valve base such that the valve arm will angle downwards 3 degrees as shown in the final valve plate assembly photo. Press each arm in turn fully into its associated valve base until are are installed. Finally, as shown in the final valve plate assembly photo, all valves arms must angle down 3 degrees, and all valves arms must be aligned.
When all the valve arms are correctly positioned and aligned, apply small dots of thick cyanoacrylate glue between each valve arm and its valve base to hold the valve arms in the correct position.
This is the valve plate assembly.
Assemble the Valve Box.
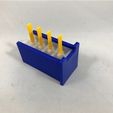
Carefully position and align the valve plate assembly in the slots of "Valve Body.stl". Once aligned, rotate the valve arms to lift the valve gaskets away from the valve surfaces on the inside of the valve body then slide the valve plate into the valve body.
Apply caulk (silicon or acrylic) to the joints between the valve plate and valve body.
Apply caulk into the slots in "Endcap .stl" then press it onto the left end of the valve body.
Apply caulk into the slots in "Endcap Balloon.stl" then press it onto the right end of the valve body.
This is the valve box assembly.
Assemble the Base.
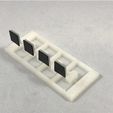
Start by placing one "Arm Cylinder.stl" into "Base.stl" in the left most (right most in the photograph) cylinder arm position as shown. Slide "Axle Arm Cylinder.stl" into position as shown. Test to make sure the cylinder arm pivots freely on the axle. It should easily rock back and forth as the base is tilted back and forth.
Repeat this process for the remaining three "Arm Cylinder.stl" testing each arm for freedom of movement.
This is the base assembly.
Install the Valve Box Assembly into the Base Assembly.
Turn the base upside down as shown then place the valve box assembly into the slides in the base (turning the base upside down allows the cylinder arms to drop in order to provide clearance for the valve arms during assembly).
Slide the valve box fully forward into the base until the four pins (two on each end cap) fully engage with the four holes in the base.
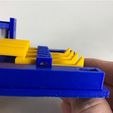
Turn the assembly right side up and note the alignment of the valve and cylinder arms.
6) Assemble the Cylinder Sequencer.
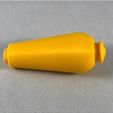
To assemble the Cylinder Sequencer, start by siding "Axle Knob.stl" in "Knob.stl". This is the knob assembly
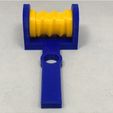
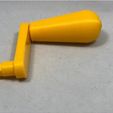
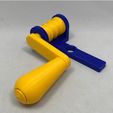
Press the knob assembly into "Crank Arm.stl". When in position, make sure the knob rotates freely on its axle. This is the crank assembly.
Place "Gear Worm 5 Turn.stl" into position in "Support Cylinder Left.stl".
Press "Axle Gear Worm.stl" into the back end of "Gear Worm.stl". Test to make sure the worm gear rotates freely.
Press the crank assembly into the front end of "Gear Worm.stl". Test to make sure the assembly rotates freely. This is the support left assembly.
Press "Cylinder Notes Drive.stl" fully into "Cylinder Notes MHALL.stl". This is the cylinder assembly.
Slide the cylinder assembly into the support left assembly as shown.
Press "Worm Gear Driven for 5 Turn.stl" onto "Cylinder Notes Drive.stl" of the cylinder assembly.
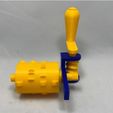
Slide "Support Cylinder Right.stl" onto the remaining end of the cylinder assembly. This is the cylinder sequencer assembly.
Attach the Cylinder Sequencer Assembly and Pipes.
Align the two cylinder support towers with the two holes in the base, then press fully into position. The bottom of each tower must be even with the bottom of the base.
Next press the pipes into position on the valve body as shown. When pressing the pipes into position, grip the pipe by the lower end (the end below the air opening), do not press on the top of the pipe or it may break during insertion (hmmm..., I wonder how I figured that out?).
Attach the Balloon and Balloon Adapter.
Place a punch balloon onto "Adapter Balloon.stl", then press this assembly into the slot in "Endcap Balloon.stl".
To play, remove the balloon adapter from the end cap and use it as a mouth piece to inflate the balloon. Press your thumb over the balloon and down onto the adapter to hold the air, then press the adapter into the end cap. Crank the handle clockwise and music! At the correct cranking speed, I get about six playings of the song before the balloon is depleted.
That's how I printed and assembled Four Whistles!
Hope you like it!

/https://fbi.cults3d.com/uploaders/13550170/illustration-file/201bdd03-5569-4088-86d5-d5ad23124b4e/97be99f1a3bcdcc91eba2d339e74da4b_preview_featured.jpg)


