Skip to content

String "Climbing" Mechanism

Advertising
Advertising
?
Creation quality: 5.0/5 (1 vote)
Evaluation of members on the printability, utility, level of detail, etc.

  • 3.5k views
  • 5 likes
  • 54 downloads

License
3D design format
STL Folder details Close
  • Axle.stl
  • Case.stl
  • Ring.stl
  • Spool_Center.stl
  • Spool_Large.stl
  • Spool_Small.stl

Learn more about the formats

Publication date 2018-06-07 at 14:55
Design number 26474

3D printer file info

3D model description

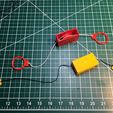
String Climbing Mechanism is an open frame dual spool string "climbing" mechanism (String Climbing Mechanism doesn't really "climb" a string, but the dual spool mechanism provides the illusion of doing so) as found in a number of toys made years ago and even today.

Consisting of only 6 unique parts (8 total), and only requiring the purchase of embroidery floss and glue, once assembled String Climbing Mechanism illustrates how these toys, some made over 100 years ago, operate.

I've utilized this mechanism in a few toy designs, the first of which is posted here: http://www.thingiverse.com/thing:1829317.

Video of prototype is here: https://www.youtube.com/watch?v=INctzet3oAo.

A video of various string climbing toys is here: https://www.youtube.com/watch?v=Z92M0Gh4rGo.

Designed using Sketchup Make 2016 and printed in PLA on an Ultimaker 2 Extended.

3D printing settings

Printer Brand:

Ultimaker

Printer:

Ultimaker 2

Rafts:

No

Supports:

No

Resolution:

.1mm

Infill:

20%

Post-Printing
Parts I Purchased:

1) Embroidery floss (super center, sewing shop, Amazon, etc). Sewing thread is too thin, and standard cotton string is too large and frays.

Printing:

Print 2 "Case.stl" and "Ring.stl", then print 1 each of the remaining pieces.

Assembly:

Prior to assembly, test fit and trim, file, sand, etc. all parts as necessary for smooth movement of moving surfaces, and tight fit for non moving surfaces. Depending on the colors you chose and your printer settings, more or less trimming, filing and/or sanding will be required. If the tight fitting components are too loose, add a small dot of cyanoacrylate to each side of the pin, allow to dry completely (I use accelerator to speed the process), then try the fit again. Repeat until tight.

Assemble as per "Assembly.stl". I perform the assembly task in the following order:

1) Press "Spool Center.stl" onto "Spool Large.stl".

2) Press "Spool Small.stl" onto "Spool Large.stl".

3) Press "Axle.stl" into "Spool Large.stl".

4) Cut two 24" lengths of embroidery floss, and tie a knot into one end of each piece.

5) Starting with the unknotted end, thread the embroidery floss into the small hole in "Spool Large.stl" starting from the flat side, then pull it all the way through until the knot sits inside the hole. Secure the knot in the hole using cyanoacrylate glue.

6) Repeat step 5 for "Spool Small.stl".

7) Wind the embroidery thread onto the spools in opposite directions. On the large spool, leave about 4" of embroidery thread unwound, the small spool about 10" of embroidery thread unwound.

8) Slide one axle into one of the "Case.stl", then the other into the second "Case.stl", then engage the dovetails, noting the orientation of each of the "Case.stl" parts.

9) Insert the embroidery thread from the small spool through the hole in the end of one of the "Case.stl" parts, then insert the thread from the large spool through the hole in the other "Case.stl" part.

10) Tie one "Ring.stl" to the embroidery thread from the large spool. I tied a double knot, secured the knot with cyanoacrylate glue, then trimmed away the excess. This ring is the "lower ring".

11) Tie the remaining "Ring.stl" to the thread from the small spool and secure and trim it as was done to the lower ring. This is the "upper ring".

12) Pick the entire assemble up by the rings, the upper ring on top. Pulling either ring will cause the String Climbing Mechanism to climb the embroidery thread. Allowing the embroidery thread to go slack will allow gravity to return the String Climbing Mechanism to the lower ring.

Hope you print one!

Advertising


Issue with this design? Report a problem.

Would you like to support Cults?

You like Cults and you want to help us continue the adventure independently? Please note that we are a small team of 3 people, therefore it is very simple to support us to maintain the activity and create future developments. Here are 4 solutions accessible to all:

  • ADVERTISING: Disable your banner blocker (AdBlock, …) and click on our banner ads.

  • AFFILIATION: Make your purchases online by clicking on our affiliate links here Amazon.

  • DONATE: If you want, you can make a donation via Ko-Fi πŸ’œ.

  • WORD OF MOUTH: Invite your friends to come, discover the platform and the magnificent 3D files shared by the community!


Sharing and downloading on Cults3D guarantees that designs remain in makers community hands! And not in the hands of the 3D printing or software giants who own the competing platforms and exploit the designs for their own commercial interests.

Cults3D is an independent, self-financed site that is not accountable to any investor or brand. Almost all of the site's revenues are paid back to the platform's makers. The content published on the site serves only the interests of its authors and not those of 3D printer brands who also wish to control the 3D modeling market.

100% secure payment by credit card, PayPal, Apple Pay, Google Pay, etc.
View all payment options.