Skip to content

PLA Spring Motor, Rolling Chassis

Advertising
Advertising
?
Creation quality: 5.0/5 (1 vote)
Evaluation of members on the printability, utility, level of detail, etc.

  • 5.7k views
  • 12 likes
  • 189 downloads

License
3D design format
STL and ZIP Folder details Close
  • Archive.zip
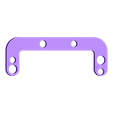
  • Axle_Front.stl
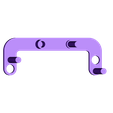
  • Axle_Rear.stl
  • Axle_Rear_Slotted.stl
  • Gear_Axle_Rear.stl
  • Gear_Idler.stl
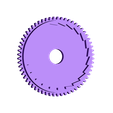
  • Gear_Main.stl
  • Knob.stl
  • Pawl.stl
  • Pawl_New.stl
  • Side_Left.stl
  • Side_Right.stl
  • Spring.stl
  • Wheel_Front.stl
  • Wheel_Rear.stl
  • Wheel_Rear_Slotted.stl

Learn more about the formats

Publication date 2018-06-13 at 14:52
Design number 26925

3D printer file info

3D model description

Just discovered this thing is featured! Thanks Thingiverse! And thanks to the viewers, "likers", downloaders, commenters and followers!

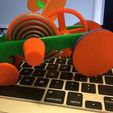
A rolling chassis version of the PLA Spring Motor (http://www.thingiverse.com/thing:402412), printed entirely in PLA, spring and all, requiring no batteries, bearings, screws, power supply, electric or drill motors to operate.

Wheelie, an updated wheelie pulling dragster version of this thing is here: http://www.thingiverse.com/thing:452248.

Video of upgraded wheel design (see UPDATE below) showing a 40 foot run is here: https://www.youtube.com/watch?v=_w1LrRPG0Uo&list=UUv_zm49u-RjnCJVwhUO-ecA&index=1. With the wife's assistance, it hits the baseboard at 40 feet, but has enough energy to run further.

Video of original wheel design is here: https://www.youtube.com/watch?v=MzcdfTisBjk&index=1&list=UUv_zm49u-RjnCJVwhUO-ecA. I did not have a large short carpet area to run it on, but I estimate it would run 30+ feet on short carpet. As you can see in the video, it spins out once it reaches the hard floor, indicating a waste of whatever energy was remaining in the PLA spring.

The first photo is of the original PLA Spring Motor, Rolling Chassis. The second is with the updated rear wheels and axles.

The original prototype works best on short carpet with the original wheels as it will spin out on hard floors or when wound to 100%. With the updated wheels and axle (see UPDATE below) it works best on hard surfaces and will run 40 feet plus.

UPDATE: I've uploaded two new files, "Axle Rear Slotted.stl" and "Wheel Rear Slotted.stl". The new wheel allows for a rubber band tire, and the new axle allows for the new wheel width, both of which allow the PLA Spring Motor, Rolling Chassis to run on hard floors. The prototype runs an average of 40' (approximately 12 meters) across a hard surface before coming to a stop.

UPDATE 2: I've uploaded "Pawl New.stl", use this if your slicer has trouble with "Pawl.stl".

Use safety glasses when operating the PLA Spring Motor, Rolling Chassis. While I've operated the mechanism well over a hundred times without a failure, I always recommend erring on the side of caution as the spring could snap and send pieces flying where they shouldn't be flying, and that's never a good thing.

Designed using Sketchup 8, and printed in PLA on a Makerbot Replicator 2 using Makerware 2.3.3.42.

3D printing settings

Use safety glasses when operating the PLA Spring Motor, Rolling Chassis. While I've operated the mechanism well over a hundred times without a failure, I always recommend erring on the side of caution as the spring could snap and send pieces flying where they shouldn't be flying, and that's never a good thing.

Carefully study "Assembly.skp". Note that the .skp file should be used as an assembly diagram and not be used to print parts as the parts in the .skp file may not be the final parts as found in the .stl files.

Print all PLA parts from the .stl files. Print "Knob.stl" and "Spring.stl" with Makerware "Standard" settings modified for 100% infill, the remaining parts using Makerware "Standard" settings with the default infill.

Test fit and trim, file, sand, etc. all parts as necessary for smooth movement of moving surfaces, and tight fit for non moving surfaces. Depending on the colors you chose and your printer settings, more or less trimming, filing and/or sanding will be required.

Assemble as per "Assembly.skp".

Lubricate moving surfaces with light machine oil.

Comment if questions.

Hope you like it!

Advertising


Issue with this design? Report a problem.

Would you like to support Cults?

You like Cults and you want to help us continue the adventure independently? Please note that we are a small team of 3 people, therefore it is very simple to support us to maintain the activity and create future developments. Here are 4 solutions accessible to all:

  • ADVERTISING: Disable your banner blocker (AdBlock, …) and click on our banner ads.

  • AFFILIATION: Make your purchases online by clicking on our affiliate links here Amazon.

  • DONATE: If you want, you can make a donation via Ko-Fi πŸ’œ.

  • WORD OF MOUTH: Invite your friends to come, discover the platform and the magnificent 3D files shared by the community!


Sharing and downloading on Cults3D guarantees that designs remain in makers community hands! And not in the hands of the 3D printing or software giants who own the competing platforms and exploit the designs for their own commercial interests.

Cults3D is an independent, self-financed site that is not accountable to any investor or brand. Almost all of the site's revenues are paid back to the platform's makers. The content published on the site serves only the interests of its authors and not those of 3D printer brands who also wish to control the 3D modeling market.

100% secure payment by credit card, PayPal, Apple Pay, Google Pay, etc.
View all payment options.