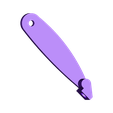
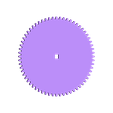
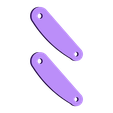
Study "Assembly.skp".
Study the mechanism video "https://www.youtube.com/watch?v=WxkQmy-txq8".
Depending on your printer, printer settings and / or colors you may need to ream, file, sand, scrape, etc. various parts for smooth operation and / or tight but attainable fit as appropriate.
Obtain the following parts:
1) Gear Motor - "6VDC 45 RPM Pinky Finger Sized Gear Motor 1" Long x 15/32" x 3/8"" from either amazon.com or directly from http://sciplus.com/p/MICROMOTOR_47952. Other sources are available, I've not tested them though.
2) Coaxial Power Jack - Radio Shack part number 274-1583.
3) 3.0 Vdc Power Supply - Radio Shack part number 273-315 with the "N" style plug (273-345, you get one free with the power supply).
4) 22 neodymium 3mm by 1.5mm magnets - Amazon.com.
Print all parts. Trim any stray and/or sagging filament from the parts then test fit all parts before assembly as shown in "Assembly.skp". Remove the hold down disks from both "Base.stl" and "Top.stl" (used only to minimalize warping during printing). Depending on your printer, printer settings and/or colors, you may need to use a 5/16" drill bit or round file to slightly enlarge the hole in "Top.stl" for "Axle Wheel.stl" to allow for smooth rotation.
Install cranks ("Crank.stl"), axle ("Axle Slide Short.stl") and one of the three slide gears ("Gear Slide.stl") in the base as shown in "Assembly.skp" and the mechanism video. Apply a small dot of thick cyanoacrylate on the axle ends to assist in holding the cranks in their proper position.
Install two gears ("Gear Slide.stl") and axle ("Axle Slide Long.stl") in the base as shown in "Assembly.skp" and the mechanism video.
Press a neodymium magnet in each of the two slides ("Slides.stl", north side up) then slide them into their correct positions in "Base.stl" and engage the respective crank pins. The easiest way to engage the pins is to position a pin at its lowest point, then carefully bend the pin slot on the slide outwards and capture the pin. Repeat with the other pin and slide.
Manually operate the gear train to make sure there is no binding and that there is minimal friction. It should be easy to turn the gears and the slides should move smoothly. A "flick" with the finger should be enough to operate the mechanism.
Press "Gear Motor.stl" onto the motor shaft.
Solder a red wire from the motor plus terminal to the "Center" connector of the coaxial power jack. Solder a black wire from the motor minus terminal to the "Shell" connector of the coaxial power jack. Install the motor and coaxial power jack into their correct positions in "Base.stl".
Press 16 neodymium magnets into "Wheel.stl", north side out.
Insert the wheel axle ("Axle Wheel.stl") into position in the top ("Top.stl"). Slide "Gear Wheel.stl" onto the wheel axle. Slide "Wheel Hub.stl" onto the wheel axle. Finally, slide "Wheel.stl" onto the wheel axle. Check and adjust if necessary for free rotation.
Assemble the figure as shown in "Assembly.stl". Note the pins are fragile. Note also each joint must pivot freely, and should be kind of "floppy". Once assembled, check the mounting hole to top ("Top.stl") connection and trim off any excess pin that extends into the rectangular hole. Press one neodymium magnet into the underside of each hand, north side up. Press one neodymium magnet into the underside of each foot, north side up.
Install the figure on "Top.stl".
Apply a small amount of light machine oil to the slides and gears.
Install the top assembly into the base assembly.
Install the "N" style connector on the power supply cord, positive tip.
Plug it in, turn it on, and watch someone else's frustration.

/https://fbi.cults3d.com/uploaders/13550170/illustration-file/2b1c2bcd-70d8-4396-9137-43cca281447e/photo_preview_featured-1.jpg)


