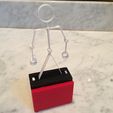
Study "Assembly.skp".
A sincere word of caution before you proceed. Depending on your printer, slicer, printer settings, printer adjustments, colors chosen, etc., etc., etc., you may need to sand, trim, file, etc. the various moving parts for smooth and continuous operation, or you may not be able to print a part. I've designed many things using Sketchup 8 and printed them in PLA using Makerware 2.3.3.42. Each print is tested by running for days before published. However, I occasionally get a comment that a part and/or entire thing cannot be printed or doesn't work. I promise I print 3 copies of each thing, and if they all work, I publish it. That being said, if you wish to continue the Disco revival, proceed on.
Obtain the following parts:
1) Gear Motor - Polulu part number 2366.
2) Battery Holder - Radio Shack part number 270-0398.
3) Switch - Radio Shack part number 275-0624
4) 2 "AAA" batteries.
5) Coaxial power jack - Radio Shack part number 274-1583.
6) 3VDC power supply - Radio Shack part number 273-315 or 273-316.
7) White lithium grease.
Print the "Disco Dan the Dancing Man" parts.
After printing "Figure Stick.stl", carefully loosen the 4 joints and remove any stray filament if necessary using a modeling knife. Note the hip joint has less movement than the remaining joints.
After printing "Base.stl", carefully snap off the four hold down disks (these disks assist in minimizing warping) and trim, sand and/or file the surfaces smooth.
Slide "Gear Rack.stl" into "Base.stl". This should slide very freely. If not, slide it back and forth repeatedly until it slides freely.
Slide the gear motor into "Base.stl" until the shaft is even with the exposed surface of "Gear Rack.stl". Install the switch and coaxial power jack into "Base.stl". Solder a red wire between the gear motor "+" terminal to the "Center" terminal on the coaxial power jack. Also solder the battery holder red wire to the "Center" terminal on the coaxial power jack. Solder a black wire between the gear motor "-" terminal to either contact on the switch. Solder a black wire between the remaining switch contact to the coaxial power jack "Shell" terminal. Solder the battery holder black wire to the coaxial power jack "Switch" terminal. This wiring will allow either battery or power supply mode of operation, and in either mode, the switch will turn this thing on or off.
Slide gear motor the remainder of the way into "Base.stl". When positioned correctly, the motor shaft should extend 4mm above the exposed surface of "Gear Rack.stl".
Press "Gear Motor.stl" onto the shaft of the gear motor, taking notice of the motor and gear flats.
Slide the battery holder into "Base.stl". Make sure the wires are positioned in the wire wells and not pinched between the surfaces of the battery holder and "Base.stl".
Lubricate "Gear Motor.stl" and Gear Rack.stl" with white lithium grease.
Turn the switch on a make sure "Gear Rack.stl" slides freely on "Base.stl" and the gear motor isn't stressing (if it is, you'll hear a gear whine sound, and all that needs to be done is to raise the gear slightly until the gear whine stops).
Turn the switch off.
Press "Cover Base.stl" into the under side of "Base.stl".
Press "Cover Gear Rack.stl" onto "Gear Rack.stl".
Slide the feet of "Figure Stick.stl" into the foot holders on "Gear Rack.stl". Bend the legs of "Figure Stick.stl" outward if necessary to hold "Figure Stick.stl" in place in the foot holders.
Turn it on and Disco!

/https://fbi.cults3d.com/uploaders/13550170/illustration-file/77c78349-88cb-4dcd-9af6-ef224889dfaf/photo_preview_featured-7.jpg)


