Skip to content

Duck Pond

Advertising
Advertising
?
Creation quality: 5.0/5 (1 vote)
Evaluation of members on the printability, utility, level of detail, etc.

  • 4k views
  • 11 likes
  • 90 downloads

License
3D design format
STL and ZIP Folder details Close
  • Assembly.skp.zip
  • Axle.stl
  • Axle_Cap.stl
  • Base.stl
  • Cam.stl
  • Duck_3D.stl
  • Gear_Axle.stl
  • Gear_Main.stl
  • Gear_Motor.stl
  • Gear_Worm.stl
  • Plunger.stl
  • Skirt.stl
  • Surface.stl

Learn more about the formats

Publication date 2018-06-19 at 11:35
Design number 27405

3D printer file info

3D model description

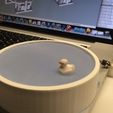
A duck on a pond.

Poor video at http://www.youtube.com/watch?v=8ybtkGWoWII.

While testing new component designs and techniques, Duck Pond happened using the spare parts. Gotta love 3D printing!

"Skirt.stl" (in white in the photo) is optional and simply sets over the assembly to hide the inner workings. I like to show the inner workings, the wife does not. Guess who won?

Designed using Sketchup 8, and printed in PLA on a Replicator 2 using Makerware.

Thanks beekeeper for the duck!

3D printing settings

You'll need the following parts:

1) 2 3mm diameter, 1mm thick neodymium magnets.

2) 1 "6VDC 45 RPM Pinky Finger Sized Gear Motor 1" Long x 15/32" x 3/8"" from either amazon.com or directly from http://sciplus.com/p/MICROMOTOR_47952. There are other sources but I've not tried them.

3) Small rubber band. I used one that came of a bunch of green onions found at the local market.

4) 6 VDC power supply.

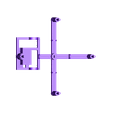
Study "Assembly.skp" for the assembly.

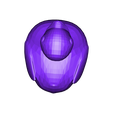
Press one of the magnets on the bottom side of "Duck 3D.stl". Cyanoacrylate can be used to hold it in place. I printed "Duck 3D.stl" in white, then used permanent ink markers to color the beak and eyes.

Place the other magnet in the container on "Plunger.stl", and seal with a small wad of painters tape, masking tape, etc. The magnet should move freely in the container so that it will self orient when it comes close to the magnet on the bottom of "Duck 3D.stl".

After "Plunger.stl" is inserted into "Gear Main.stl", place the rubber band through the hole in "Plunger.stl", then through and around the two remaining towers on "Gear Main.stl". Once completed, "Plunger.stl" should slide smoothly. If not, remove it, sand it, and repeat until smooth.

Advertising


Issue with this design? Report a problem.

Would you like to support Cults?

You like Cults and you want to help us continue the adventure independently? Please note that we are a small team of 3 people, therefore it is very simple to support us to maintain the activity and create future developments. Here are 4 solutions accessible to all:

  • ADVERTISING: Disable your banner blocker (AdBlock, …) and click on our banner ads.

  • AFFILIATION: Make your purchases online by clicking on our affiliate links here Amazon.

  • DONATE: If you want, you can make a donation via Ko-Fi πŸ’œ.

  • WORD OF MOUTH: Invite your friends to come, discover the platform and the magnificent 3D files shared by the community!


Sharing and downloading on Cults3D guarantees that designs remain in makers community hands! And not in the hands of the 3D printing or software giants who own the competing platforms and exploit the designs for their own commercial interests.

Cults3D is an independent, self-financed site that is not accountable to any investor or brand. Almost all of the site's revenues are paid back to the platform's makers. The content published on the site serves only the interests of its authors and not those of 3D printer brands who also wish to control the 3D modeling market.

100% secure payment by credit card, PayPal, Apple Pay, Google Pay, etc.
View all payment options.