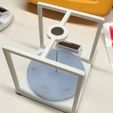
Study "Assembly.skp" (viewed using the free version of Sketchup 8).
Carefully remove the solar assembly from your dollar store devil by removing the base from your dollar store devil. Once removed, I added a drop of cyanoacrylate glue to each end of the solar panel to hold it in place in the solar tower.
Print "Base.stl". Once printed, attempt to press the solar assembly into the underside of the "Base.stl", and you'll notice you will need to trim about 1/4" from the two-tower end of the solar assembly before it will fit. After trimming, press fit the solar assembly into "Base.stl". Finally, press one neodymium magnet into the underside of "Base.stl", north up.
Print "Solar Cover.stl" and position over the solar assembly tower. While not required, it does assist in holding the entire assembly together.
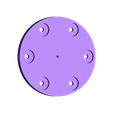
Print "Rotor.stl" then carefully press 6 of the neodymium magnets into the underside. You can either insert all magnets north up, or insert the magnets alternating the north / south. I've tried both, and north / south seems to work better (I'm not sure of the exact electronics in the solar assembly, so I cannot be sure which method should work the best. Experiment and post comments if you discover why it works best one way or another).
Print "Support.stl", and press one neodymium magnet into the center ring, north up. Then carefully press the four legs of "Support.stl" into "Base.stl". Depending on your printer settings, color, etc., you may need to trim the four legs in order to fit into "Base.stl" with a modeling knife.
From the topside of "Rotor.stl", carefully insert the needle such that 4mm extends from the bottom side of "Rotor.stl", and the needle is perpendicular to the rotor. Be as accurate as possible here, using a drill press or arbor press if available. The more accurate the needle is pressed perpendicular to the rotor, the better the motor will work.
Install the assembled rotor into the assembled base through the left or right side, carefully centering the needle point on the magnet if the base assembly. The rotor assembly should center vertically, with the needle point touching the magnet in the base, and the needle eye positioned about 10mm below the magnet in "Support.stl", and centered.
Under a significant light source, carefully give the rotor a spin and if all is as designed, off it will spin. If you hear any dragging noise, make sure the rotor is centered and perpendicular to the needle.
Mine has run for 8 days now under a constant light source (not the sun, here in Oklahoma, we have been under cloudy sky and sub freezing temperatures for about a week). When the sun comes out, I will update the performance of the motor if any significant changes are experienced. Keep in mind, any extraneous magnetic sources (wireless mouse, notebook close detect via magnetics, motors, etc.) will effect the performance of this motor.
Enjoy, and post a comment if you have any questions.

/https://fbi.cults3d.com/uploaders/13550170/illustration-file/47379cdd-f469-4156-9adf-576687d77861/photo_preview_featured.jpg)


