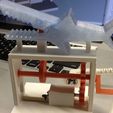
Assembly hints:
1) The design is press / slide fit. Depending on a number of factors, you made need to sand, file, and/or trim a part to fit. Don't sand, file and/or trim too much as the parts need to stay in place after assembly. A small dot of cyanoacrylate may be used to hold the parts in place if they become or are loose. Be patient.
Assembly:
1) Study "Assembly.skp". "Assembly.skp" is a Sketchup 8 file. You can download Sketchup 8 for free.
2) You can make Mr. Jaws animate either by hand or by electric motor. If you want to animate by electric motor, then purchase the motor "6VDC 45 RPM Pinky Finger Sized Gear Motor 1" Long x 15/32" x 3/8"" from either amazon.com or directly from http://sciplus.com/p/MICROMOTOR_47952 (this is the same motor I used in the "Marbelvator" design), a coaxial power jack (I used Radio Shack part number 274-1583), and a 6vdc power supply with the appropriate connector to fit the coaxial power jack (I used Radio Shack part number 273-316). Print "Gear Motor.stl" and "Gear Crank.stl". Solder wires to motor plus and minus terminals. Slide motor into "Base.stl". Mount coaxial power jack on "Base.stl". Solder motor wires to the coaxial power jack; plus to "center" pin, and minus to "shell" pin. Finally, press "Gear Motor.stl" onto the motor shaft, paying attention to the flat. You may need to slightly adjust the position of the motor in order to press the gear on. Once the gear is on, return the motor to the position as shown in "Assembly.skp".
3) Print two of "Axel Cap.stl", print one of each of the remaining parts.
4) Assemble "Crank.stl" on "Base.stl". Start by sliding one "Axel Cap.stl" onto "Crank.stl", oriented as shown in "Assembly.skp", and slide it all the way down to the handle, then slide "Axel.stl" into the right axel hole (as facing the front of "Base.stl") on "Base.stl" starting from the outside. Angle "Axel.stl" off to the side of "Base.stl, ", and, if using a motor, slide "Gear Axel.stl" onto "Crank.stl", to the approximate position shown in "Assembly.skp", Next slide "Cam.stl" onto "Axel.stl" to the approximate position shown in "Assembly.skp". Finally, position "Axel.stl" in the left axel hole (as facing the front of "Base.stl), then slide "Axel Cap.stl" onto end of "Axel.stl", but only tight enough to minimize end play. Finally, adjust "Cam.stl" position to be directly below the lifter hole in "Guide.stl", and, if animating with an electric motor, adjust "Gear Axel.stl" to be directly in line with "Gear Motor.stl".
5) Assemble "Guide.stl". Carefully assemble Mr. Jaws as shown in "Assembly.skp". Snap the assembled Mr. Jaws onto "Guide.stl". Insert "Lifter.stl" into the bottom of "Guide.stl". Move "Lifter.stl" up and down and Mr. Jaws head should easily move up and down. Finally, snap the guide assembly onto the base assembly as shown in "Assembly.skp".
6) If animating by hand, you can only turn the crank one way (counter clockwise as facing the handle end of "Crank.stl"). If you desire to rotate clockwise, flip the orientation of "Cam.stl".
7) If animating by motor, plug it in.
Enjoy!

/https://fbi.cults3d.com/uploaders/13550170/illustration-file/bda7ffea-83c8-4f55-b837-9d3e59141d7d/Mr_Jaws_In_Motion_preview_featured.jpg)


