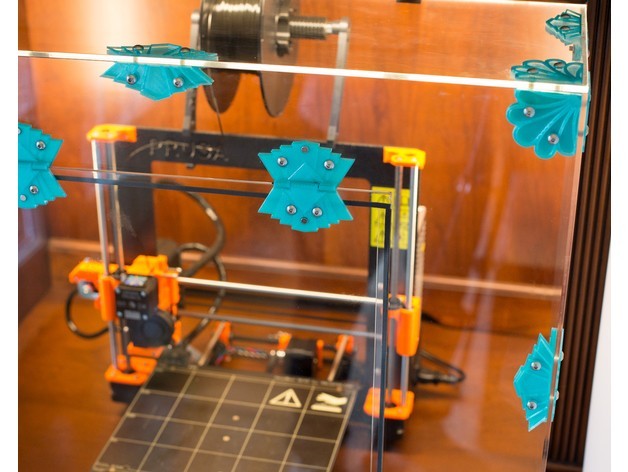
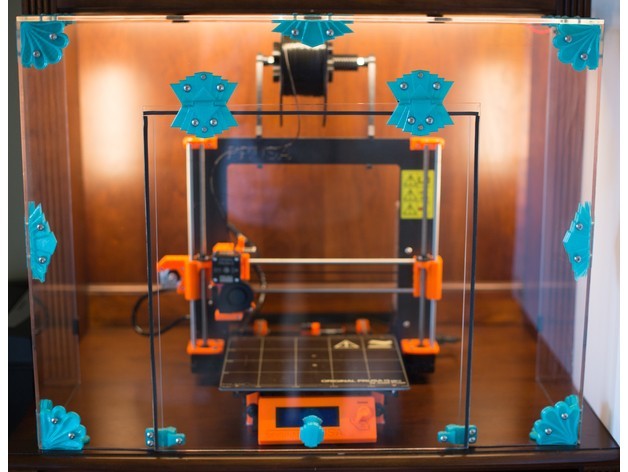
This is a 3D printer enclosure that is attached to the face of an open shelf bookcase. The design is meant to be simple, functional, and interesting. I used acrylic sheets and Atomic Filament’s PETG for this build.
Features
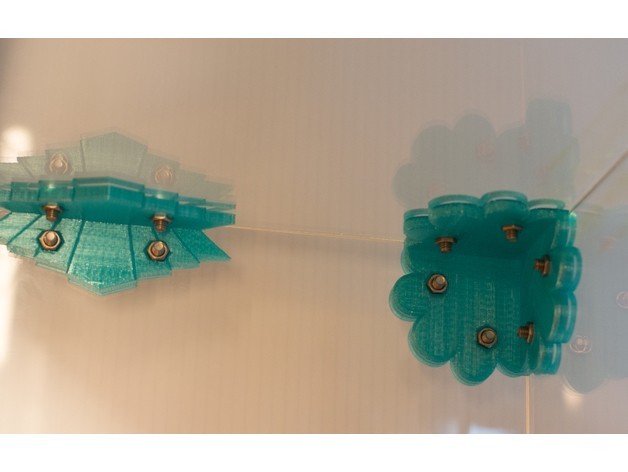
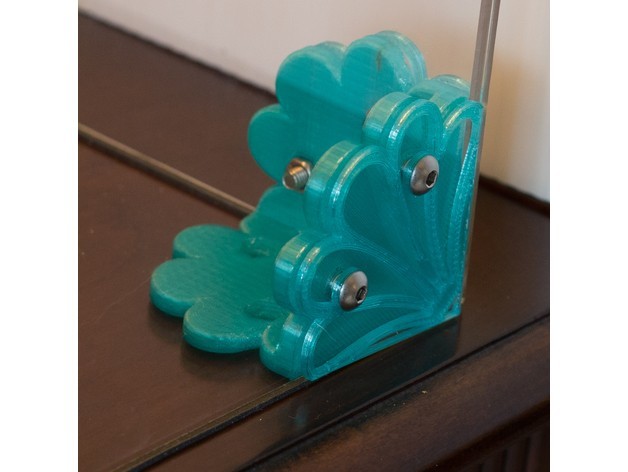
The door opens vertically. Magnets on the hinges hold the open door in an upright position so that the door stays out-of-the-way when I access the printer.
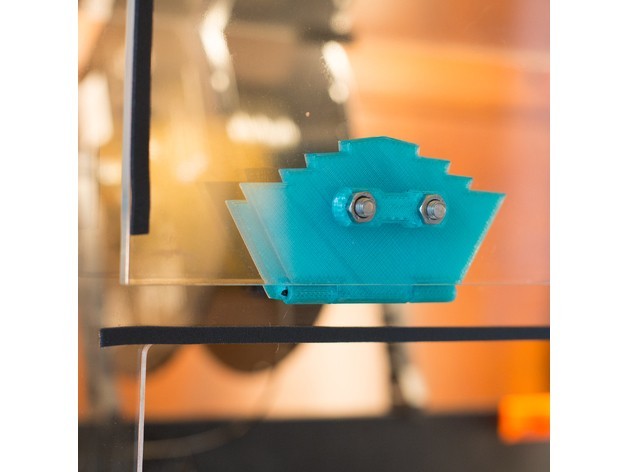
The door is larger than the opening and when closed the door rests against the outer wall. This accommodates a sealing gasket such as self-adhesive foam tape between the door and outer wall. See BOM. The gasket that I use compresses to about 1mm thick.
Magnetic latches on both sides of the door hold the closed door firmly in-place (taking weight off of the hinge pins) when it is shut.
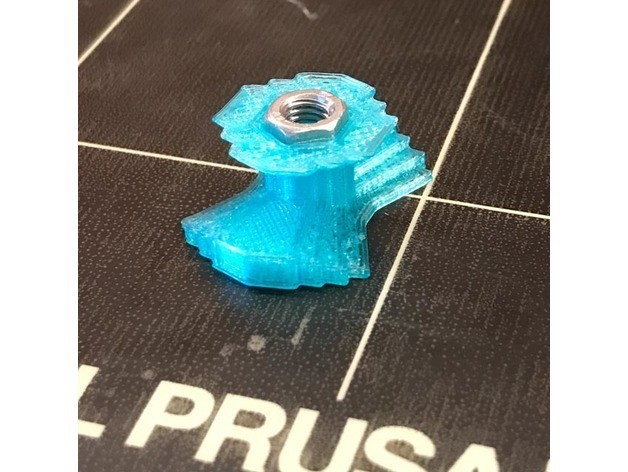
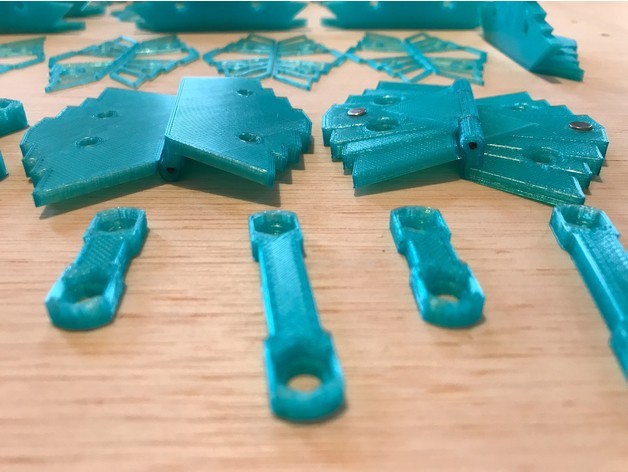
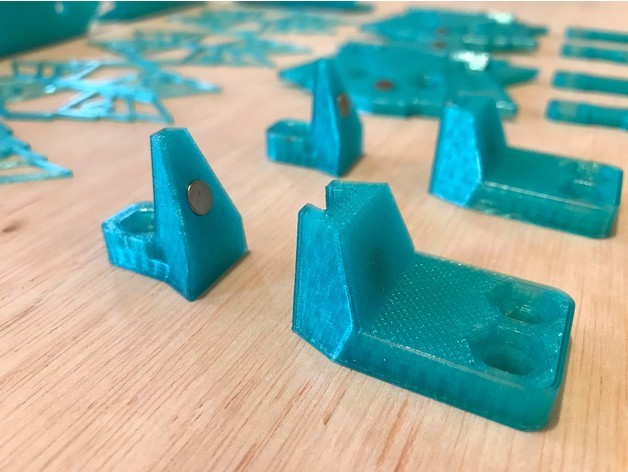
Nut capture wells on the interior speeds up assembly.
The hinges use a piece of 1.75mm filament for the hinge pin.
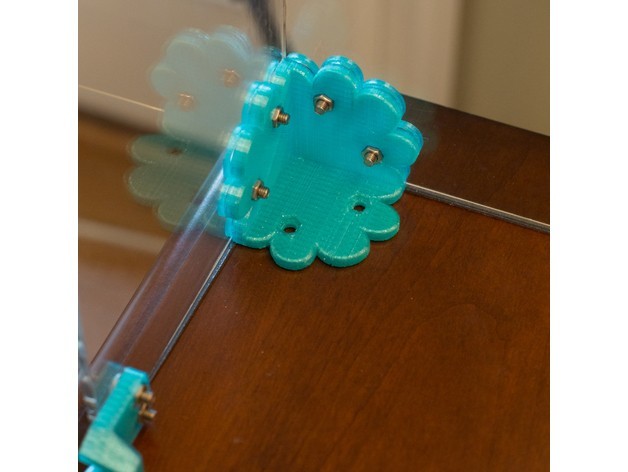
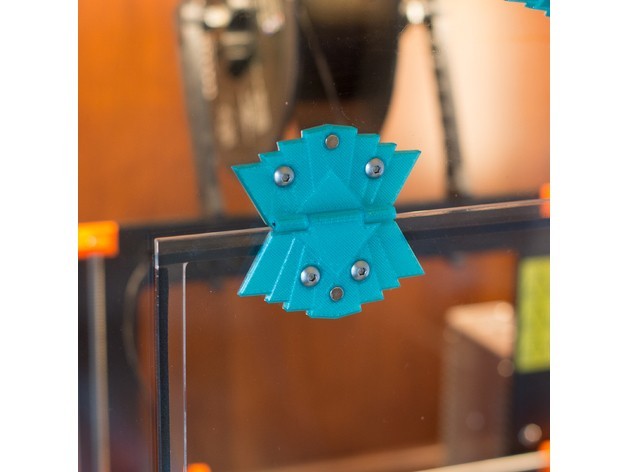
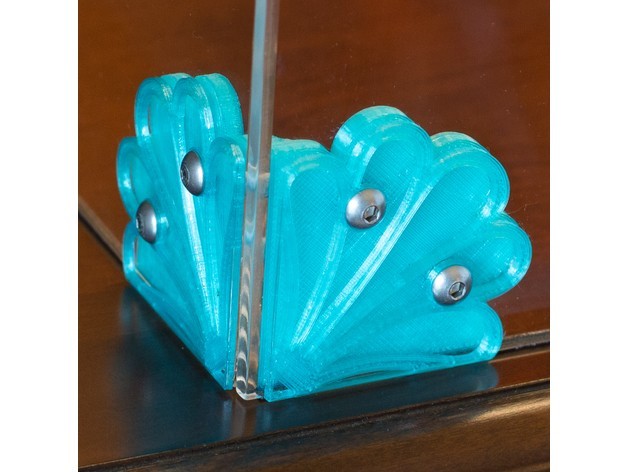
The enclosure is held in place to the bookshelf with printed clips and the enclosure weight rests on the same surface that is holding the printer. The enclosure slides out and lifts off of the shelf system.
Self-adhesive foam tape on the aft vertical and bottom edges of the acrylic fill the air gap where acrylic meets the wooden surface of the bookshelf.
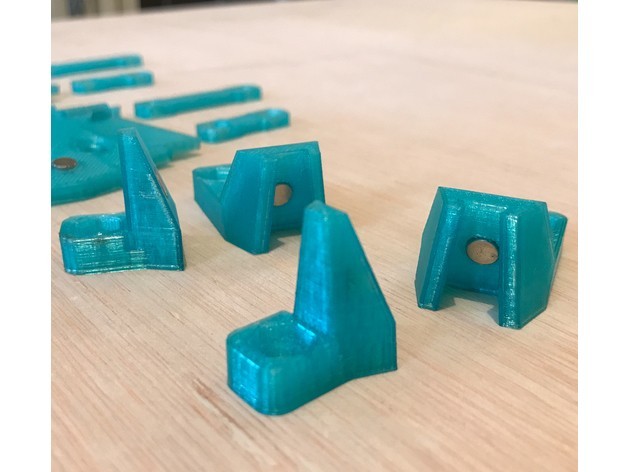
Models are included for printing drilling jigs to precisely drill the holes for the brackets, hinges, and latches. See build notes.
Models are included for printing spacers to accommodate different thicknesses of acrylic, or if you want to control the gap for a door gasket. The hinge is dependent on the door-gasket panel thickness and latch models are dependent on the wall-gasket panel thickness. See build notes.
The lighting is mounted on the bookshelf, hidden from view.
Eventually, my active spool(s) of filament will be located on the shelf above the printer and will feed through a hole that I will cut in the shelf.
Approx dimensions: 28” wide, 22” tall, and 10” deep. The door is 16” wide x 17.5” tall. The door opening is 15” wide x 17” tall.
Build Notes
Acrylic Measurements
The height of the Front Panel should equal the height of the Side Panels, +/- 1mm. The difference in this height will be compensated for by the foam strip that will be placed on the bottom edges of the enclosure.
The width of the Front Panel should equal the width of the Top Panel. The difference in width will be appear as over-hang (or under-hang) by the top panel, relative to the Side Panels.
Before cutting, take the time to make sure that each panel corner will be cut to as close to "square" as you can possibly measure. If all corners are square, differences in widths can be managed; but corners that are out-of-square will result in uneven gaps in the joints between panels.
Door vs. Door Opening Measurements
To allow for clearances for screw heads and nuts, the hinges and latches are designed to allow for a specific maximum overlap of the wall by the door. The overlap distance (door edge to wall edge) is a maximum of 1.4cm and a minimum of 0. Eg. My opening is about 25mm smaller horizontally than my door, and the opening height is about 12mm shorter than my door.
Acrylic Cutting and Finishing
I used a jig saw to rough cut the door opening. I used a circular saw to rough cut all other acrylic panels. All rough cuts were done to leave an extra approximate 1/16 of an inch on each side of each panel.
I used a router with a straight ¼” router bit to cut the finished edge on all acrylics, removing the rough cut extra 1/16 of an inch from each edge. Without a doubt, the router is the right tool to provide the super clean edge that looks so good with acrylic. The key limitation of the router is that it is good at shaving off a little bit of material, but does not work well for cutting the full width of the bit (the bit heats up and ruins the edge of the acrylic).
I used a portable MAPP torch to polish the edge of the acrylic. No sanding required. Be sure to NOT remove the protective sheets from your acrylic until after you have finished cutting and drilling. But, also be sure to remove the protective sheet BEFORE using the torch to polish the edges.
Acrylic Drilling
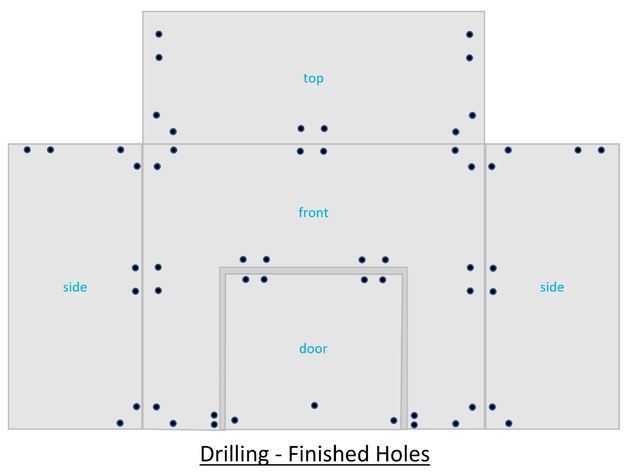
Accurately placed holes are critical to easy assembly. Here are the precise steps to follow to achieve accurately placed holes.
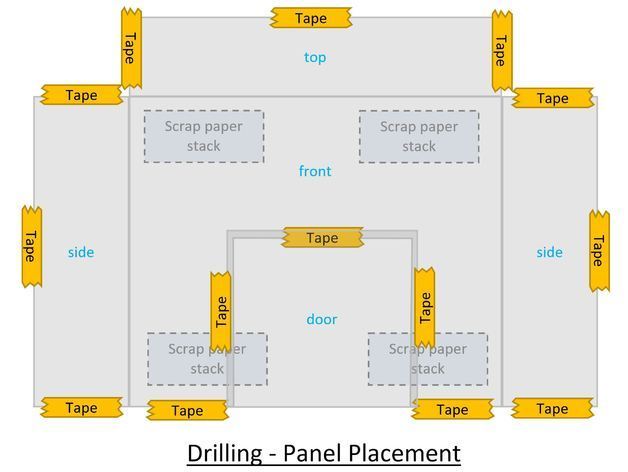
Place all four of adjoining panels (two sides, top, and front) on a single flat work surface.
Elevate the front panel (by about half a thickness of your acrylic) by placing sheets of paper under the front panel.
Tape or clamp down the front panel.
Place Side panels against the side edges of your Front panel and use a straight edge to make sure that the top edges of the Sides and the Front panel are in a single line. Tape or clamp down the side panels. It is okay if the bottom edges of the Side and Front panel are not in line as long as the difference is <1mm.
Place the Top panel against the top edge of the Front panel, and center the Top panel from side-to-side with the Front Panel. If you have cut your panels accurately, the Top panel should be the same width as the Front panel. Tape or clamp down the Top panel.
Place the Door panel, centered over the Front panel door opening, on the Front panel. Tape or clamp the door panel.
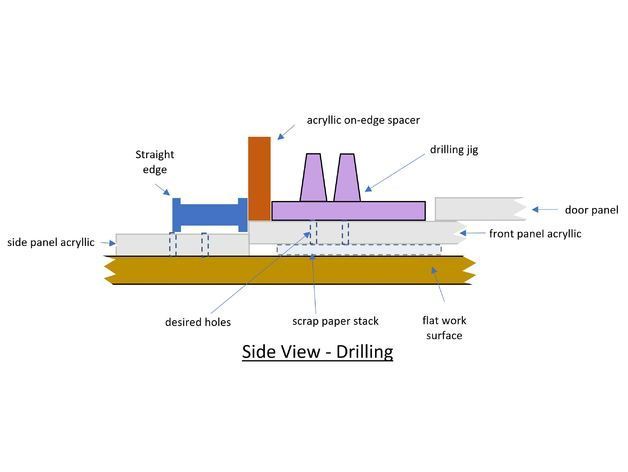
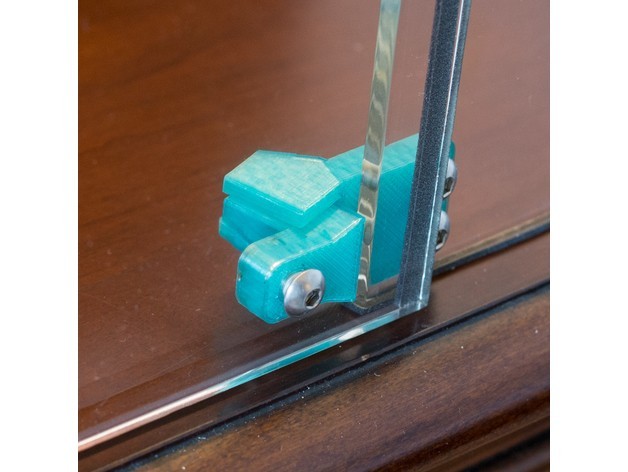
The drilling jigs are designed to be placed on the elevated edges of the front panel. For drilling into the side or top panels, the jig will rest against the front panel edges. For drilling into the front panel, the jig will rest against a portable straight edge that is resting against the front panel edge. Always use the Front panel edges as your reference edge when placing the drilling jigs for the corners and the edges.
A piece of scrap acrylic is used to offset the jig edges when drilling holes into a surface that will overlap the neighboring edge.
The hinge jig, and the latch jig, rest directly against the door panel edge.
Before drilling, insert the brass tubes into the jig drilling holes. The brass tubing prevents the drill bit from damaging the jig, and the tall tubes assure that the drill bit is perpendicular to the drilling surface. I used a small plumber’s tube cutter to cut my brass tubes to length.
A 3/16” drill bit makes a hole that is a tight fit for a 5mm bolt. After drilling my holes with the jigs, I went back over my holes and re-drilled free-hand without the jigs. This final extra drilling step enlarged the holes just enough to make it easier to insert my bolts into the holes.
Adapting for Various Acrylic Panel Thicknesses
As designed, the hinges and the latches will place the front surface of the door at a distance of 5.5mm from the front surface of the wall. Therefore, do not use adaptive spacers if the thickness of the acrylic panel + compressed door gasket is 5.5mm.
If acrylic thickness + gasket < 5.5mm
Use Thin Panel spacers with a thickness set to the DIFFERENCE IN THICKNESS. For example, if the compressed gasket is 1mm thick and the acrylic panel is 3mm thick, then set the Thin Panel spacers to a thickness of 1.5mm (5.5 – (3 + 1)). Mount the Thin Panel spacers under the Hinge Plate Door, and under the Latch Wall.
If acrylic thickness + gasket > 5.5mm
Use Thick Panel spacers with a thickness set to the DIFFERENCE IN THICKNESS. For example, if the compressed gasket is 1mm thick and the acrylic panel is 6mm thick, then set the Thick Panel spacers to a thickness of 1.5mm ((6 + 1) – 5.5). Mount the Thick Panel spacers under the Hinge Plate Wall, and under the Latch Door.
Four models are provided for the thickness adapting spacers (2 for thicker materials and 2 for thinner materials) at a thickness of 1.0mm for each spacer type. Use a slicer app to scale the appropriate spacers in the Z-axis to achieve the desired thickness. For example, if a spacer thickness of 1.5mm is desired, scale the appropriate spacer models by 150% in the Z-axis, before generating the code for your printer.
What Would I Change?
Make the door opening 4 sided, instead of 3. The Front Panel would have a small 1" high lip on the bottom of the door opening, that connects the left and right front sides. This change does two things: it increases the structural integrity of the Front Panel, and this would allow me to have an overlapping gasket sealing surface for the door on all four sides of the door.
Add additional latches at the midway point on both vertical sides of the door/door opening. The two added latches would help close the air gap that results from any slight bowing of the door panel. Since my gasket is so shallow (1mm), it does not take much bowing of the acrylic to give me a small gap. My decision to make my door so tall (17") is a factor. This would be even more critical if I was using thinner acrylic.
Drilling - Panel Placement
Drilling - Jig and Straight Edge Placement
Drilling - Side View
Drilling - Finished Holes
Bill of Materials
Purchase
Approx 12 sq ft of 0.177 inch Acrylic (Plexiglas) https://www.amazon.com/gp/product/B0062R406K
60 (approx.) – M5x0.8x16mm screws (button socket head) https://www.albanycountyfasteners.com/Button-Socket-Head-Cap-Screw-5MM-Stainless-Steel-p/5420000.htm
60 (approx.) – M5x0.8 nuts https://www.albanycountyfasteners.com/Metric-Finish-Hex-Nuts-A2-Stainless-Steel-p/5560000.htm
7 – Wood screws (for Retention Clips)
8 – Magnets (6mm diam x 3mm thick) https://www.amazon.com/Cylinder-Personalized-Multi-Use-Whiteboards-Refrigerators/dp/B072K4NB6V
4 m - Single Side Self Adhesive PVC Foam Tape: 1/16 in. thick x 3/16 in. This compresses to about 1mm thick when used as a light duty gasket. https://www.amazon.com/gp/product/B004MSMFNG
4 – Brass tubing (each approx 4 cm in length) ¼” outside diam (OD 6.35mm, ID 4.83mm). Required for the drilling jigs.
1 - Drill bit: 3/16” (4.76mm)
:format(webp)/https://fbi.cults3d.com/uploaders/13539655/illustration-file/bca1aa77-3b52-4646-9a20-e116f21749b1/19b3e8946f69aedeb0cf96674db5c925_preview_featured.jpg)