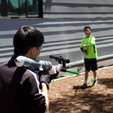
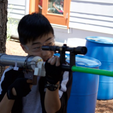
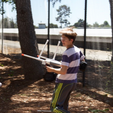
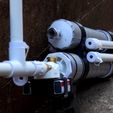
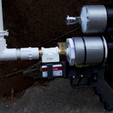
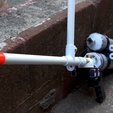
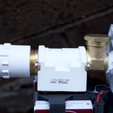
After nearly two years of development, we are proud to announce the release of the Marshmallow Gun V1 and V2. These were originally inspired by the classic 1/2" PVC marshmallow blow gun in which 3 pieces of PVC were jointed at a T shape, this allowed marshmallows to be loaded in the top like a magazine and be fired continuously by blowing through one side. We decided to take this concept a little further by adding two 120psi compressed air chambers behind this simplistic firing mechanism along with a timing circuit to allow fully automatic and semi automatic firing. The total cost of this project is ~$36
Looking for an EPIC one week classroom project? This project was also a part of our Inventing Reality 2017 summer program which we taught at Redwood Day to 6th-12th students for a week. It was a blast (pun intended) with all students For more information for lesson planning, preparation, and tutorials, check out the educational sections below.
Youtube Tutorials:
-Tank assembly tutorial
-Grip wiring tutorial: coming soon
As long as the trigger is held down, marshmallows will shoot out of the barrel in a continuous stream. This method of firing is significantly more inefficient and will only allow the emptying of one 20 round marshmallow magazine (approximately 12" long 1/2" PVC) before your air tank is empty. You can also shoot mini full auto bursts of marshmallows to make it a little more efficient. The range of full auto is around 50ft though accuracy significantly decreases after around 20 feet where the mini marshmallows begin to be affected by wind.
Each time you pull the trigger, a timing capacitor drains into your solenoid valve firing a quick burst of air. To fire again, the trigger must be released and re-pulled. Depending on timing capacitor size, solenoid valve size, and air tank size this should allow you to fire around 1-3 20 round magazines and release 1 to 2 marshmallows each shot. The range of semi auto mode is similar to that of full auto mode (around 50 feet)
This mode essentially turns off your marshmallow gun. If the trigger is pulled in this mode, nothing will happen. Note that when you switch your marshmallow gun into safety mode after having it in semi-auto mode, there will still be one charged shot in the gun that needs to be discharged before it is really "safe".
Over the course of designing and refining this project, a couple of variations surfaced.
The grip V1 allows the installation of two 9v batteries directly into the grip itself. This simplifies the grip assembly though also doesn't allow the mode switch to select full/semi automatic firing or safety mode. This means that you either have to wire the 18v from the batteries through the micro switch directly to the solenoid valve to allow only full auto firing, or use a simplified timing circuit to allow only semi automatic firing.
The second version of the grip mounts the batteries externally in a battery mount which slides over your solenoid valve. This creates a little more room inside your grip to add the necessary electronics for a mode switch to toggle between full and semi automatic firing.
The original marshmallow gun only had a single 2"x12" PVC air tank. This air tank supplied enough air to fire one full 20 round magazine but no more. Benefits of using this simpler tank design include a significantly lighter gun which is easier to carry as well as a more sturdy gun which is less likely to break (because of the weak joint between the two tanks on the dual tank version)
To take this project one step further, we added a seccond 2"12" air tank. These air tanks are joined at the rear by some 90 degree elbows and a short 2" connector piece. The double air tank will allow you to empty around 2-3 full 20 round magazines in semi auto mode and get a little extra punch in full auto mode. The dual air tanks also allow you to install a 3D printed rear cap which allows you to snap on and hold up to four extra magazines on the side of your gun.
This trigger screws into your grip with an M3x35 bolt and lock nut. It presses into your micro switch when you pull on it!
To easily and conveniently mount your two 9v batteries as well as protect your solenoid valve wires, we've designed a handy battery holder to slide onto the top of your solenoid valve and screw on to the front of the V2 grip with an M3x35 bolt and lock nut.
The rear end cap serves multiple functions for the dual tanked marshmallow guns. First, it's a safety necessity. Because the the two tanks are only joined by one small 1/2" PVC pipe, they are very susceptible to breaking apart. Since the tanks are pressurized at 120psi, if they were to break, it would be... explosive. The rear end cap covers the ends of both tanks and makes sure they they are protected during accidental drops and normal usage. The rear end cap also has four handy clips on the side to store four extra magazines so you aren't constantly reloading!
As an additional safety measure, we designed two "tank clamps" to ensure both of your air tanks stay nice and aligned and don't get twisted and break. These clamps simply go on either side of your dual tanks and screw together with an M5x35 bolt and lock nut to keep them nice and tight.
Just to save a few extra dollars, instead of buying 1/2" PVC caps, you can instead print these handy caps!
To allow you to store multiple loaded magazines without all the marshmallows falling out, these handy end caps are easily removable with a little hole to see if the magazine is loaded as well as a handy string to attach them to the magazine so they don't get lost.
Electronics & Hardware List:
-1 1/2" metal solenoid valve
-1 Three position rocker switch (only if using grip V2)
-1 Micro switch (for trigger)
-2 220uf capacitors
-2 9v batteries
-2 9v battery connectors
-Some 24awg silicone wire
-2 M3x35 bolts (only need one if using grip V1)
-1 M5x40 bolt](https://amzn.to/2LvnV72) (only if using dual tank clamps)
-2 M3 lock nuts
Single Tank PVC Pipe & Hardware List (buy at local hardware store):
-1 12" length of 2" PVC pipe
-1 2" length of 1/2" PVC
-1 12" length of 1/2" PVC
-1 2" PVC socket cap
-1 2" PVC coupler
-1 2"-3/4" PVC reducer
-1 3/4"-1/2" threaded reducer
-1 1/2" PVC T joint
-1 1/2" PVC coupler
-1 1/2" PVC threaded to non threaded coupler
-1 1" wood screw
-1 Quick release air valve
Dual Tank PVC Pipe & Hardware List (buy at local hardware store):
-2 12" lengths of 2" PVC pipe
-2 2" lengths of 1/2" PVC
-1 12" length of 1/2" PVC
-1 2" PVC socket cap
-3 2" PVC couplers
-2 1/2" PVC street elbows
-1 2"-3/4" PVC reducer
-1 3/4"-1/2" threaded reducer
-1 1/2" PVC T joint
-1 1/2" PVC coupler
-1 1/2" PVC threaded to non threaded coupler
-1 1" wood screw
-1 Quick release air valve
Other Tools n' Stuff:
-A LOT of mini marshmallows (see good and bad marshmallows section below for more info)
-Plumbers tape
-1/4" drill tap for quick release valve (not necessary but helps keep things air tight)
-Duct tape
-PVC primer
-PVC cement
-PVC pipe cutters
-Safety glasses
-Air compressor
After some extensive testing of many brands of mini marshmallows to see which ones performed the best, we concluded that Dollar Tree's "Fireside" branded marshmallows and GIANT supermarket's mini marshmallows performed the best because of their slightly larger and more consistent size compared to other brands such as Jet Puffed.
When using your marshmallow gun, it is critical to load your magazines properly so they don't jam. The trick is to make sure that each marshmallow you load can easily slide down the magazine to the bottom without getting stuck. If a marshmallow is too large and doesn't want to slide down easily, roll it in your fingers a bit until it is just the right diameter. Remember, even one oversized marshmallow can cause a magazine to jam.
IMPORTANT SAFETY NOTICE: This project is potentially very dangerous if not done properly! Make sure that everything is glued, dried, and protected properly! YOU MUST WRAP YOUR AIR TANK(S) WITH DUCT TAPE TO HELP PREVENT THEM FROM SHATTERING IF THEY BURST! We are not responsible for any injuries obtained from building this project. Additionally, don't shoot people in the eye or from point-blank range because these can cause bruises! Lastly, wrap the tip of your barrel with bright orange tape or spray paint an orange band around it so it is not mistaken as a dangerous weapon.
Printer: Flash Forge
Rafts: No
Supports: Yes
Resolution: Use your defaults
Infill: 20-50%
Notes: Many parts for this project need to be printed with significant supports. We would highly recommend changing your support to model spacing to .4mm to make support removal easier. All parts should also be printed with 3 shells for a little extra strength as well.
If you're looking for an easy remix, don't hesitate to make a copy of our public document.
This project began four years ago when we built a simple blow gun version of these marshmallow blasters. It was simply composed of a PVC T joint with a few miscellaneous pipes sticking out for a barrel and magazine. A year or so later and after a couple of battles, we decided to take it to the next level with compressed air. 18 of the new compressed air marshmallow guns made their debut at a fundraiser event we hosted to raise money for our neighbor's charity, Help Uganda Kids. It was a huge success raising over $1k and with people asking if we could send them designs so the could build their own marshmallow guns. We then thought that it would be a great idea to incorporate the marshmallow gun as a one week project of our upcoming Inventing Reality Summer Program eventually leading to this Thingiverse listing.
For our Inventing Reality Summer Program, we split the day into morning and afternoon sessions. During the morning, we taught Tinkercad and then switched to a project based curriculum using Onshape for the afternoon. By the end of five half day sessions, all students had successfully designed, printed, and redesigned their grips, dual tank clamps, and rear end caps as well as having multiple epic battles. Since we only had half days to work on the marshmallow blasters, we did the soldering of the timing mechanism for the students who wanted us to simply to save time but would recommend teaching students how to solder if time permits.
During the first day, we separated new students from returning students so that returning students wouldn't have to sit through lessons they already knew (we know this is boring from personal experience). Returning students were referred to our marshmallow gun introduction tutorial which they used to immediately start working on the project independently. We then introduced the new students to 3D printing, Onshape, and CAD in general with our other slide decks After about an hour or so, the two groups of students were reunited with a reminder to help your neighbor if they have a question to keep things a little less chaotic.
For the rest of the week, we began each afternoon session with a 20 minute tutorial on an important skill, concept, or new tool before releasing students to continue working on their projects. To ensure that everybody has enough time to glue everything together, over the course of the week, we pulled aside students one at a time and supervised them building their air tanks to ensure they were built safely. We let students build any length of air tank but would recommend that you limit the maximum tank length to 18" or else it gets a bit hard to use. Remember to remind students that though there is a handy tutorial with specific dimensions, it is the bare minimum on what could be considered functional and is by no means a good looking, refined, or finished final design. Also encourage students to design their own parts for their marshmallow blasters such as scopes, suppressors, muzzle breaks, stocks, extra grips, etc.
After a few days, students will begin testing their first prototypes of their marshmallow gun. To make sure nobody shoots out their eyes, make sure students wear safety glasses at all times. Also explain the dangers of compressed air and shooting somebody at point blank. Have students test their marshmallow guns at a paper cup shooting range with explicit instructions not to shoot anybody yet (which can quickly devolve into a full blown battle). Once everybody has completed their marshmallow guns, on the last day of the week, arrange a massive battle. We purchased two full bags of mini marshmallows from Dollar Tree per student and it seemed to be just the right amount for the week. For the type of battle, we did team death match as well as capture the flag which were super fun and kept us busy all day. Note that a massive battle will also make a massive mess so be prepared to do some serious cleanup unless you are in a wet climate and wait for the rain to dissolve all the marshmallows. Just remember to stay safe and have fun!
This project requires a LOT of parts and a lot of 3D printer capacity for each student. I would recommend purchasing 10% extra of all parts in the event that a few student's air tanks end up leaky or some of the solenoid valves don't work properly. After a bit of experimentation, we've noticed that each solenoid valve will give you a different number of shots by staying open longer or shorter with the same voltage as the other identical valves. We think this is just because of manufacturing inconsistency and sometimes a valve just won't stay open long enough to fire and needs to be thrown out. If a valve isn't staying open long enough, you can add another capacitor to help keep it open a little longer.
Regarding 3D printer capacity, plan for each student to use 250-750g of filament depending on how many iterations of their design they make. Since most parts on the marshmallow guns are also pretty large, we would highly recommend allocating three medium-large printers per every two students to ensure everybody gets everything printed by the end of the week.
Now that you've got everything printed out, we've put together a couple of handy tutorials you can follow to assembly your marshmallow gun! If you like youtube videos, we have a tank assembly tutorial and hope to soon film a grip wiring tutorial as well. If you like more traditional instructions, you get to skip squinting at poorly cropped images and instead can make a copy of our Onshape document to be able to interact with our extremely detailed, fully assembled model in the assembly. This will allow you to delete parts of the blaster as well as move others around to see exactly how things are supposed to fit together. Lastly, we've included a schematic diagram of the selectable firing mode wiring in the images above.

/https://fbi.cults3d.com/uploaders/13474583/illustration-file/9b822d18-0c08-4c42-8b14-96b330296b9c/Capture%20d%E2%80%99e%CC%81cran%202018-07-30%20a%CC%80%2015.20.30.png)


