Printer Brand:
PrintrBot
Rafts:
Doesn't Matter
Supports:
Yes
Resolution:
~1.2
Infill:
~10%
Notes:
In the Steel Wool part you are required to use supports, see the explanation about that for more information.
In the spool part no supports are needed
Post-Printing
Typical cleanup with the exception of the Steel Wool
In the Steel Wool part you are required to remove the supports in another way, see the explanation about that for more information.
How I Designed This
Programs used
Inventor 2018
Cura
Arduino
Some General Explanations
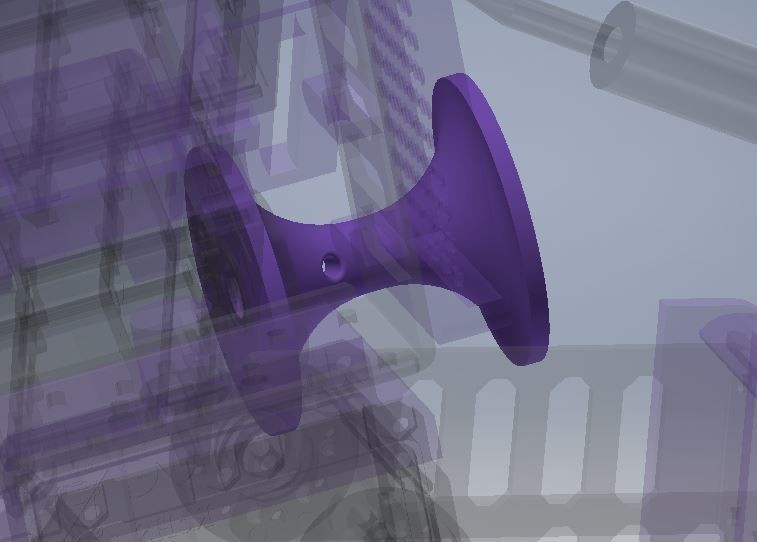
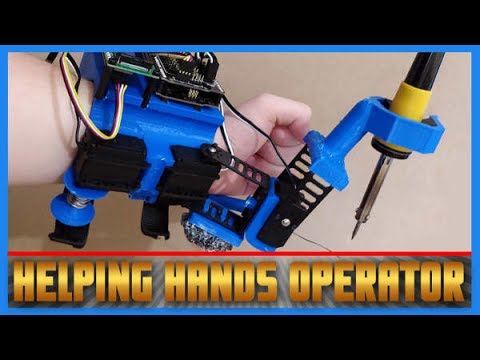
Rod Holder Explanation
The part itself has 2 interesting parts.
1) Connecting to the metal sheet part is done by wrapping around the object instead of using the built in holes. There is not particular advantage to doing so, I wanted to explore what I could do and it resulted in an extremely stable connection.
2) The part holding the Soldering iron is as thick as the traction pads provided in the original kit (20 mm). The shape of that side of the part is an octagon which houses the traction pads in a way that leaves roughly 20 mm between the traction pads. I chose that number because it seems to be a rather average size between and Soldering irons I came across with. This shape has the additional advantage that it can change it's shape. If the Soldering iron is larger then 20 mm than the pull of the printing material will hold the iron in place, just like in the video presented, in which the iron was secures so tightly it wouldn't nudge at all, even when met with alarming force. If the iron is smaller than 20 mm than a simple 4 mm screw can be used alongside a 4 mm nut to hold the iron in place. I could not find any iron that would fit that criteria but I still left it as an option.
Joint Shoe Explanation
This design is the file "Right Shoe". It was not tempered with at all.
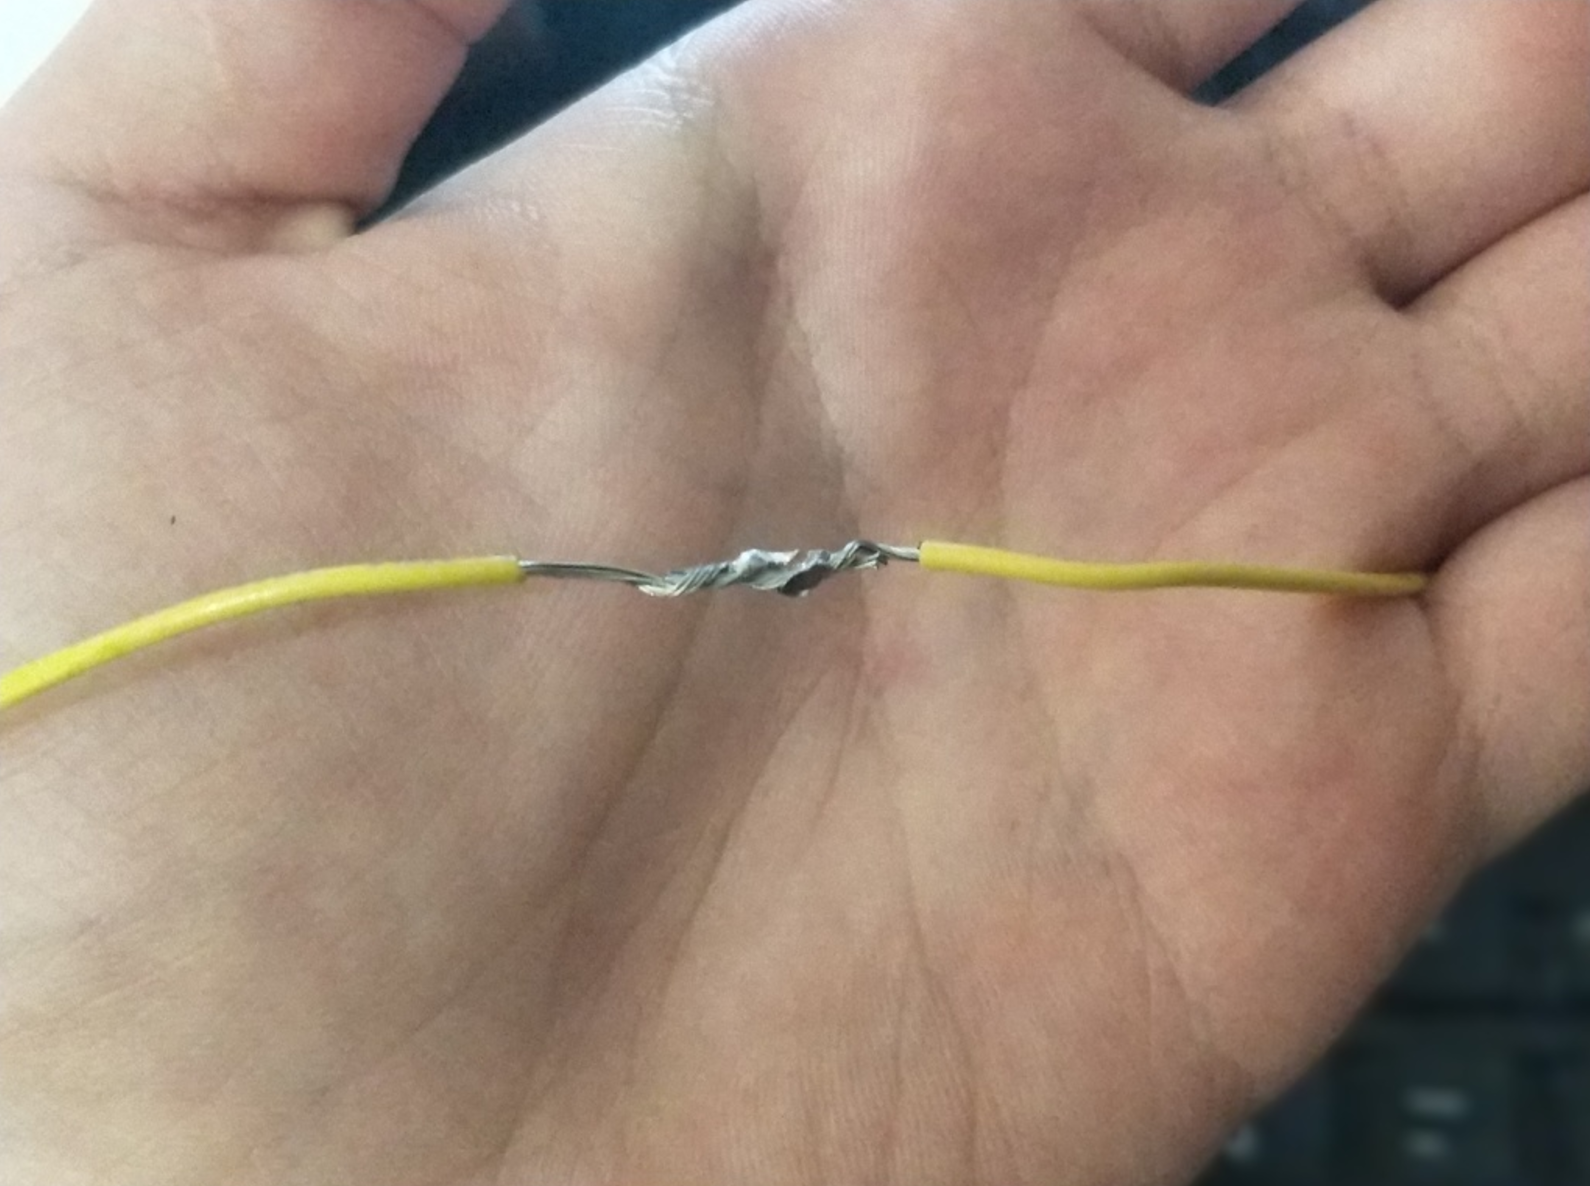
Spool Explanation
This part should not require any supports. I used 1 mm wide soldering wire I found at my local hardware store. In order to spool it correctly, insert the wire into the hole in the spool and lock it in place at the other side by turning it 90 degrees. After you do that continue to spool the wire clockwise (if the hole connecting to the motor is facing you). When all of that is done simply fit the rest of your solder up the straw.
Also on the same site where you can purchase all of the other motors and electronics, you can get a servo without the 180 degree limitation with the same measurements. If you cannot open up the motor you have and remove the limitation I would suggest you purchase the free-spin motor. If you are unable to do both, feel free to un-spool the solder material after each period.
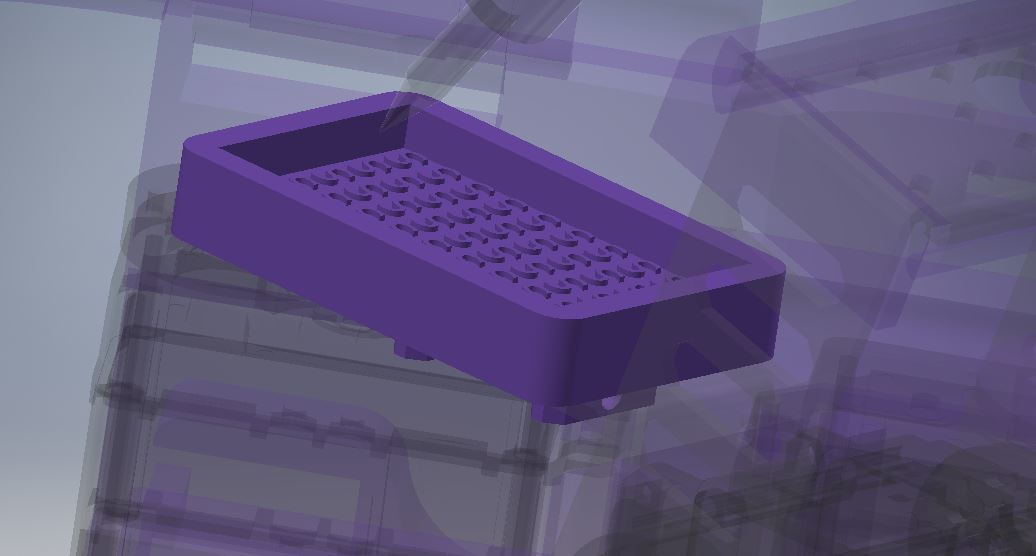
Steel Wool Holder Explanation
When this part is printed, make sure the plane facing the printing surface is the plane with the letter "S" all about. Don't expect at all that the "S" parts will print out well, don't waste your time on that. The idea is after it is printed with supports, you remove them by the top, leaving the bottom of it all sharp and messy. That way it can be used as a form of physical adhesive with the steel wool. Personally I like adding some glue to the area, but that is up to you.
I went to my local market and got a small pack of Steel wire, intended for dishes for about 1.5$ and I cut it with a piece with a pair of scissors, I wrapped all of the loose fibers around the main part of the wool and it held on great, way better than expected. In order to connect the piece to the sheet metal, insert it the in top 2 holes and try and jam one of the provided thin screws in the holes I made, once I added them both it never came close to coming off.
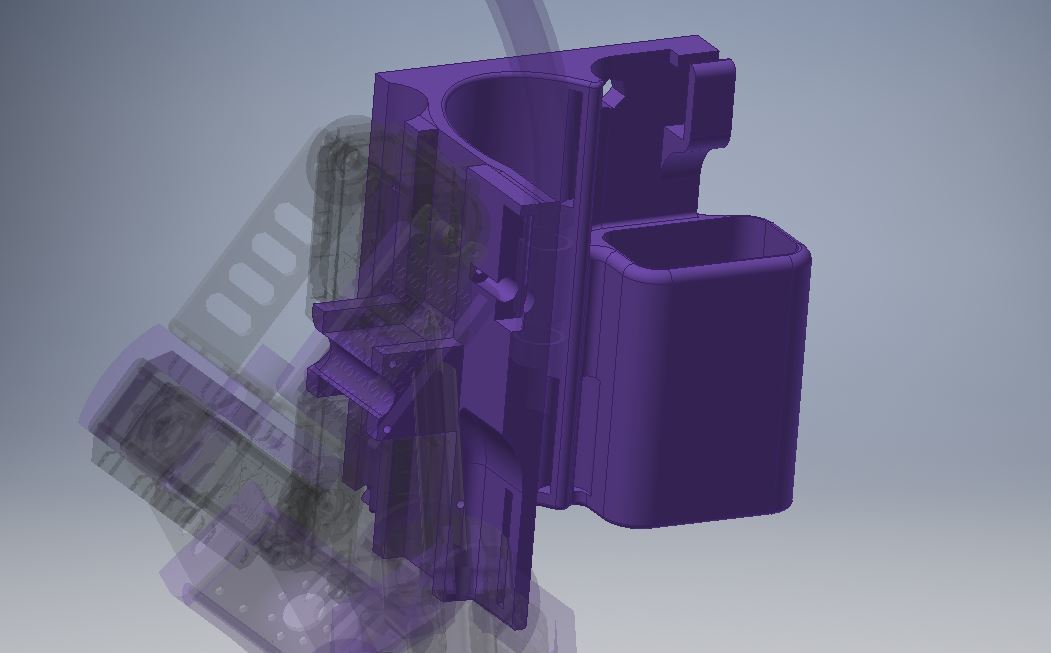
Brace Explanation
This is the largest part in my gadget, so let's break it down a little bit.
1) The motor connections: For that part I took the connection RobotGeek used in their Shoe design, simple and elegant. I mirrored them and added them to my chassis.
2) The electrical board connections: I really enjoyed that part, and the more I like using screws, the less I like using nuts to hold them in place. I used the electrical spacers added in the kit, and made Hex shaped holes that are slightly larger. You are meant to slide the spacers into the holes and if the connection is not tight enough, apply a tiny amount of superglue. Now that you've done that you can simply screw the electrical board in place. I really enjoyed that part.
3) The battery and On/Off switch connections: both of them easily slide into place, turned out better than expected.
4) Strap connections: Despite how well this part turned out, I still regret it's not printable. I went to my local outdoors shack and got myself some 24 mm wide silicon straps, anything thicker, larger or smaller should would just as well. I am well aware that those straps are not the same size everywhere in the world, that's why I made them adjustable, tried to make up for it.
Straw Explanation
The straw is the last part of my gadget, and still one of my favorites. To begin it has a flat side, which rests on top of the brace. The reason the straw is not a part of the chassis is only due to the size of my printer. Although in hindsight, there's nothing stopping you from inserting something as small as a piece of paper in one of the sides of the flat area to make up for different types of Soldering Irons. This part was the most difficult part to sketch and the most enjoyable at the same time. A lot of thinking went into the curve of it all until I figured it out.
The straw has 2 areas which are thinner than the usual; they are meant to provide walls for the zip ties which hold it in place. the zip ties are present in the kit we are given. The zip ties connect through the the Strap holes as shown in the picture below.
:format(webp)/https://fbi.cults3d.com/uploaders/12986867/illustration-file/7cd1a2bd-77c0-4caf-8297-4a8e6ad17ee3/Capture%20d%E2%80%99e%CC%81cran%202017-07-10%20a%CC%80%2012.21.49.png)