Skip to content

Nano Pi2 UMPC

Advertising
Advertising
?
Creation quality: 4.0/5 (1 vote)
Evaluation of members on the printability, utility, level of detail, etc.

  • 20.4k views
  • 19 likes
  • 3 downloads

License
3D design format
STL Folder details Close
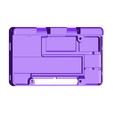
  • NANO_Pi2_BOX.stl
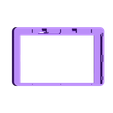
  • NANO_Pi2_LCD.stl
  • NANO_Pi2_LCD_COVER.stl

Learn more about the formats

Publication date 2017-09-04 at 17:28
Design number 14357

Pole-Ergo

3D printer file info

3D model description

More details about this project on Thingiverse: https://www.thingiverse.com/thing:2514014

Nano Pi2 in action: https://youtu.be/Qcx_SnriwhU

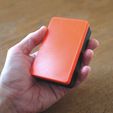
Pursuing this exercise of integration and design of cases, here is the intermediate stage towards the development of a complete computer, in the UMPC size, running the Raspberry Pi version 2 board.

γƒΌ

On the previous project Raspberry UMPC (https: // www.thingiverse.com (http://www.thingiverse.com) / thing: 2430252) The Raspberry port is the only one of its kind in the world.

. To finish, it is necessary to manage actively the strong heating of Raspberry Pi3.

HDMI without destroying anything.

If you are interested, you can answer the following question: https://goo.gl/forms/Gfs5fyGjNHq9FU3E3. Thank you for your opinion!

Preparation of Raspberry panel. Paired the bluetooth keyboard, parametrize the WIFI connection. Verify that everything works.

To do it, it is possible to follow the advice proposed by Adafruit: https://learn.adafruit.com/diet-raspberry-pi/steps. Solder the FCP / FFP connector instead of the original HDMI one.

.

Prepare the screen by unsticking the LCD panel (very fragile Warning: break very easily ...). Clean both surfaces: board and LCD backward by removing the adhesive tape. Deprive all the connectors, solder the connector FFC / FPC instead of the HDMI. Recut the electroni board. Keep the micro switch and cable the ignition of the backlight.

Battery:

Use the small switch and switch it to the powerboost. Cable the set according to the instructions for use by Adafruit for his module.

3D printing settings

On Zortrax M200:
Box: Black Z-ABS 0.14, max infill
LCD bezel: Red Z-ULTRA, 0.14, max infill
LCD backcover: Red Z-ULTRA, 0.14, max infill.

Advertising


Page translated by automatic translation. See the original version.
Issue with this design? Report a problem.

Would you like to support Cults?

You like Cults and you want to help us continue the adventure independently? Please note that we are a small team of 3 people, therefore it is very simple to support us to maintain the activity and create future developments. Here are 4 solutions accessible to all:

  • ADVERTISING: Disable your banner blocker (AdBlock, …) and click on our banner ads.

  • AFFILIATION: Make your purchases online by clicking on our affiliate links here Amazon.

  • DONATE: If you want, you can make a donation via Ko-Fi πŸ’œ.

  • WORD OF MOUTH: Invite your friends to come, discover the platform and the magnificent 3D files shared by the community!


Sharing and downloading on Cults3D guarantees that designs remain in makers community hands! And not in the hands of the 3D printing or software giants who own the competing platforms and exploit the designs for their own commercial interests.

Cults3D is an independent, self-financed site that is not accountable to any investor or brand. Almost all of the site's revenues are paid back to the platform's makers. The content published on the site serves only the interests of its authors and not those of 3D printer brands who also wish to control the 3D modeling market.

100% secure payment by credit card, PayPal, Apple Pay, Google Pay, etc.
View all payment options.