Skip to content

Scale wheels and tires for ESM P-51 Mustang

Advertising
Advertising
?
Creation quality: 5.0/5 (3 votes)
Evaluation of members on the printability, utility, level of detail, etc.

  • 14.5k views
  • 39 likes
  • 594 downloads
  • 4 comments

License
3D design format
STL Folder details Close
  • Door01.STL
  • Door02.STL
  • Door03.STL
  • Door04.STL
  • Tailgear02.STL
  • Tailhub01.STL
  • Tailtire01.STL
  • Wedge02.STL
  • Wheel04.STL
  • Wheel05.STL

Learn more about the formats

Last update 2019-02-27 at 04:06
Publication date 2016-10-27 at 19:20
Design number 7661

3D printer file info

3D model description

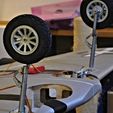
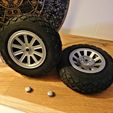
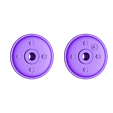
Printable scale wheels for the 1800 mm ESM P-51B and P-51D models. They are 1/6.26-scale, like the ESM model. They can be resized for other planes, off course. The bolt sizes have to be changed accordingly.

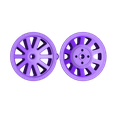
Use four M3x20 mm bolts to assemble each main wheel. Use CA glue to assemble the tail wheel.

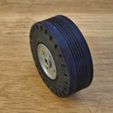
Print four tire halves from your favourite TPE and glue together with Plasti dip liquid tape (or other glues that will stick to your favourite TPE) and use a soldering iron to weld together the edge.

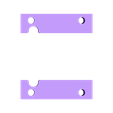
Wedge02 - Wedges for using the 90Β° heavy duty retracts from Hobbyking.
Door01 - Wheel door.
Door02 - Wheel door.
Door03 - Cover for retracts.
Door04 - Mount point for door link on Robostrut 672 legs.
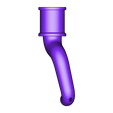
Tailgear02 - Scale tail gear leg for Hobbyking metal tail retract.

The large inner wheel doors need to be heat formed after printing so that they fit the curvature of the wing. This takes practice. 3D printing them with the right curve intact is not viable as it would require a lot of difficult to remove support material. Here's a video showing the gear doors:
https://youtu.be/2lypqoKAEzg

3D printing settings

Main and tail tires:
Two perimeters, 30% infill and enough top layers to close the surface. This will depend on your printer settings for printing rubber. I use 0.12 mm layers with 4 bottom layers (24 bottom for the tail tire) and 24 top layers.
Print the main wheels with a brim 2mm wide and two layers thick. That will give you something to work with when you weld the two parts together with a soldering iron.

Main and tail wheels:
0.08 mm layers for good surface quality. four bottom and 14 top layers. I use two perimeters and 15% infill.

Advertising


Issue with this design? Report a problem.

Would you like to support Cults?

You like Cults and you want to help us continue the adventure independently? Please note that we are a small team of 3 people, therefore it is very simple to support us to maintain the activity and create future developments. Here are 4 solutions accessible to all:

  • ADVERTISING: Disable your banner blocker (AdBlock, …) and click on our banner ads.

  • AFFILIATION: Make your purchases online by clicking on our affiliate links here Amazon.

  • DONATE: If you want, you can make a donation via Ko-Fi πŸ’œ.

  • WORD OF MOUTH: Invite your friends to come, discover the platform and the magnificent 3D files shared by the community!


Sharing and downloading on Cults3D guarantees that designs remain in makers community hands! And not in the hands of the 3D printing or software giants who own the competing platforms and exploit the designs for their own commercial interests.

Cults3D is an independent, self-financed site that is not accountable to any investor or brand. Almost all of the site's revenues are paid back to the platform's makers. The content published on the site serves only the interests of its authors and not those of 3D printer brands who also wish to control the 3D modeling market.

100% secure payment by credit card, PayPal, Apple Pay, Google Pay, etc.
View all payment options.