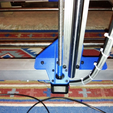
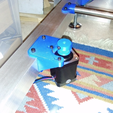
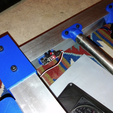
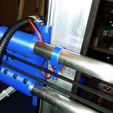
Update
I have updated the parts as singles. They haven't been oriented for printing.
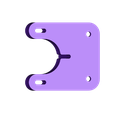
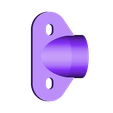
Z-nut.STL       mount for the z-screw nuts. Print two, and mirror the second one.
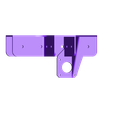
X-stop01.STL        End stop switch mount for the X-axis. Adjustable.
Y-stop01.STL        Tab for optical homing switch for the bed
Z-stop02.STL        Holder for the optical homing switch for Z.
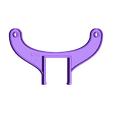
T-bracket01.STL     T-frame gusset for the vertical frame. Print two, and mirror the second one.
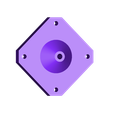
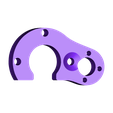
Y-motormount.STL    Motor mount for the Bed stepper motors. Print two.
Z-coupling01.STL    Stepper motor coupling for the Z-screws. Print two.
X-LH.STL        Left X-axis.
Filamentholder01.STL    Filament roll holder for the top frame. Print two.
X-RH.STL        Right X-axis.
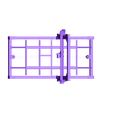
PrinterKit01.stl    Complete parts kit for the printer.
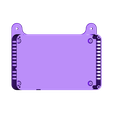
Elbox01.STL     Electronics box bottom.
Corner01.STL        Corner piece for the frame assembly. Print two.
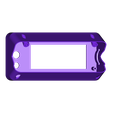
Display04.STL       Display holder.
Carrier01.STL       Extruder carrier and hot end clamp.
Extruder01.STL      Extruder part.
Powercover01.STL    Cover for the power supply.
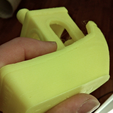
Grip01.STL      Belt grip for the extruder carrier.
Grip02.STL      Alternative belt grip for the extruder carrier.
Corner02.STL        Corner piece for the frame assembly. Print two.
bearing02.STL       Bearing assembly for the bed. Print four.
bearing01.STL       Bearing assembly for the extruder carrier. Print three.
Fanshield01.STL     Shield to deflect plastic cooler fan flow. Print two.
Fanholder01.STL     Holder for hot end cooler and plastic cooler fans.
Corner03.STL        Corner piece for the vertical frame assembly. Print two.
Extruder02.STL      Extruder lever.
Stop02.STL      Display stop button.
Tiemount01.STL      Zip tie mounts for organizing cables along the frame. Print as many as necessary.
Pulley02.STL        Stepper drive pulley. Print three.
Pulley03.STL        Idler pulley with bearing spacer. Print two.
Elbox02.STL     Electronics box top.
Y-stop02.STL        Holder for optical homing switch for the Y-axis.
Stepperdummy.STL    Stepper dummy if using one stepper on the bed axis. Two steppers are recommended.
Y-shaftmount.STL    Y shaft mounts. Print four.
Z-stop01.STL        Tab for the optical homing switch for Z.
Y-beltgrip01.STL    Belt grip for the bed.
complete.STL        An almost complete model of the assembled printer.
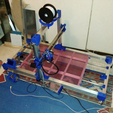
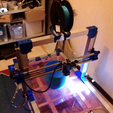
Here are the parts for my Mammut (mammoth) printer. It has a moving bed, which I was sceptical about at this size, but it works great. The reason I tried a large moving bed was to use stuff I had lying around that would lend itself to that kind of configuration. I now run two motors on the Y-axis for extra power.
I will not provide detailed assembly instructions, so don't start building iit if you don't feel that you can do it on your own. It should be self explanatory to experienced makers using the pictures provided. You may need to change some things to suit your part selection in case you don't have/can get hold of the same stuff. Just do it.
The part file includes all the parts in one file, so you don't have to download fifty different files.
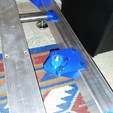
The bed is made from a 40x20x2mm aluminum rectangular tube, split in half along the length, and five 90° angles. The surface is a sanded 4mm acrylic sheet, 800x520 mm.
The parts include a holder for a smart controller LCD display (mine was from Sunhokey) and a MKS Gen V1.2 controller board with A4988 drivers. The Newest version is V1.4:
https://www.banggood.com/MKS-Gen-V1_4-3D-Printer-Control-Motherboard-Compatible-RepRap-Ramps1_4-p-951136.html?p=HD240528697332015103&cur_warehouse=CN
https://www.banggood.com/10Pcs-3D-Printer-A4988-Reprap-Stepper-Motor-Driver-Module-p-955808.html?p=HD240528697332015103
https://www.banggood.com/3D-Printer-A4988-Reprap-Stepping-Stepper-Step-Motor-Driver-Module-p-88765.html?p=HD240528697332015103
The pulleys are 2mm pitch. I use them with GT2 belts with no skipping despite being printed:
https://www.banggood.com/10M-Rubber-GT2-Open-Timing-Belt-Width-6mm-For-3D-Printer-RepRap-p-1148503.html?p=HD240528697332015103
The linear bearing blocks take 3x10x4 mm ball bearings. A total of 28 bearings is needed:
https://www.banggood.com/10pcs-623-ZZ-3x10x4mm-Deep-Groove-Ball-Bearings-Miniature-Bearings-p-81182.html?p=HD240528697332015103
The linear rails for X- and Y are 3/4" (or 19mm) stainless steel tubes. I'm sure other rods or tubes in other materials will work as well as long as they are 19-19.05 mm (3/4") thick. 2x700 mm and 2x1220 mm are needed.
The rails for the Z are 500 mm long SBR16 supported rails, with four LME16UUOP bearings. These bearings are the 26 mm outer diameter kind, and not 28mm:
https://rover.ebay.com/rover/1/711-53200-19255-0/1?ff3=4&toolid=11800&pub=5575353675&campid=5338226872&mpre=https%3A%2F%2Fwww.ebay.com%2Fitm%2F1pcs-LME16UUOP-16mm-Open-Linear-Ball-Bearing-16x26x36mm-for-3D-Printer-CNC%2F263224706711%3Fhash%3Ditem3d496a4697%3Ag%3A3HIAAOSwjL5ZJpBm
Rails:
https://rover.ebay.com/rover/1/711-53200-19255-0/1?ff3=4&toolid=11800&pub=5575353675&campid=5338226872&mpre=https%3A%2F%2Fwww.ebay.com%2Fitm%2FLinear-Shaft-Rail-Support-SBR16-L500mm-Rails-Support%2F351705115619%3Fhash%3Ditem51e3422be3%3Ag%3AzoQAAOSwq19XC0DE
The frame is made from plastic gussets and 40x40x2 mm square tubing of the following lengths:
2x1300 mm for the lengthwise pieces.
3x620 mm for the ends and top. The ends would benefit from being made from steel instead of aluminum.
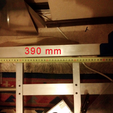
2x500 mm for Z. These are installed on the side frames at a distance of 390 mm from the front end gusset, as one photo shows.
2x500 mm long 8x8 mm lead screws with nuts are needed. They will fit into the Z shaft adapters:
https://www.banggood.com/500mm-Lead-Screw-8mm-Thread-2mm-Pitch-Lead-Screw-with-Copper-Nut-p-982941.html?p=HD240528697332015103
I use a chinese E3D clone with a home made Volcano hot end. The fans for the hot end are 40x40 mm for the cold end ccooling, and two 35x10mm blower fans for PLA cooling:
https://www.banggood.com/Volcano-Hot-End-Eruption-Heater-Block-Heating-Block-For-3D-Printer-Accessories-p-1014475.html?p=HD240528697332015103
https://www.banggood.com/Heatsink-12V-0_1A-2-Pins-CPU-Cooling-Fan-PC-Computer-40x40x10mm-p-920618.html?p=HD240528697332015103&cur_warehouse=CN
https://rover.ebay.com/rover/1/711-53200-19255-0/1?icep_id=114&ipn=icep&toolid=20004&campid=5338226872&mpre=https%3A%2F%2Fwww.ebay.com%2Fitm%2F1pc-NEW-Delta-BFB03505HA-35x35x10mm-35mm-3510-5V-0-17A-DC-Brushless-Blower-Fan%2F221214013657%3Fhash%3Ditem338161f8d9%3Ag%3AgxcAAMXQLbVRaf6C
This fan can fit with some modification:
https://www.banggood.com/Aluminum-Heatsink-Cooling-Fan-For-LattePanda-Matching-Acrylic-Case-p-1092769.html?p=HD240528697332015103&cur_warehouse=CN
I use 92 oz in/65 Ncm steppers for X, Y and extrusion, and smaller motors for Z. The 30 tooth pulleys on X- and Y need strong motors, and allow high travel speeds of up to 300 mm/s.
A ~11 mm extruder gear is needed:
https://www.banggood.com/2Pcs-MK7-MK8-Extruder-Driver-Feeder-Gear-Wheel-40Teeth-11mm-Bore-5mm-For-3D-Printer-p-1036149.html?p=HD240528697332015103&cur_warehouse=CN
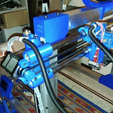
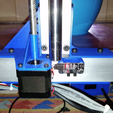
X uses a microswitch for homing. Y and Z uses PiBot optical end stops for homing. Parts are included for installing all switches. X- and Z-switch brackets are attached to the frame with high strength double sided tape and provide a large enough contact area to give a very secure attachment:
https://www.banggood.com/10Pcs-AC-250V-15A-V-156-1C25-SPDT-Roller-Lever-Micro-Switch-p-944613.html?p=HD240528697332015103

/https://fbi.cults3d.com/uploaders/384187/illustration-file/7caa6d4a-8528-452f-ba16-e772a1315797/Capture%20d%E2%80%99e%CC%81cran%202016-10-17%20a%CC%80%2010.49.33.png)


