Skip to content

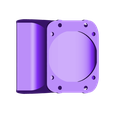
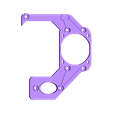
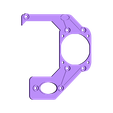
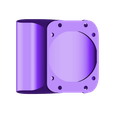
Dual E3D V6 MK8 part fan mount

Advertising
Advertising
?
Creation quality: 5.0/5 (1 vote)
Evaluation of members on the printability, utility, level of detail, etc.

  • 2.2k views
  • 2 likes
  • 59 downloads

License
3D design format
STL Folder details Close
  • dual_e3d_v6_mk8_v2B_fan_mount-BOTTOM.stl
  • dual_e3d_v6_mk8_v2B_fan_mount-TOP.stl
  • dual_e3d_v6_mk8_v2C_fan_mount-BOTTOM.stl
  • dual_e3d_v6_mk8_v2C_fan_mount_TOP.stl

Learn more about the formats

Publication date 2016-12-21 at 09:42
Design number 8550

FrankLumien

3D printer file info

3D model description

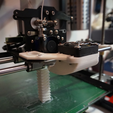
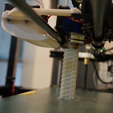
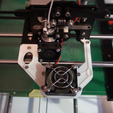
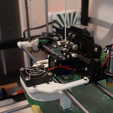
Part fan for Peter Stoneham's Rigidbot Dual V6 Mk8 Alloy Mount. Fits both version 1 & 2.
This fan mount takes advantage of the existing bearing bolts as well as the extra mount point on the far right edge (M3) to minimize sloping.

Consists of two parts in order to get perfectly flat bottom parts closest to the print bed, as well as to the carriage. The parts fit together with M3 bolts and nuts - or super glue if you want to keep the weight to an absolute minimum.

Uses a single 40mm fan to cool part for both extruders.

UPDATE 2016-01-27 (v2B)

Increased distance to bed, will not hit printed parts on fast moves
Improved airflow with wider distribution, better downward angle
Centered fan in relation to print heads (X axis)
Centered fan in relation to mount (Y axis)
Stronger mount points
Better weight distribution
UPDATE 2016-01-31 (v2C)

Redesigned nozzle to force air more downward, away from heater block
Larger flat bottom area for easier printing, slightly larger air volume
Fixed small alignment issue on fan mounting holes

3D printing settings

Printer:
RigidBot

Rafts:
No

Supports:
Yes

Notes:
Printed at 75mm/s.

Printed version v2C. Works even better than expected!
Extruder temperature is steady, never deviates more than +/- 3 degrees (1-2 mid print), even with fan running at 100%.

My print could use some sanding, but I was eager to get it up and running. :)

If needed, drill up all reinforced/encircled holes to 3mm. Do NOT drill the four holes closest to the center where the fan will go.
Attach the top and bottom parts with M3 bolts through the four (drilled up) holes surrounding the fan area. fasten bolts with lock nuts on the bottom.
Place the 40mm fan in the center an attach with M3 bolts OR self-tapping screws. If necessary, pre-tap the four holes with an M3 tap.
Unfasten the left bearing bolts on the carriage, place the fan mount on top of the plate and re-fasten the bolts through the fan mount.

Advertising


Issue with this design? Report a problem.

Would you like to support Cults?

You like Cults and you want to help us continue the adventure independently? Please note that we are a small team of 3 people, therefore it is very simple to support us to maintain the activity and create future developments. Here are 4 solutions accessible to all:

  • ADVERTISING: Disable your banner blocker (AdBlock, …) and click on our banner ads.

  • AFFILIATION: Make your purchases online by clicking on our affiliate links here Amazon.

  • DONATE: If you want, you can make a donation via Ko-Fi 💜.

  • WORD OF MOUTH: Invite your friends to come, discover the platform and the magnificent 3D files shared by the community!


Sharing and downloading on Cults3D guarantees that designs remain in makers community hands! And not in the hands of the 3D printing or software giants who own the competing platforms and exploit the designs for their own commercial interests.

Cults3D is an independent, self-financed site that is not accountable to any investor or brand. Almost all of the site's revenues are paid back to the platform's makers. The content published on the site serves only the interests of its authors and not those of 3D printer brands who also wish to control the 3D modeling market.

100% secure payment by credit card, PayPal, Apple Pay, Google Pay, etc.
View all payment options.