Skip to content

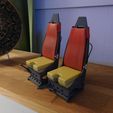
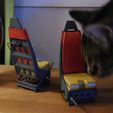
Scale helicopter seats. Westland Lynx 1:8 seats.

Advertising
Advertising
?
Creation quality: 5.0/5 (1 vote)
Evaluation of members on the printability, utility, level of detail, etc.

  • 9k views
  • 14 likes
  • 34 downloads
  • 1 collection

License
3D design format
STL Folder details Close
  • Seat01.stl
  • Seat02.stl
  • Seat03.stl
  • Seat04.stl

Learn more about the formats

Last update 2019-02-27 at 04:05
Publication date 2017-01-01 at 20:01
Design number 8754

3D printer file info

3D model description

Also check out my other Vario Lynx parts in my profile, including a complete cockpit kit and working cabin doors. The cockpit kit includes the seats.

I designed these seats for a Vario 1:8 scale Lynx which I am about to start building as a norwegian Lynx Mk86. It can be scaled up or down to fit other scales. For example, to scale up to 1:6 scale resize to 133%. When assembled correctly the mechanism for raising and lowering the seat works, but is only locked in place by friction.

Use 19 mm (3/4") fabric ribbon around the top of the seat and glue to the back of the back "pillow" to achieve the scale look.

Use a length of thin electrical wire between the harness reel and harness locking lever to simulate the wire housing.

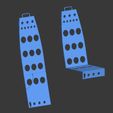
Use a heat gun and gently heat the flat seat part before bending as shown in the illustration.

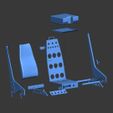
Glue the parts together with CA. I recommend using cut down brass nails for the hinge points, and thin piano wire to connect the bell cranks on the left side of the seat adjusting mechanism.

Army-Paint.com "Flat Battleship Grey" (RAL 7031) is a good color match for the Lynx interior grey.

The version with headrest is appropriate for the norwegian RNOAF Lynx Mk86.

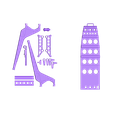
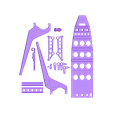
Seat01.stl - Seat set without headrest.
Seat02.stl - Seat set with headrest.
Seat03.stl - Pillow, emergency seat pack and tray for the seat pack.
Seat04.stl - Shafts for the seat mechanism.

3D printing settings

Additional support isn't needed. The parts have support where necessary. Cut away the support pieces after printing.

I printed everything from PLA with a 0,4 mm nozzle.

I recommend printing with a layer height of 0,08 mm to achieve good fidelity and finish.

If you are having trouble printing Seat04.stl then print double or triple the needed parts so that each part has time to cool down.

Advertising


Issue with this design? Report a problem.

Would you like to support Cults?

You like Cults and you want to help us continue the adventure independently? Please note that we are a small team of 3 people, therefore it is very simple to support us to maintain the activity and create future developments. Here are 4 solutions accessible to all:

  • ADVERTISING: Disable your banner blocker (AdBlock, …) and click on our banner ads.

  • AFFILIATION: Make your purchases online by clicking on our affiliate links here Amazon.

  • DONATE: If you want, you can make a donation via Ko-Fi πŸ’œ.

  • WORD OF MOUTH: Invite your friends to come, discover the platform and the magnificent 3D files shared by the community!


Sharing and downloading on Cults3D guarantees that designs remain in makers community hands! And not in the hands of the 3D printing or software giants who own the competing platforms and exploit the designs for their own commercial interests.

Cults3D is an independent, self-financed site that is not accountable to any investor or brand. Almost all of the site's revenues are paid back to the platform's makers. The content published on the site serves only the interests of its authors and not those of 3D printer brands who also wish to control the 3D modeling market.

100% secure payment by credit card, PayPal, Apple Pay, Google Pay, etc.
View all payment options.