Skip to content

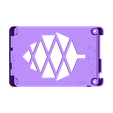
PINE A64 / A64+ computer case

Advertising
Advertising
?
Creation quality: 5.0/5 (1 vote)
Evaluation of members on the printability, utility, level of detail, etc.

  • 3k views
  • 5 likes
  • 72 downloads

License
3D design format
STL Folder details Close
  • pine_a64_case_v4.1-TOP-BATTERY.stl
  • pine_a64_case_v4.1-TOP-GPIO.stl
  • pine_a64_case_v4.2-BOTTOM.stl
  • pine_a64_case_v4.2-STAND_FAN.stl
  • pine_a64_case_v4.2.STAND.stl

Learn more about the formats

Publication date 2016-12-21 at 09:41
Design number 8549

FrankLumien

3D printer file info

3D model description

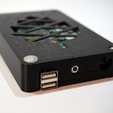
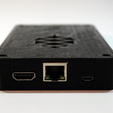
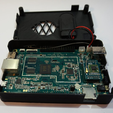
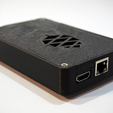
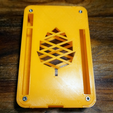
Case for PINE A64 and A64+, the $15 64-Bit Single Board Super Computer - see the Kickstarter page for more information.

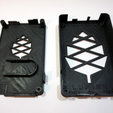
Case consists of two parts, top and bottom. For the top there are two versions:

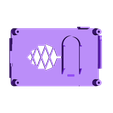
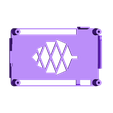
TOP-BATTERY has a dedicated holder for the add-on RCT CR battery holder.
TOP-GPIO has dedicated slots for the GPIO and other pins and on-board connectors.
The WiFi module fits with both versions. If you have no additional modules you can use either one. .

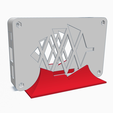
I recommend putting rubber feet on the bottom to improve airflow. You can also use bolts longer than 20mm, as they can then act as legs (use additional nuts to avoid scratching the table), or print the vertical stand to position the case upright.

UPDATE 2016-06-01, V4

I finally got my A64+; time for adjustments now that I can actually measure the little marvel! I have made a lot of improvements in this version, and I strongly recommend it over the previous versions that were entirely based on pre-production schematics and prototype photos.

News in v4:

25% smaller
Confirmed fit for WiFi module
Slide-in slot for RTC CR battery holder in the top part.
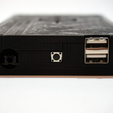
Slot for Power On button in the board default location
Slot for headset jack now support huge plugs
All additional slots optimized, including for GPIO pins in top part.
Standoffs fine-tuned to make sure they don't touch any board components
Reinforced edges, which helps prevent layer separation and flexing
Reinforced tabs
Optimized for 0.4 (or finer) nozzles - all walls are 1.6mm thick (4 x 0.4)
Better fit between top and bottom parts - the case can even stay together without any bolts & nuts, but I don't recommend tossing it in a bag without them.
Optimized for 20mm M3 bolts.
Slots for M3 nuts in bottom part, both regular and locking nuts work - leave a comment if you need a nut-less version as well (will require tapping the holes in the bottom part).
Port labels on inside of case. These will not be visible when assembled, but will clarify orientation of board.
UPDATE 2016-06-06, V4.1
As requested, there is now a version available that has slots for both Power on and Reset buttons. Let me know how it works out!

UPDATE 2016-06-07, V4.2
Fixed the reset button slot which was too narrow, thanks for ed_co for pointing it out. This only affects the bottom part, and if you have already printed version 4.1 you can simply cut the bottom tab off to achieve the same effect.

UPDATE 2016-08-22
Added two versions of a vertical stand. Both are optional but may be useful for overclockers who want active cooling. STAND_FAN version have inserts for a 60mm fan on one side and a 40mm fan on the other. Unless pushing the board to the absolute limit there is no need for both.
The cutouts in the stand matches the GPIO version, but it should work fine for the BATTERY version as well.

3D printing settings

Print Settings

Printer:
RigidBot

Rafts:
No

Supports:
No

Resolution:
0.2

Infill:
25%

Notes:
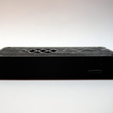
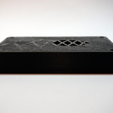
The case in the photos was a 0.2mm layer, 90mm/s print made on a heavily used glass bed without cleaning in between. Slower speed on a fresh bed will of course look much better.

Post-Printing

It might be easier to fit the bolts if you first drill up the holes using a 3-4mm drill bit. Make sure the board is not in the case when doing this. :p

Trivia

The PINE logo
The PINE logo on the Kickstarter page and the technical specs is not quite symmetrical, has inconsistent distances between the various elements and a few other flawed details which I can only assume was unintentional on their side. In my version, everything is perfectly symmetrical with consistent geometrical distances and uniform angles. This version therefore differs slightly from the original, but for (in my opinion) the better.

Advertising


Issue with this design? Report a problem.

Would you like to support Cults?

You like Cults and you want to help us continue the adventure independently? Please note that we are a small team of 3 people, therefore it is very simple to support us to maintain the activity and create future developments. Here are 4 solutions accessible to all:

  • ADVERTISING: Disable your banner blocker (AdBlock, …) and click on our banner ads.

  • AFFILIATION: Make your purchases online by clicking on our affiliate links here Amazon.

  • DONATE: If you want, you can make a donation via Ko-Fi 💜.

  • WORD OF MOUTH: Invite your friends to come, discover the platform and the magnificent 3D files shared by the community!


Sharing and downloading on Cults3D guarantees that designs remain in makers community hands! And not in the hands of the 3D printing or software giants who own the competing platforms and exploit the designs for their own commercial interests.

Cults3D is an independent, self-financed site that is not accountable to any investor or brand. Almost all of the site's revenues are paid back to the platform's makers. The content published on the site serves only the interests of its authors and not those of 3D printer brands who also wish to control the 3D modeling market.

100% secure payment by credit card, PayPal, Apple Pay, Google Pay, etc.
View all payment options.