Skip to content

Hagar the Horrible

Advertising
Advertising
?
Creation quality: 5.0/5 (4 votes)
Evaluation of members on the printability, utility, level of detail, etc.

  • 6.8k views
  • 40 likes
  • 417 downloads
  • 1 collection
  • 1 comment
  • 4 makes

License
3D design format
STL Folder details Close
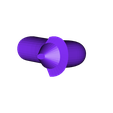
  • arm_left.stl
  • arm_right.stl
  • beard.stl
  • belt.stl
  • boots.stl
  • bootstrap.stl
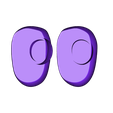
  • eyes.stl
  • face.stl
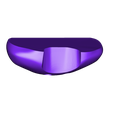
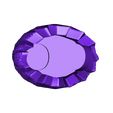
  • helmet.stl
  • helmet_rivet.stl
  • horn_left.stl
  • horn_right.stl
  • legs.stl
  • nose.stl
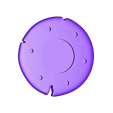
  • shield.stl
  • shield_center.stl
  • shield_handle.stl
  • shield_rivet.stl
  • shirt.stl
  • sword.stl
  • sword_guard.stl
  • tunic_bottom.stl
  • tunic_pin.stl
  • tunic_top.stl

Learn more about the formats

Last update 2016-09-21 at 14:54
Publication date 2016-06-24 at 08:58
Design number 6220

3D printer file info

3D model description

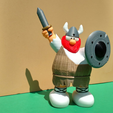
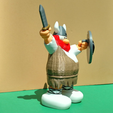
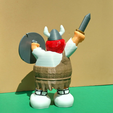
Hagar, from the comic strip 'Hagar the Horrible'.

Hagar is 27cm tall (including the sword) and does not require any painting when printing the pieces in the suggested colors. No supports are required.

Hagar may look fierce but he is really a pussycat.

Enjoy!

3D printing settings

Printer: FlashForge Creator X
Rafts: Doesn't Matter
Supports: No
Resolution: .2mm
Infill: 10%

Notes:
All pieces can be printed without a raft, however based on your own individual experience, the sword and the smaller pieces may need a brim or a raft. Personally I also print small pieces with a higher infill and two shells. I also routinely print pieces that have many curves and no flat top with 5 top layers.

Colors and multiple printed pieces
White:
horn_right
horn_left
face
shirt
boots

Grey or Silver:
helmet
sword
shield
shield_handle

Black:
eyes (2 copies)
shield_rivet (6 copies)
shield_center
helmet_rivet
bootstrap (2 copies)

Red:
beard

Yellow or Gold:
sword_guard

Brown:
tunic_top
tunic_bottom
belt
tunic_pin (2 pieces)

Flesh or Peach:
arm_right
arm_left
legs
nose

Assembly instructions
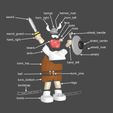
Assembly is straight forward as per the diagram below.

Of special note:
The bootstrap pieces are printed flat. Simply make a loop from each bootstrap and glue the ends together. I printed them in ABS and they were highly flexible. The bootstrap then slides over the top of the shoes, so ensure you do this before gluing the shoes to the legs.

I also suggest assembling the shield then gluing the shield_handle piece to the shield. Once this is all dry, the shield_handle slides into hand_left and can then be glued in.

Advertising


Issue with this design? Report a problem.

Would you like to support Cults?

You like Cults and you want to help us continue the adventure independently? Please note that we are a small team of 3 people, therefore it is very simple to support us to maintain the activity and create future developments. Here are 4 solutions accessible to all:

  • ADVERTISING: Disable your banner blocker (AdBlock, …) and click on our banner ads.

  • AFFILIATION: Make your purchases online by clicking on our affiliate links here Amazon.

  • DONATE: If you want, you can make a donation via Ko-Fi πŸ’œ.

  • WORD OF MOUTH: Invite your friends to come, discover the platform and the magnificent 3D files shared by the community!


Sharing and downloading on Cults3D guarantees that designs remain in makers community hands! And not in the hands of the 3D printing or software giants who own the competing platforms and exploit the designs for their own commercial interests.

Cults3D is an independent, self-financed site that is not accountable to any investor or brand. Almost all of the site's revenues are paid back to the platform's makers. The content published on the site serves only the interests of its authors and not those of 3D printer brands who also wish to control the 3D modeling market.

100% secure payment by credit card, PayPal, Apple Pay, Google Pay, etc.
View all payment options.