I designed a PC case that resembles a nuclear bomb from Fallout 4. It's not an exact copy of the F4 bomb, but instead designed to fit standard PC components. Inspired by this Linus Tech Tips project: https://youtu.be/39nIGwEJKTQ
Printable on any printer with a 200x200x142mm printable volume.
This PC case reuires general problem solving skills, maker skills and careful installation to make everything fit. You paint and finish it however you like. I recommend army paint "DDR green" for the green and flat brown tamiya paint for the rust. The other colors are whatever you like. The thread for my build can be found here:
https://linustechtips.com/main/topic/870122-custom-3d-printed-fallout-nuke-case/
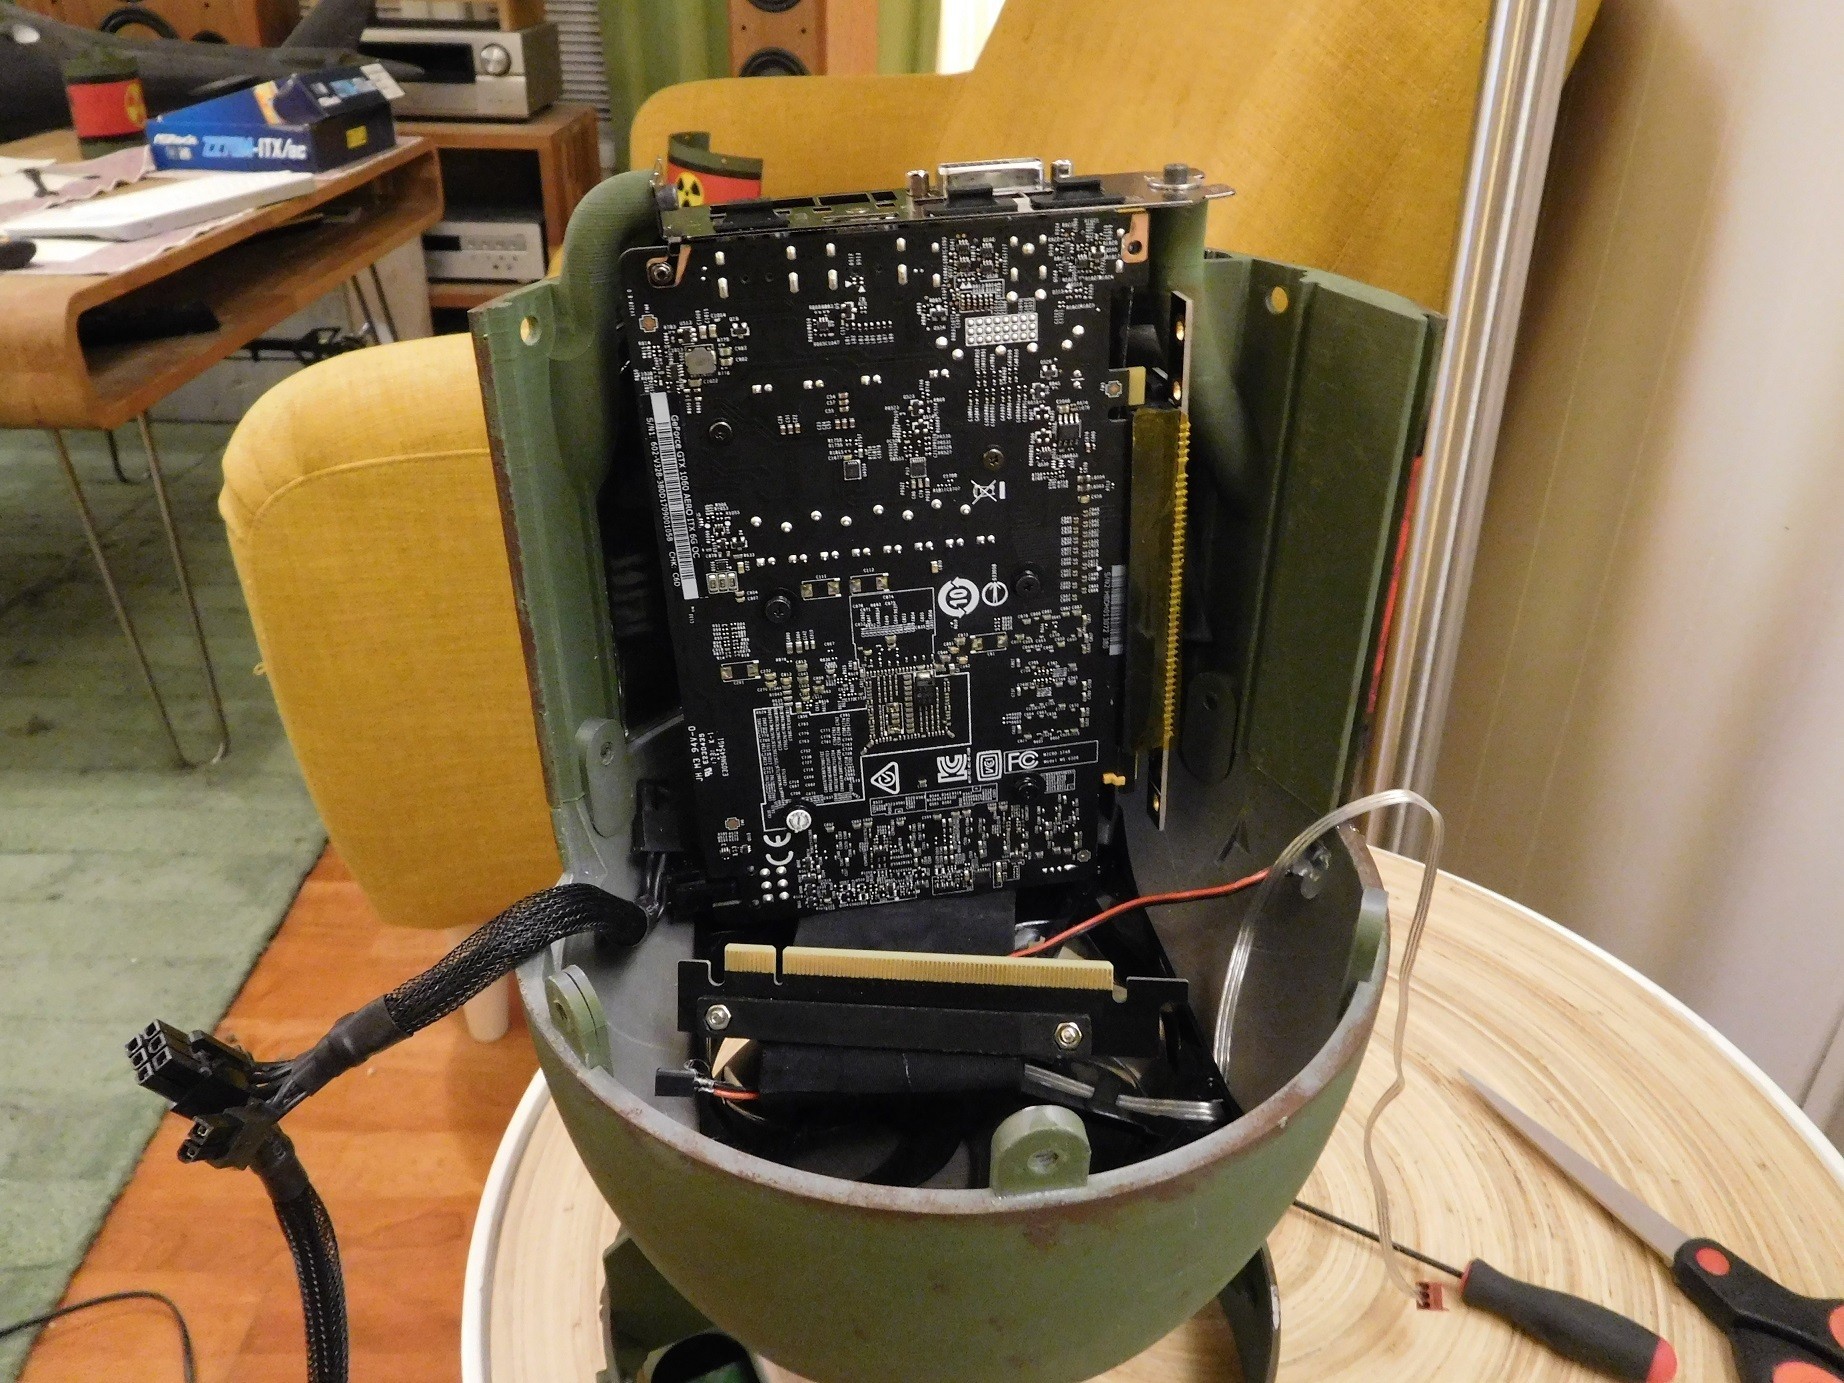
CPU temperatures are fine, but GPU temperatures were a little high on the prototype. This was be improved greatly by routing the PCIE cable around the side of the motherboard instead of under, like I did. It reduced the temperature to an acceptable 82°C under full GPU load.
Recommended components:
Motherboard: Any standard height ITX motherboard should fit, including the IO-shield. I have tried two motherboards, a GA-B150N-Phoenix-WIFI and ASRock Z270M-ITXac.
GPU: MSI GTX 1060 AERO ITX 6G OC. Other mini or ITX size cards should also fit, but I can't afford to buy more cards to test with. I have also tested with a Gigabyte 1070 mini and it's too big, but fits fine after removing the plastic around the cooler.
https://rover.ebay.com/rover/1/711-53200-19255-0/1?ff3=4&toolid=11800&pub=5575353675&campid=5338226872&mpre=https%3A%2F%2Fwww.ebay.com%2Fitm%2FMSI-NVIDIA-GeForce-GTX-1060-AERO-ITX-6G-OC-DVI-2HDMI-2DisplayPort-pci-e-Video%2F192115629896%3Fepid%3D14010847375%26hash%3Ditem2cbafbdf48%3Ag%3ACA4AAOSwuxFYtOqu
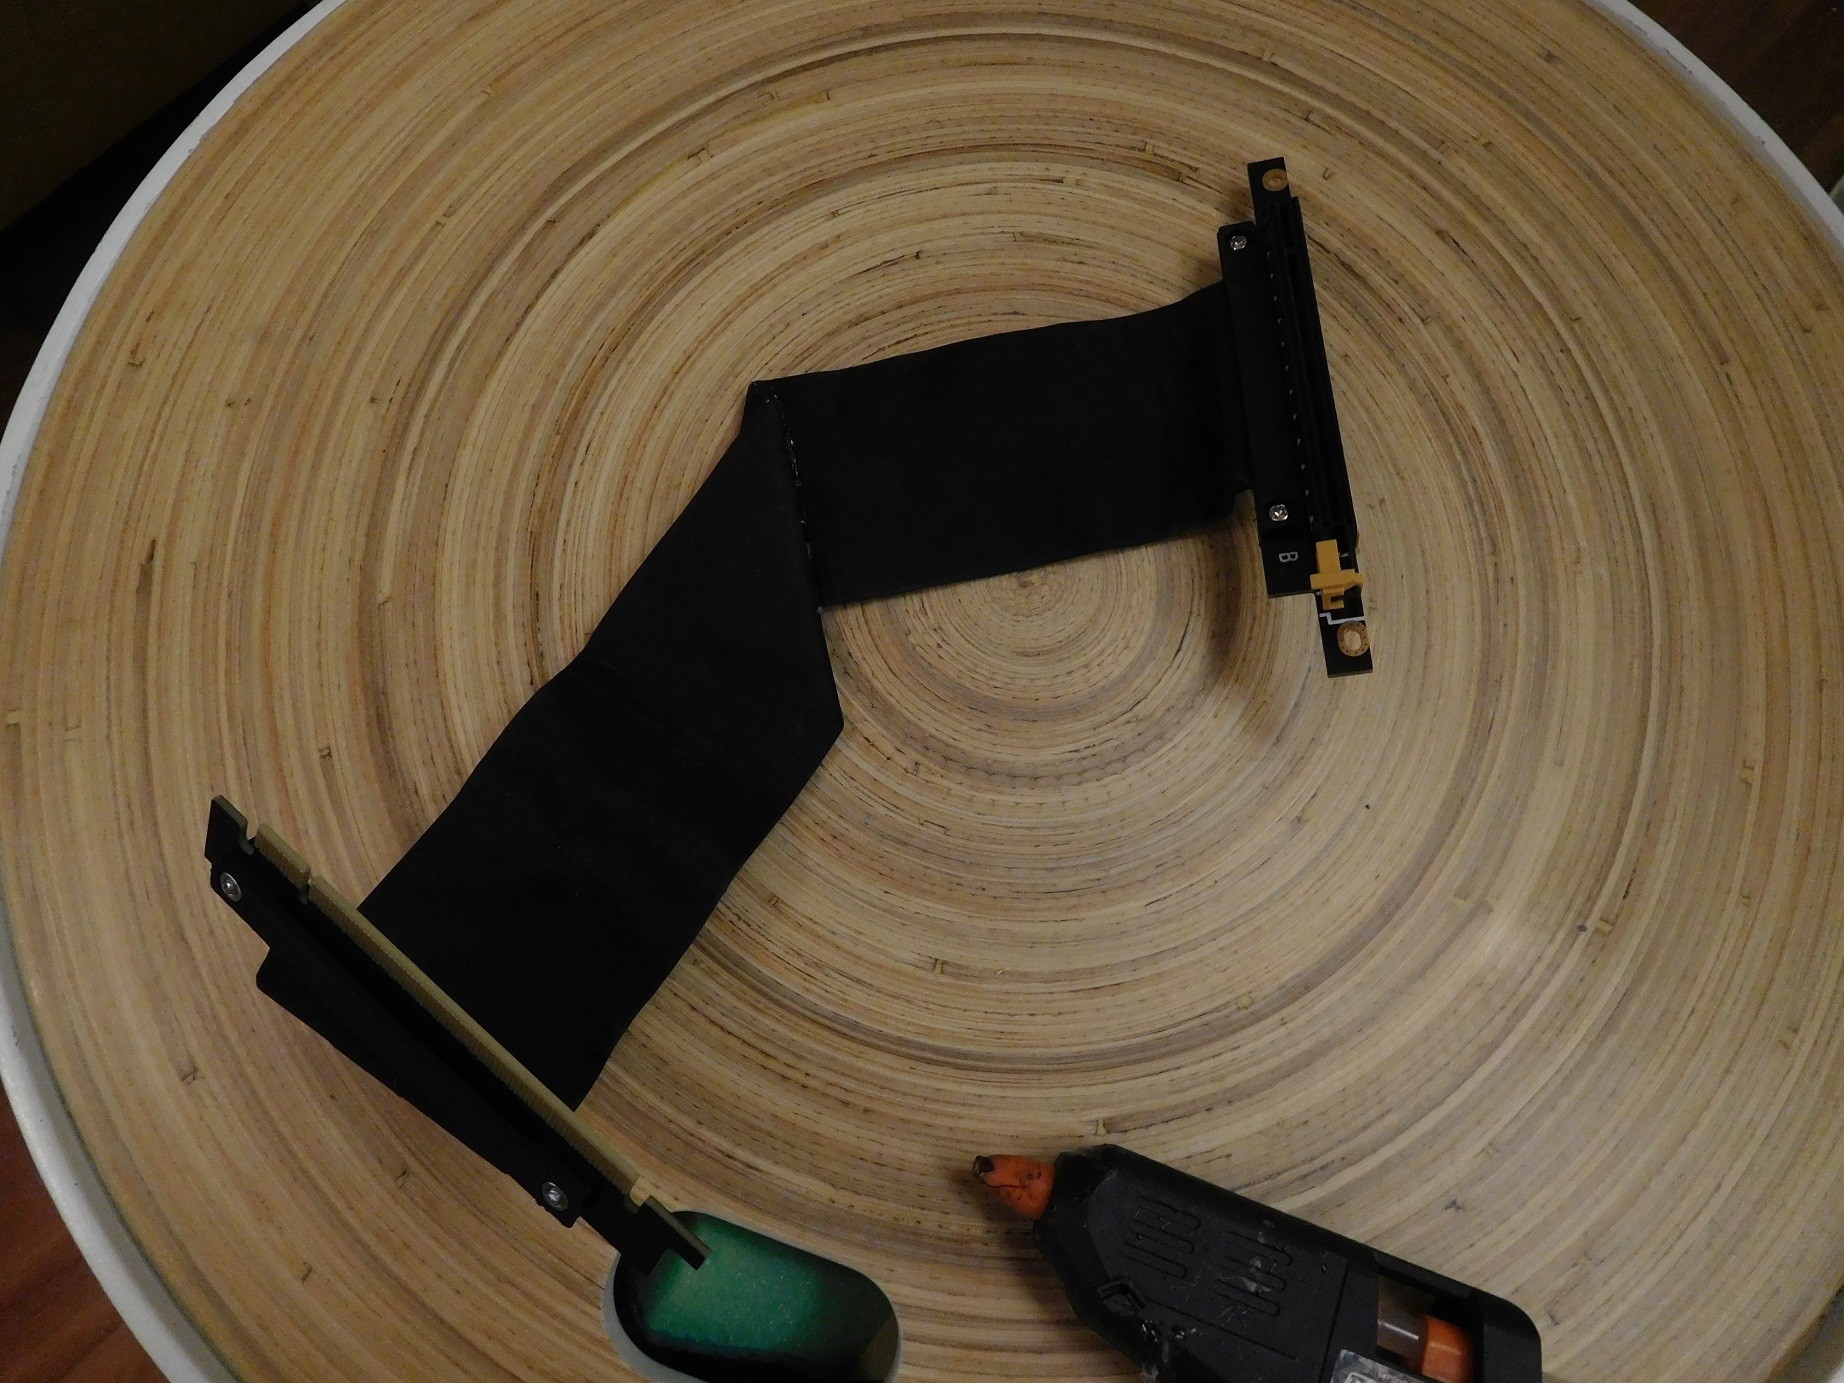
PCIE-extension cable: Thermaltek 250-300 mm PCIE16x for side routing is recommended, or Liheat 350 mm B type for bottom routing (as pictured on the prototype). Cheap ribbon cables may also work in some cases, but I couldn't get mine to work.
https://rover.ebay.com/rover/1/711-53200-19255-0/1?ff3=4&toolid=11800&pub=5575353675&campid=5338226872&mpre=https%3A%2F%2Fwww.ebay.com%2Fitm%2FThermaltake-AC-045-CN1OTN-C1-TT-Premium-PCI-E-x16-3-0-Extender-Riser-Cable-300mm%2F142455321145%3FssPageName%3DSTRK%253AMEBIDX%253AIT%26_trksid%3Dp2057872.m2749.l2649
https://rover.ebay.com/rover/1/711-53200-19255-0/1?ff3=4&toolid=11800&pub=5575353675&campid=5338226872&mpre=https%3A%2F%2Fwww.ebay.com%2Fitm%2FPCIE-PCI-Express16x-Extension-Adapter-Riser-Cable-GEN-3-350mm-B-type%2F122472932440%3FssPageName%3DSTRK%253AMEBIDX%253AIT%26_trksid%3Dp2057872.m2749.l2649
CPU cooler: Noctua NH-L9i, Thermolab ITX30, Silverstone - SST-NT08-115XP or similar low profile cooler. Larger coolers will fit with an external PSU option or Pico PSU.
https://rover.ebay.com/rover/1/711-53200-19255-0/1?ff3=4&toolid=11800&pub=5575353675&campid=5338226872&mpre=https%3A%2F%2Fwww.ebay.com%2Fitm%2FPQ559-Noctua-NH-L9i-Intel-Low-Profile-Quiet-CPU-Cooler%2F132303055940%3Fepid%3D2255356067%26hash%3Ditem1ecde06c44%3Ag%3AWgMAAOSwlQ9Zm3~f
https://rover.ebay.com/rover/1/711-53200-19255-0/1?ff3=4&toolid=11800&pub=5575353675&campid=5338226872&mpre=https%3A%2F%2Fwww.ebay.com%2Fitm%2FSilverstone-SST-NT08-115XP-CPU-K%25C3%25BChler-Hardware-Electronic-Silverstar-NEW%2F362179674356%3FssPageName%3DSTRK%253AMEBIDX%253AIT%26_trksid%3Dp2057872.m2749.l2649
https://rover.ebay.com/rover/1/711-53200-19255-0/1?ff3=4&toolid=11800&pub=5575353675&campid=5338226872&mpre=https%3A%2F%2Fwww.ebay.com%2Fitm%2F281065681925
Case fan: Cooler Master Sickleflow 120 2000 RPM Green LED 120 mm work well in the bottom of the case. Other high power 120 mm fans will work.
https://rover.ebay.com/rover/1/711-53200-19255-0/1?ff3=4&toolid=11800&pub=5575353675&campid=5338226872&mpre=https%3A%2F%2Fwww.ebay.com%2Fitm%2FCoolerMaster-SickleFlow-120mm-Silent-Green-LED-Case-Fan%2F311332098740%3Fhash%3Ditem487cd6d2b4%3Ag%3AqswAAOSw7H1ZlCxH
PSU: Standard SFX form factor units will fit. 300 W or higher recommended.
https://rover.ebay.com/rover/1/711-53200-19255-0/1?ff3=4&toolid=11800&pub=5575353675&campid=5338226872&mpre=https%3A%2F%2Fwww.ebay.com%2Fitm%2FSilverStone-Technology-450W-SFX-Form-Factor-80-PLUS-BRONZE-Power-Supply-NEW%2F191982808696%3Fhash%3Ditem2cb3112e78%3Ag%3AwTIAAOSwYIxX7RWF
SSD: M.2 drives are recommended. There is enough room to fit a couple of standard 2,5" SSD as well but no provisions for mounting have been designed yet.
Power and reset switch: 6x6x10mm momentary switch and some wires with connectors. Shorter than 10mm length can be used, but requires something thin to be inserted into the switsh hole to turn on/reset.
https://www.banggood.com/5Pcs-6-x-6-x-10-4-Pin-Momentary-Schalter-Tactile-Micro-Drucktaster-p-1031861.html?p=HD240528697332015103
https://rover.ebay.com/rover/1/711-53200-19255-0/1?ff3=4&toolid=11800&pub=5575353675&campid=5338226872&mpre=https%3A%2F%2Fwww.ebay.com%2Fitm%2FJST-2-5mm-2-Pin-Male-Female-RED-Connector-Housing-with-wire-26AWG-150mm-5-PAIRS%2F141356350121%3Fepid%3D828789197%26hash%3Ditem20e97ebaa9%3Ag%3AVz8AAOxyf1dTJwE1
Video cables: Angled HDMI cables or displayport cables.
https://www.banggood.com/Gold-2m-V1_4-HDMI-Male-To-HDMI-Male-Right-Angled-Tinned-Copper-Wire-Video-HDMI-Cable-p-1052579.html?p=HD240528697332015103
https://rover.ebay.com/rover/1/711-53200-19255-0/1?ff3=4&toolid=11800&pub=5575353675&campid=5338226872&mpre=https%3A%2F%2Fwww.ebay.com%2Fitm%2Fshort-HDMI-male-to-female-Down-Angle-90-degree-extension-cable%2F173019892023%3Fhash%3Ditem2848ca0937%3Ag%3AMrQAAOSw8gVX3UyQ
Screws:
6x M3x12 for mounting the SFX PSU and the GPU.
20x M6x8 for mounting the case parts together. It's your own choice wether you prefer slotted, philips or other screw types.
https://rover.ebay.com/rover/1/711-53200-19255-0/1?ff3=4&toolid=11800&pub=5575353675&campid=5338226872&mpre=https%3A%2F%2Fwww.ebay.com%2Fitm%2FM3-A2-STAINLESS-STEEL-SOCKET-CAP-BUTTON-COUNTERSUNK-CSK-HEAD-BOLTS-SCREWS-ALLEN-%2F112282529274%3Fvar%3D%26hash%3Ditem6016c00c55
https://rover.ebay.com/rover/1/711-53200-19255-0/1?ff3=4&toolid=11800&pub=5575353675&campid=5338226872&mpre=https%3A%2F%2Fwww.ebay.com%2Fitm%2FM6-6mm-A2-STAINLESS-SLOTTED-CHEESE-HEAD-MACHINE-SCREWS-METRIC-SLOT-SCREW%2F111835099694%3FssPageName%3DSTRK%253AMEBIDX%253AIT%26var%3D410817757651%26_trksid%3Dp2057872.m2749.l2649
Bottom01 - The lowest part of the bottom of the bomb casing.
Bottom02 - The center part of the bottom of the bomb casing.
Bottom03 - The upper part of the bottom of the bomb casing.
Center01 - The right side of the center section, with GPU mounts.
Center02 - The left side of the center section, with an opening for a regular 110v/220v power cable in the rear.
Center03-externalPSU - An alternative left side of the center section, with a larger opening for power cables from an external PSU.
Fin01 - The fins on the bottom.
PSUclamp01 - Clamps for holding the SFX psu to the left center section. Print two.
Tab01 - Mounting tabs between the center section and top and bottom sections. Print twelve.
Top01 - The bottom part of the top of the casing.
Top02 - The top half of the top of the casing.
Top03 - The aerodynamic splitter cone for glueing to the bottom of Top02.
Fanring01 - A ring to improve the efficiency of the Cooler MAster Sickleflow fan used in the bottom of the case, by reducing the blade gap to a minimum.
Printed part assembly:
Glue Bottom01 and Bottom02 together with the two pegs as guides.
The fin01 part and the bottom parts fit together nice and tight and usually don't require glue to fit together. I recommend painting them separately.
Glue Top03 to the bottom of Top02, and also glue top02 to Top01 with the fins of Top01 fitting in the slots under Top02.
Glue the twelve Tab01 pieces to the respective slots inside Top01 and Bottom03 using super glue/CA glue. M6x8mm screws will later hold the center section parts to these tabs.
Top01 has three slots in the rear for routing HDMi or displayport cables out the back. 90° adapters are recommended on the GPU connection if you use a fan in the top of the casing, to clear the fan.
Component installation:
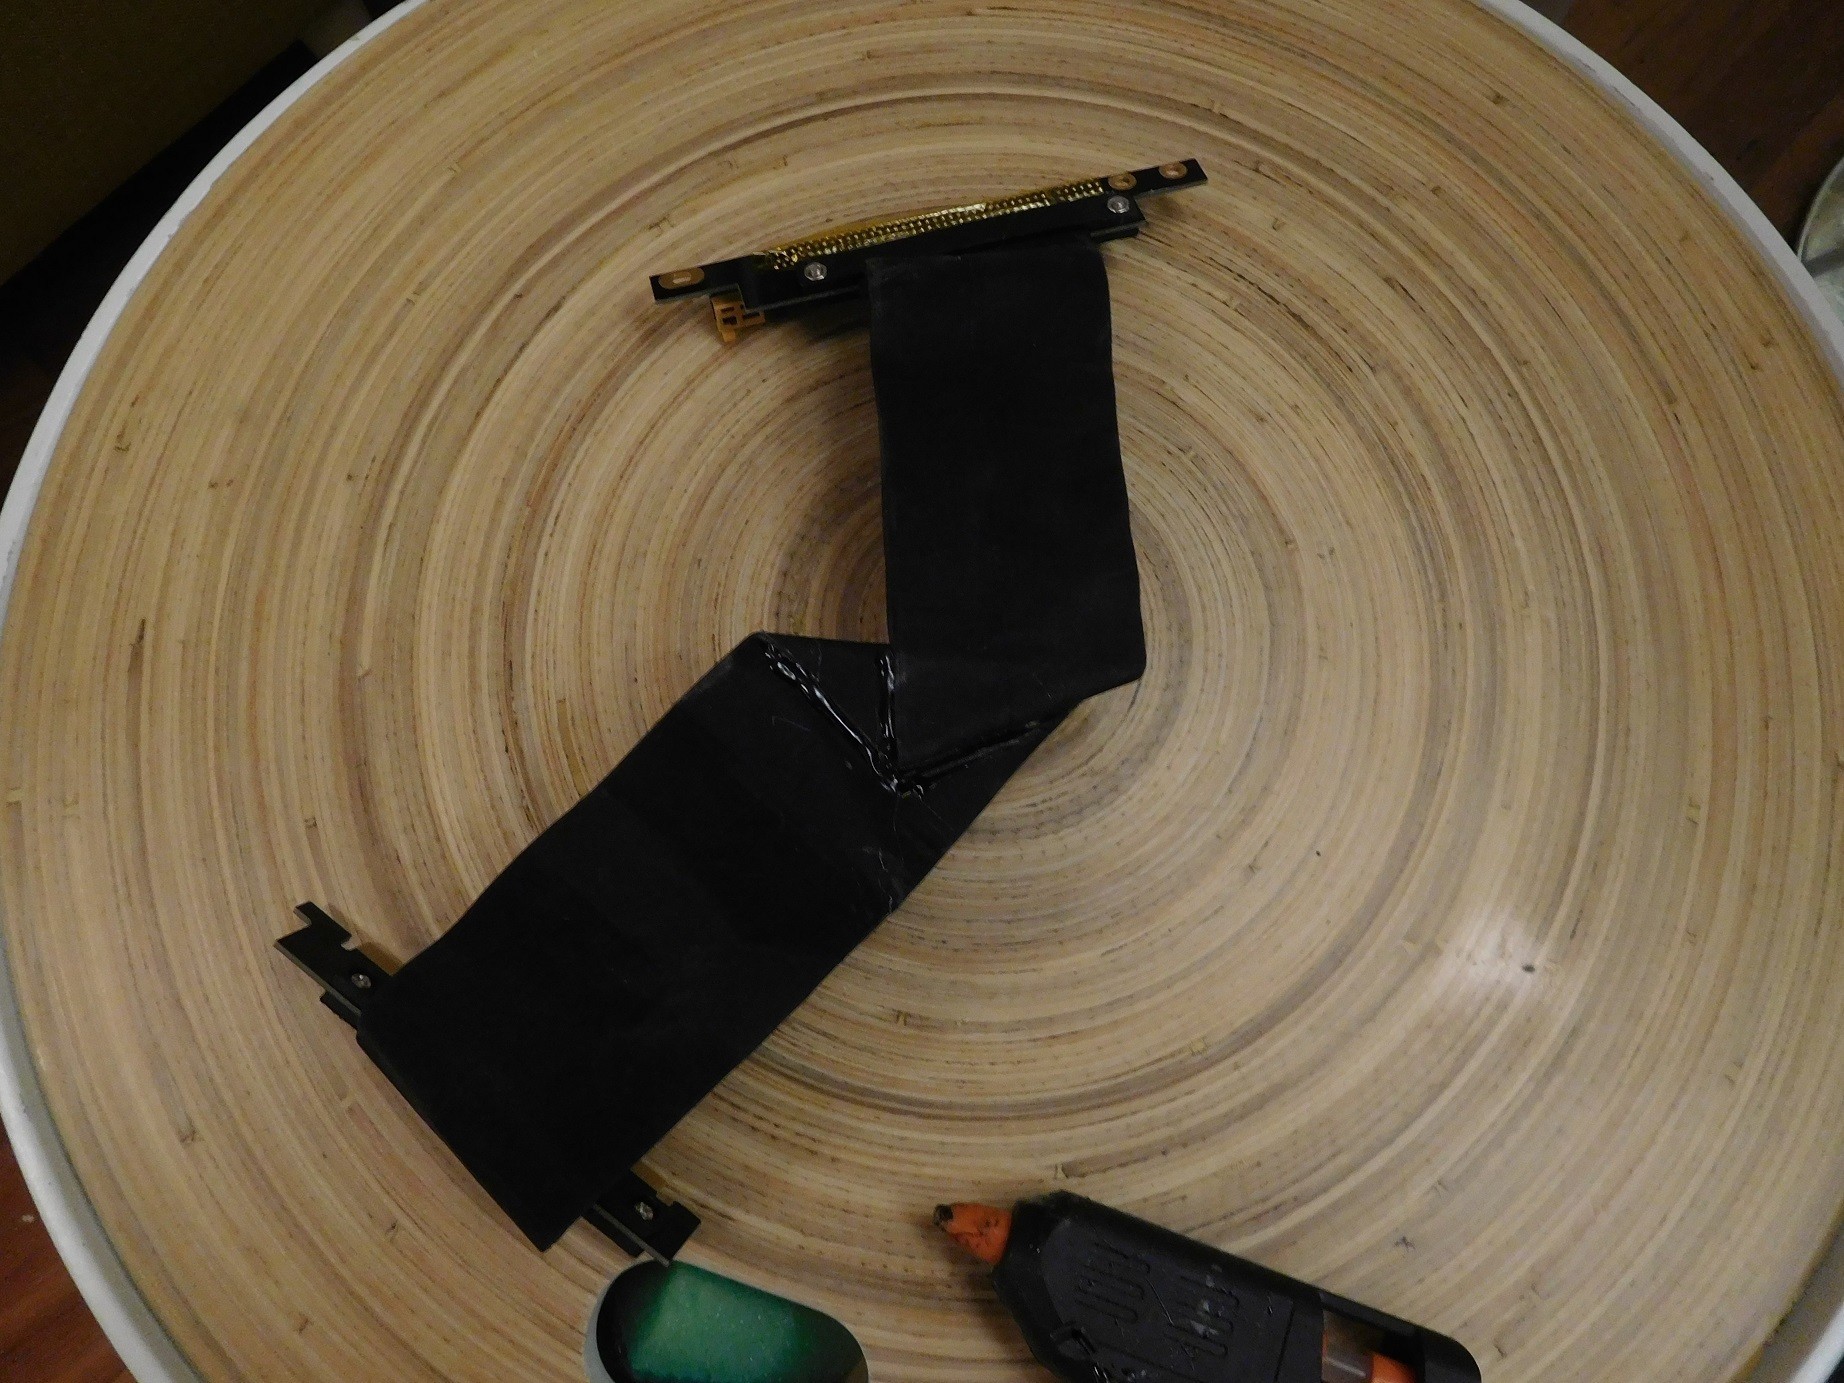
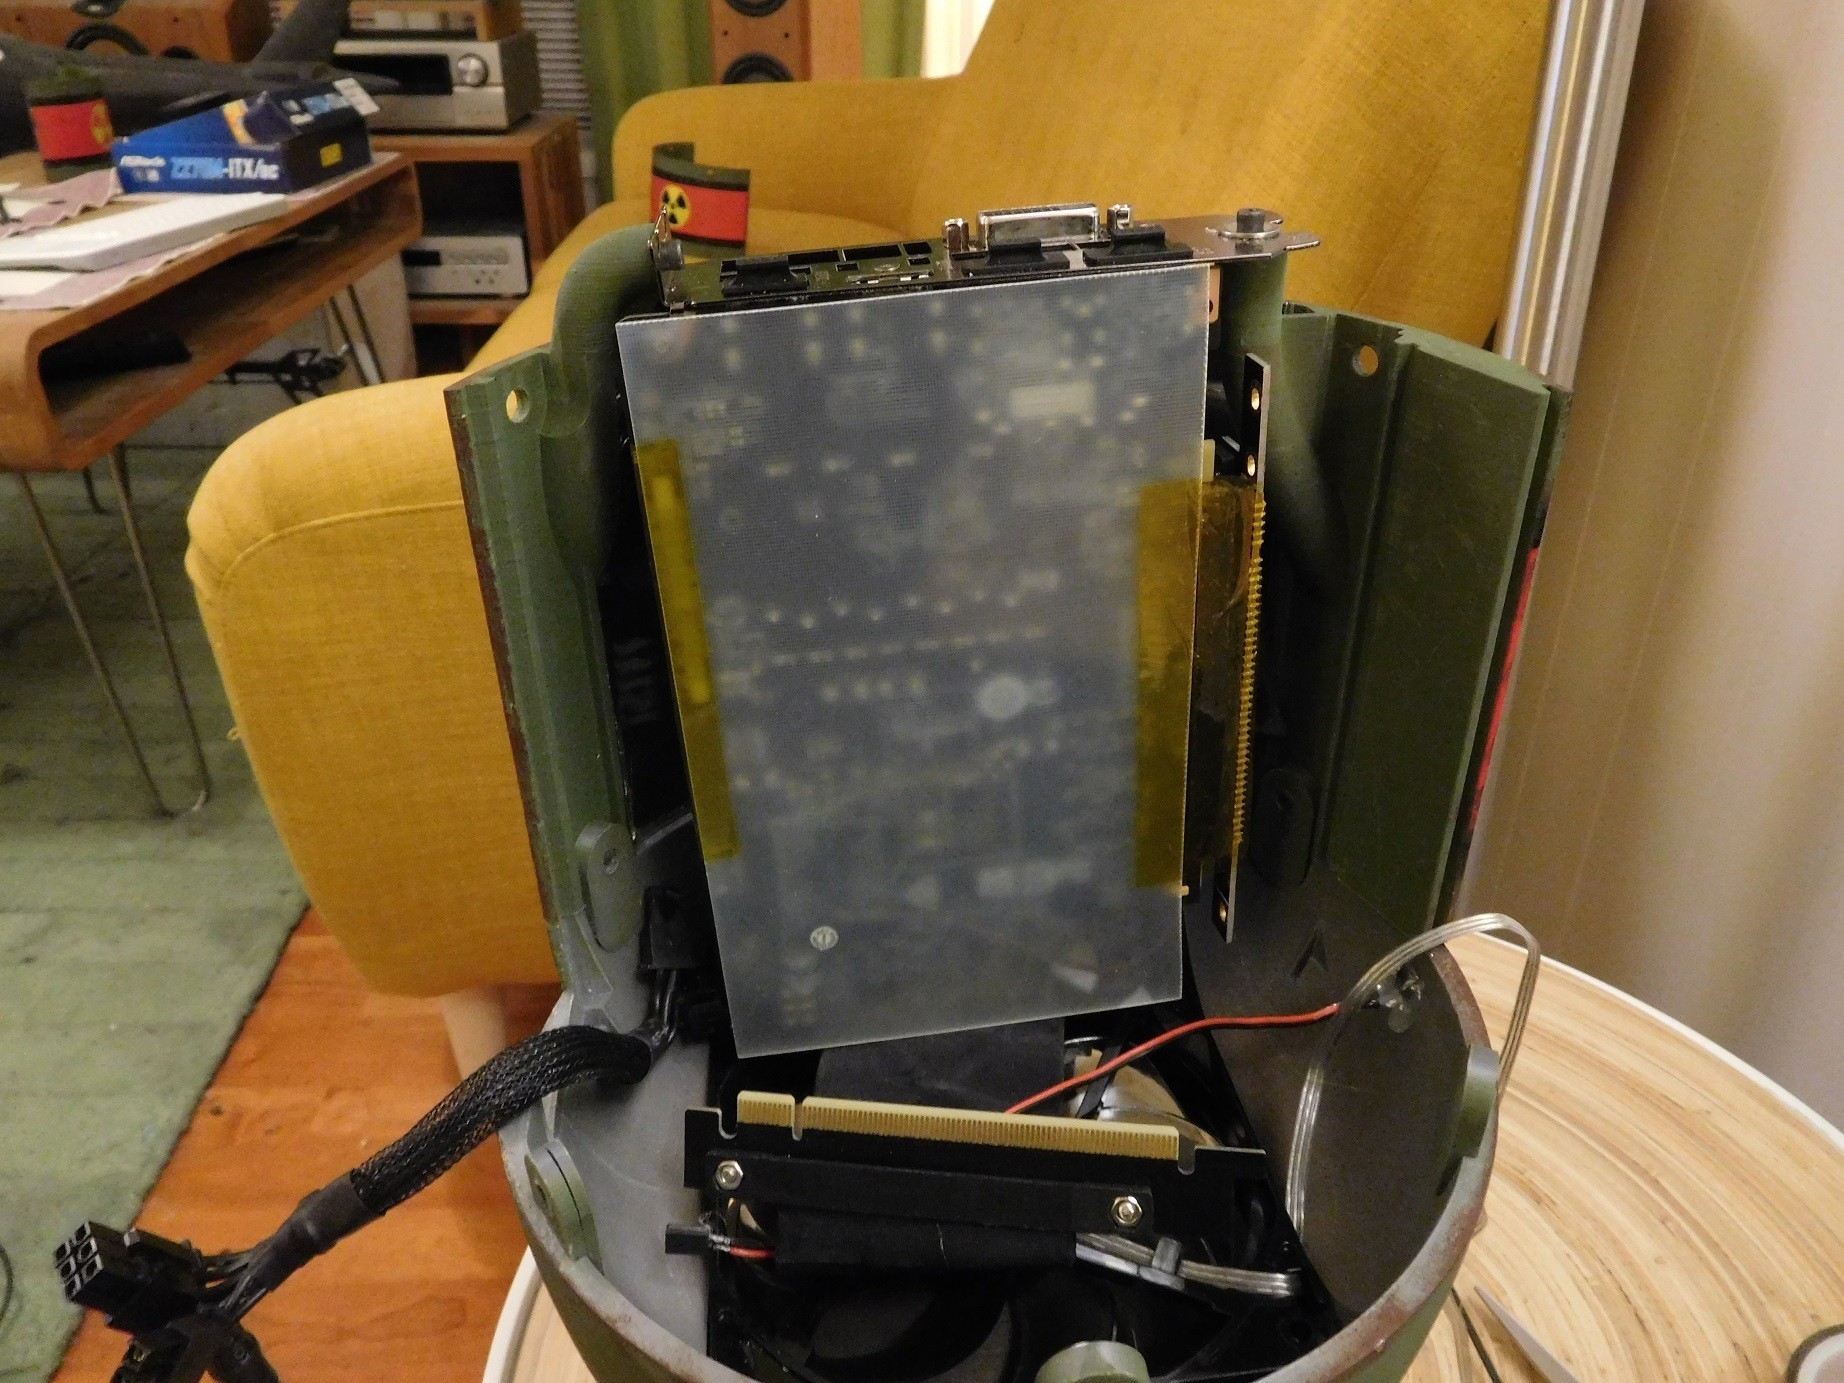
There are two ways to route the GPU PCIE extension cable. On the prototype shown in the photos I have chosen to route the B-type 350 mm cable around the GPU and then down under the motherboard. I have folded the cable to achieve this.
The other option is to route the cable directly around the edge of the motherboard from the side and to the PCIE slot on the motherboard using, for example, a Thermaltek PCIE extension. I later made this change to the prototype. This gave a reduction in temperature of 10°C compared to routing under the motherboard. A 300 mm cable is more than long enough to reach around the side. A 250mm will probably be a perfect fit, but I haven't tried a 250 mm cable myself. The Thermaltek cables are very easy to manage as they are soft and split into narrow strips. I added a photo showing the PCIE cables coming around the side of the motherboard.
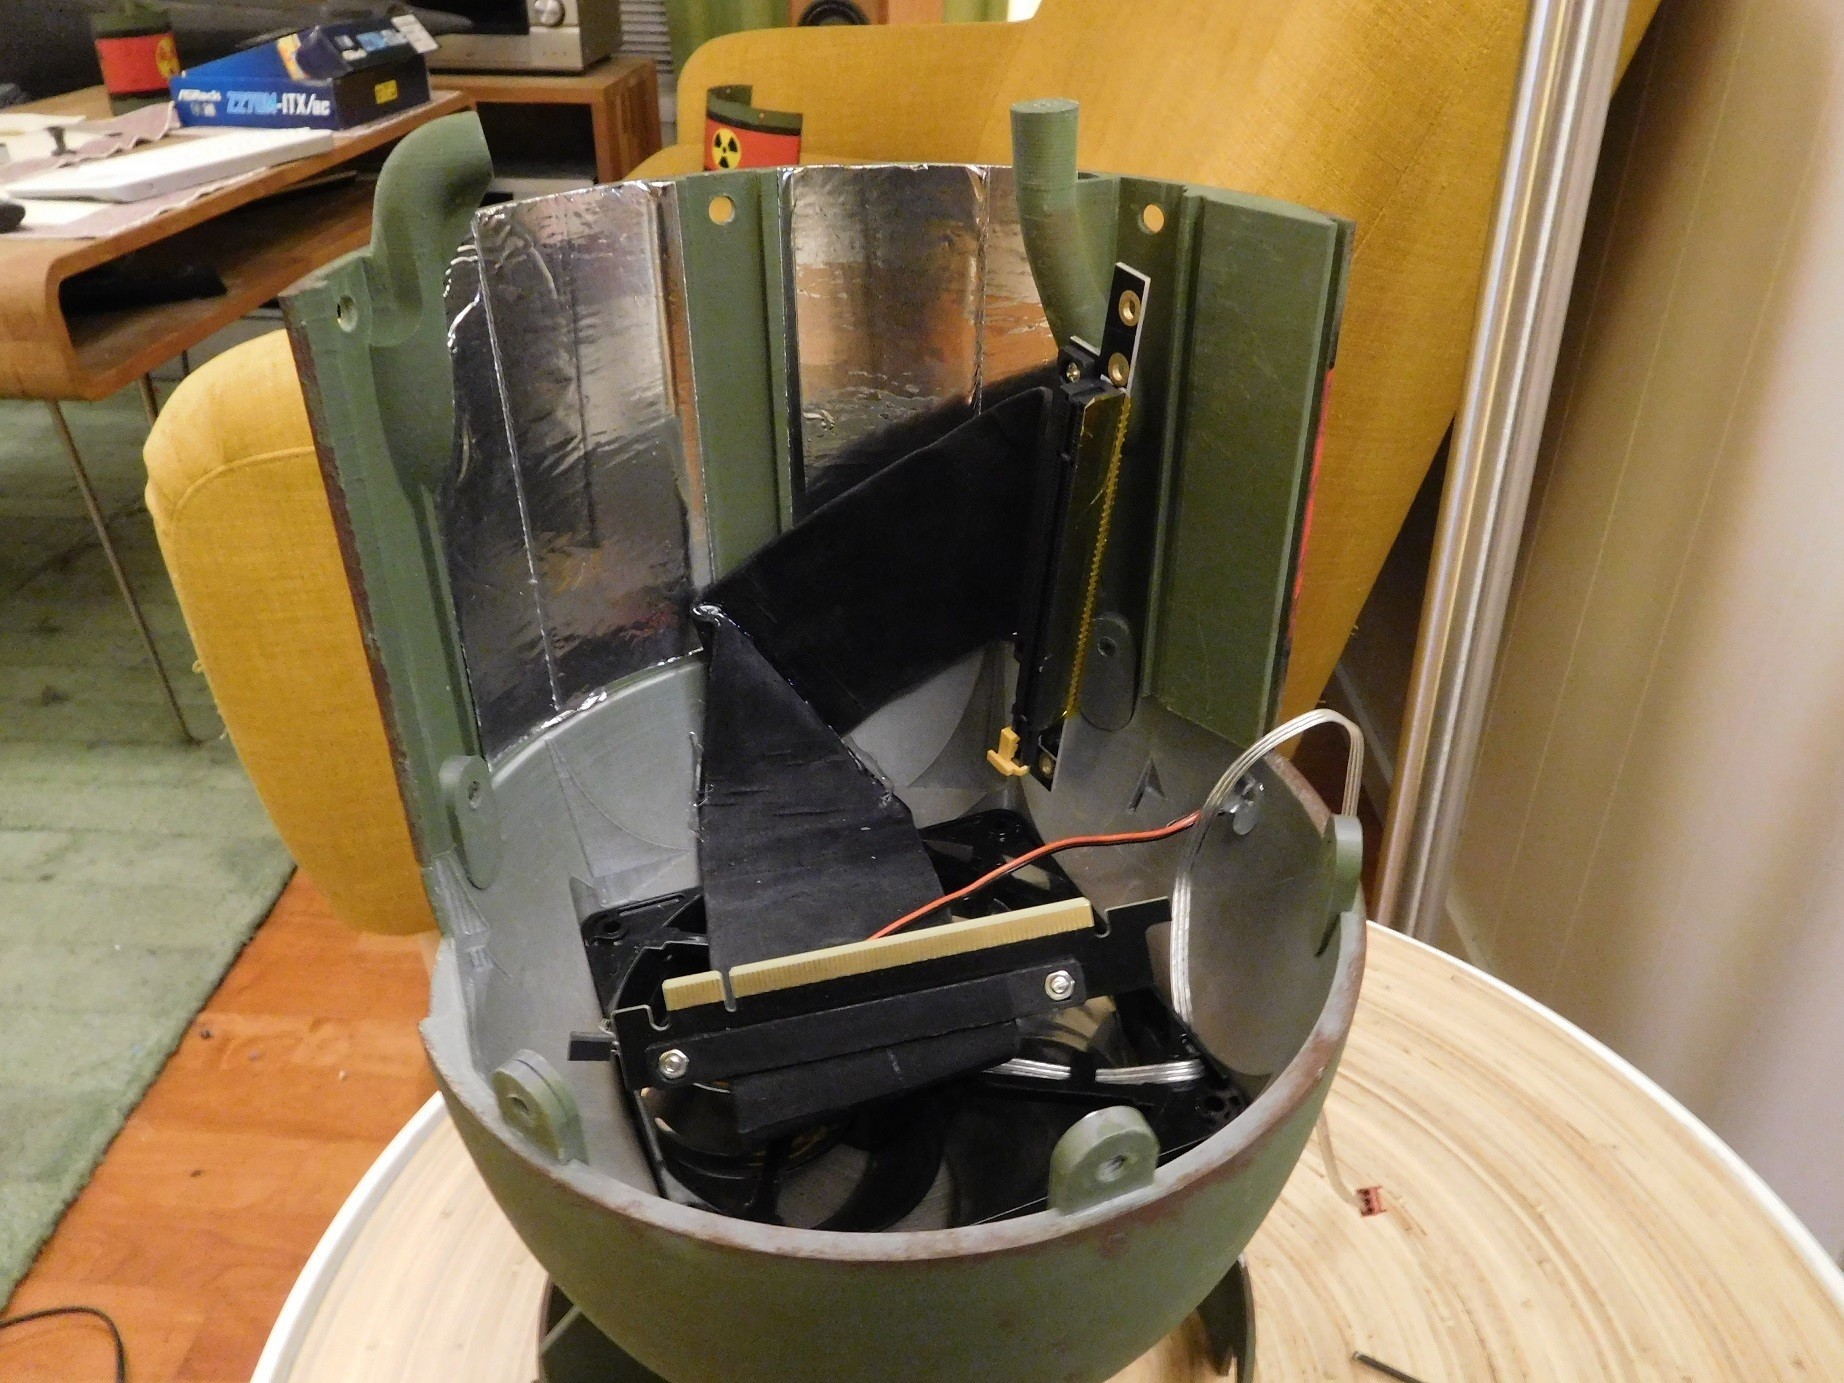
The GPU should be mounted at a slight angle, and the mounting points make this happen as it's installed. This was done on purpose to center the bottom end so that it would fit.
Use something insulating between the GPU and motherboard to prevent shorting. I recommend a thin sheet of fiberglass or a sheet of teflon. Cardboard can also be used in a pinch.
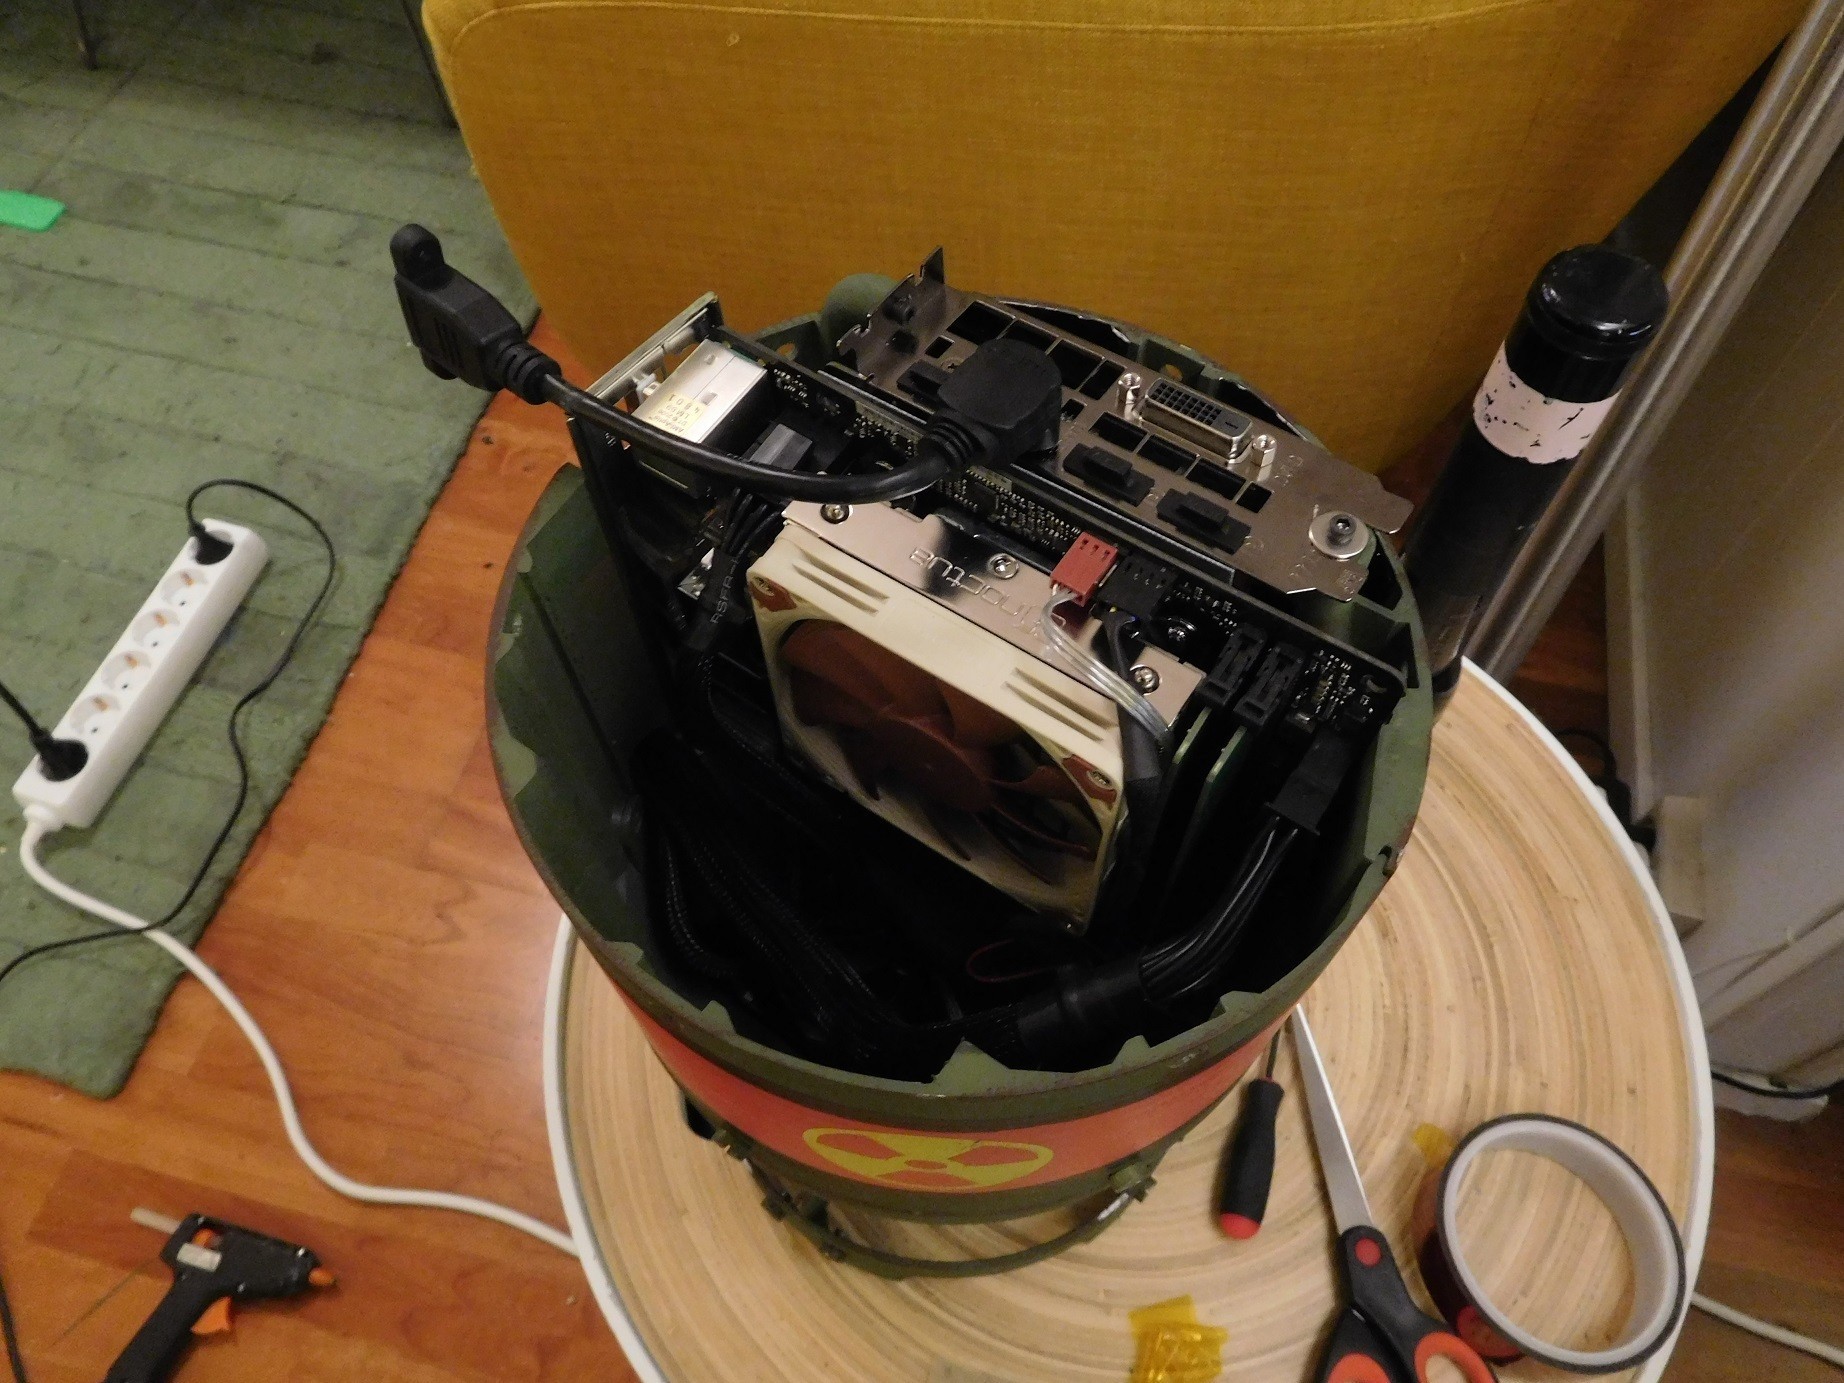
The motherboard is a tight fit in the slots in the bottom of the case. Test fit it before installing the GPU to practice first.
On the prototype I used one 120mm Cooler master sickelflow 2000 rpm fan in the bottom of the case, and no fan in the top. It provides plenty of airflow on its own, and I use fan managment software to keep it quiet when it's not needed to run fast.
The PSU is installed onto the left center section using two of the printed clamps and four M3x12 bolts.
![IMG_20171225_000010416_HDR[1].jpg Nuclear bomb PC case. "Nuke"](https://images.cults3d.com/GqGX7M4pSdYt0JwSSXFP_9l0QkU=/113x113/top/filters:still():format(webp)/https://fbi.cults3d.com/uploaders/12943812/illustration-file/654002b3-b0c9-49b1-8b65-b8ebb4238726/IMG_20171225_000010416_HDR%5B1%5D.jpg)


![IMG_20171225_000010416_HDR[1].jpg Nuclear bomb PC case. "Nuke"](https://fbi.cults3d.com/uploaders/12943812/illustration-file/654002b3-b0c9-49b1-8b65-b8ebb4238726/IMG_20171225_000010416_HDR%5B1%5D.jpg)


![DSCN1555[1].jpg Nuclear bomb PC case. "Nuke"](https://fbi.cults3d.com/uploaders/12943812/illustration-file/e2b77d54-6e4f-4fe7-a7ca-09a56a2458cd/DSCN1555%5B1%5D.jpg)