Filament Spool Shelf Rack Stand


Filament Spool Shelf Rack Stand
Published 2017-03-07T15:58:01+00:00
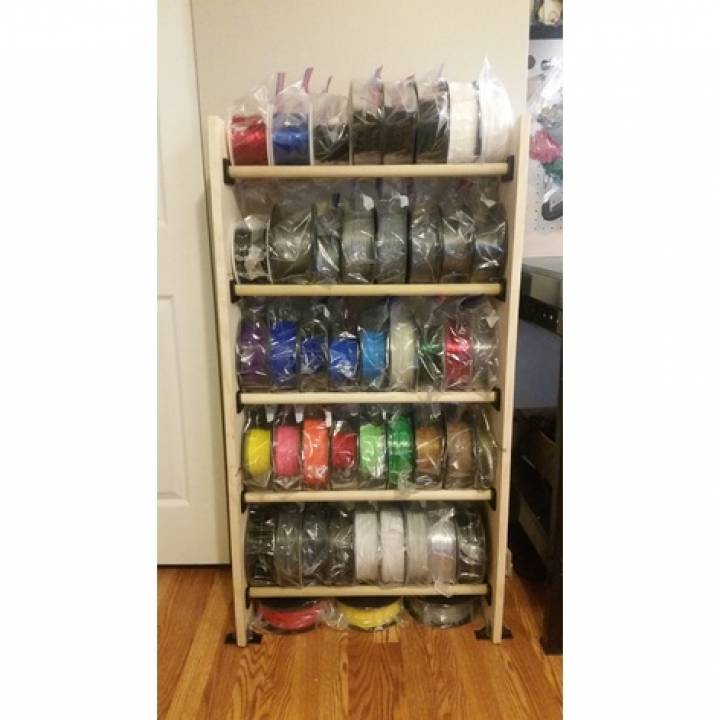
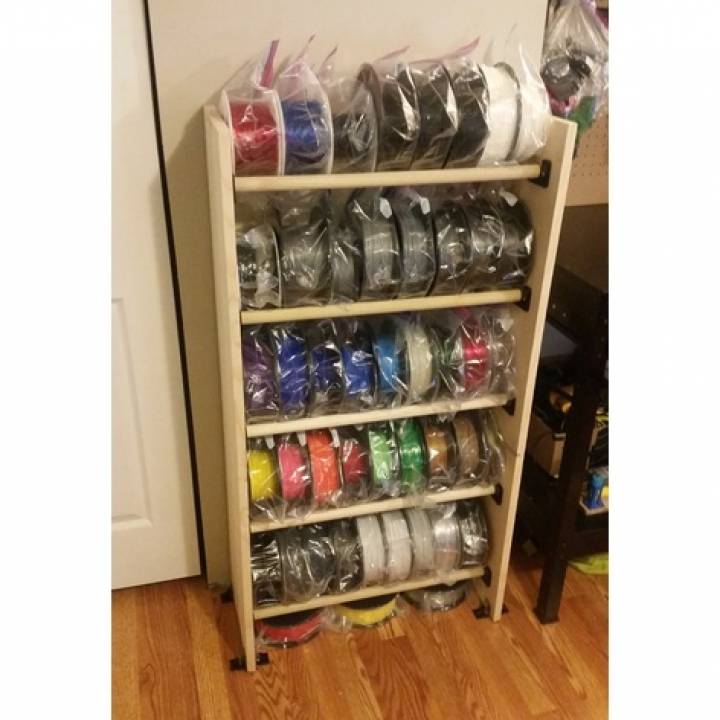
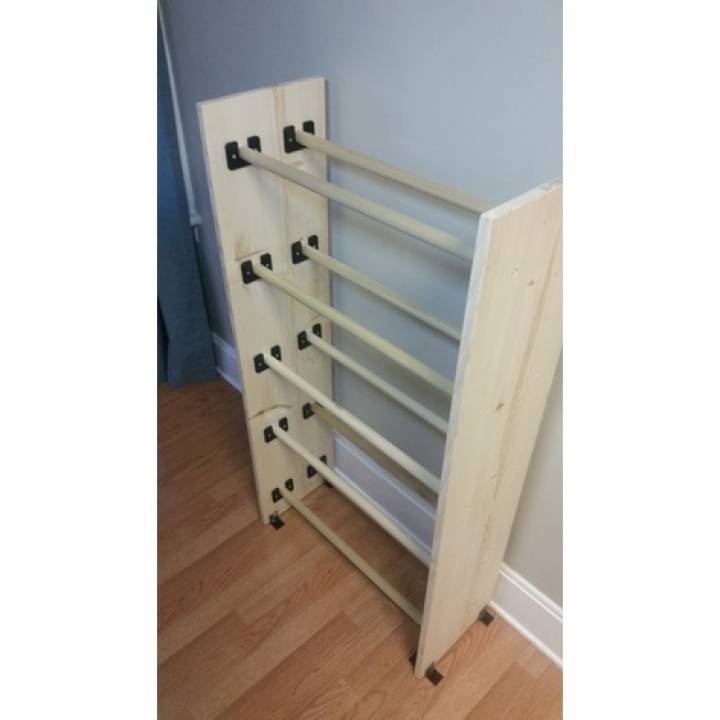
After not being able to find a spool storage system that had the features I wanted, I decided to take a shot at designing one myself. This stand-alone spool rack has 5 tiers and can fit between 45-50 filament spools (depending on the sizes/brands). Material costs are approximately $40, depending on the quality of wood.
UPDATE: I designed a holder for the spool bags that hangs off the side of the shelf.
http://www.thingiverse.com/thing:2113066
Materials:
⦁ 2 - Wood Boards sized 1" x 12" x 48"
⦁ 5 - Dowel Rods sized 1" x 48"
⦁ 40 - #8 3/4" Wood Screws
⦁ 20 - #10 1-1/4" Wood Screws
3D Printed Parts:
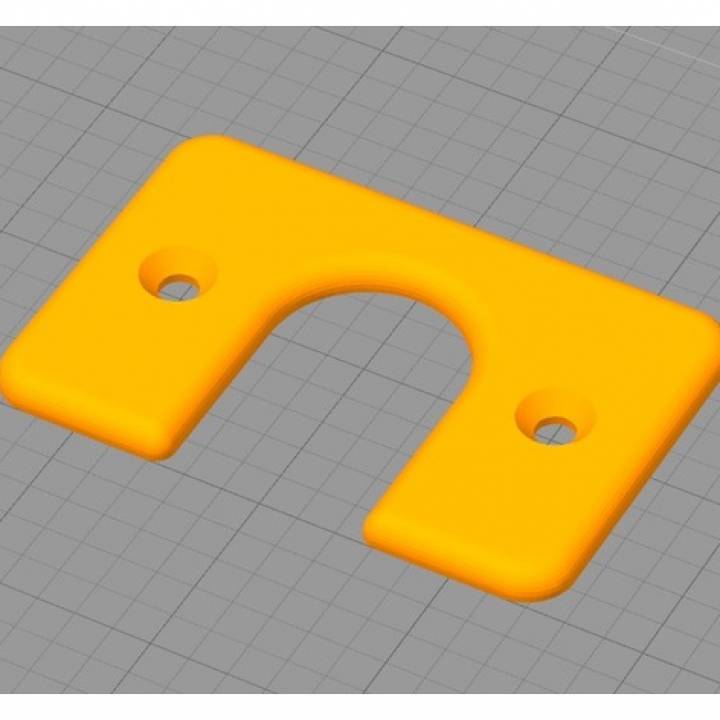
⦁ 20 - Dowel Mounts
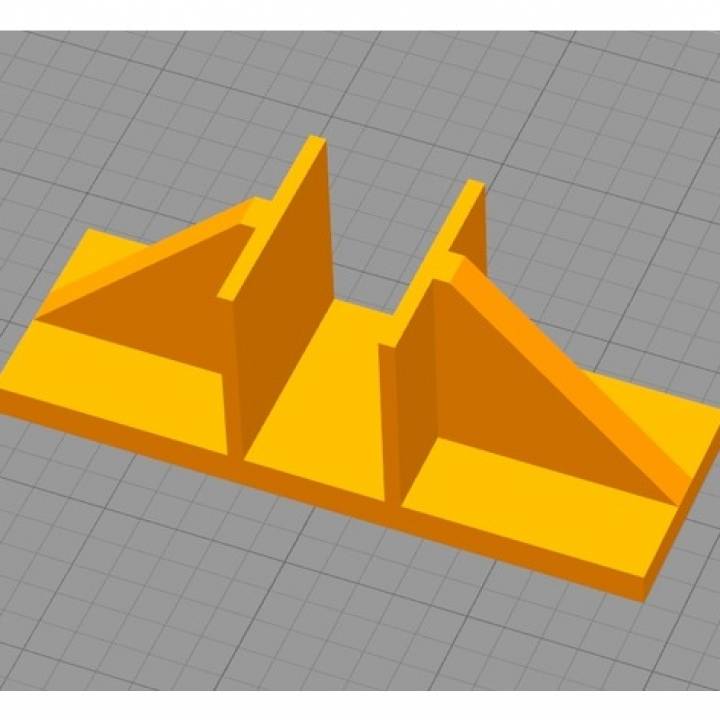
⦁ 4 - Shelf Feet
Tools:
⦁ Hand Saw
⦁ Power Drill
⦁ Sandpaper (120 - 220 grit)
⦁ Measuring Tape/Pencil
⦁ Square
⦁ Duct Tape (if necessary)
Wood Boards ($16) - http://www.homedepot.com/p/1-in-x-12-in-x-4-ft-Common-Board-458503/100322335
Dowel Rods ($20) - http://www.homedepot.com/p/6416U-1-in-x-1-in-x-48-in-Hardwood-Round-Dowel-10001808/203334068
Instructions:
Photos: http://imgur.com/a/Ig3gq
1. Start printing the 20 Dowel Mounts and 4 Shelf Feet
2. Cut all 5 Dowel Rods in half and sand so that they are smooth, flat, and as close to the same length as possible.
3. Inspect boards and determine which sides will face in and out (and top/ bottom).
4. Measure and mark the distance between each tier. Each tier requires a clearance of 10 inches, which will leave 4" inches extra on the top and bottom.
- First measure and mark 4" inches from the bottom of each board.
- Then measure and mark every 10" inches after the 4 inch mark.
(When done, there should be marks at 4", 14", 24", 34", 44")
5. Using the square and the tier marks you made in the last step, draw horizontal lines across the inside and outside of each board for all 5 tiers.
6. Measure the center points where each dowel rod will be placed.
- On each tier, measure and mark 3" inches in from the outside edges.
- Do this on both the inside and outside faces of each board.
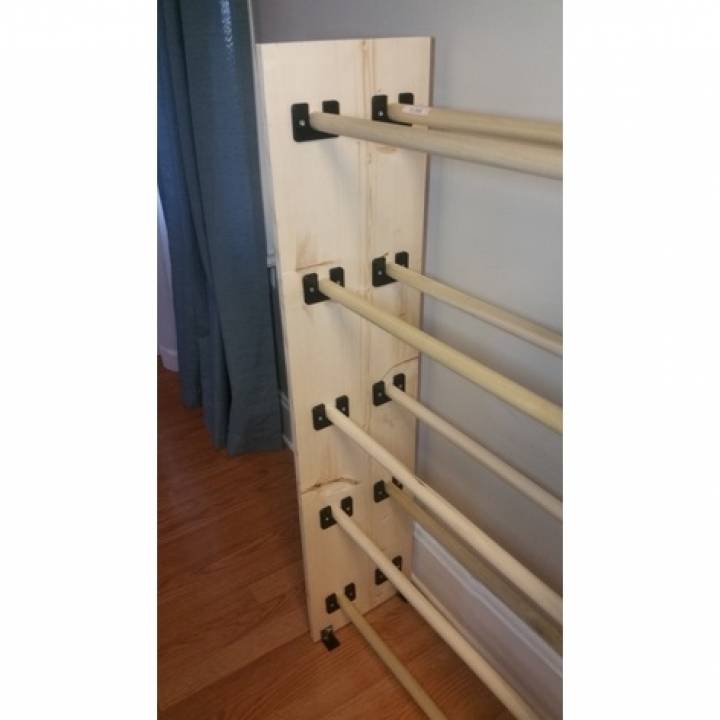
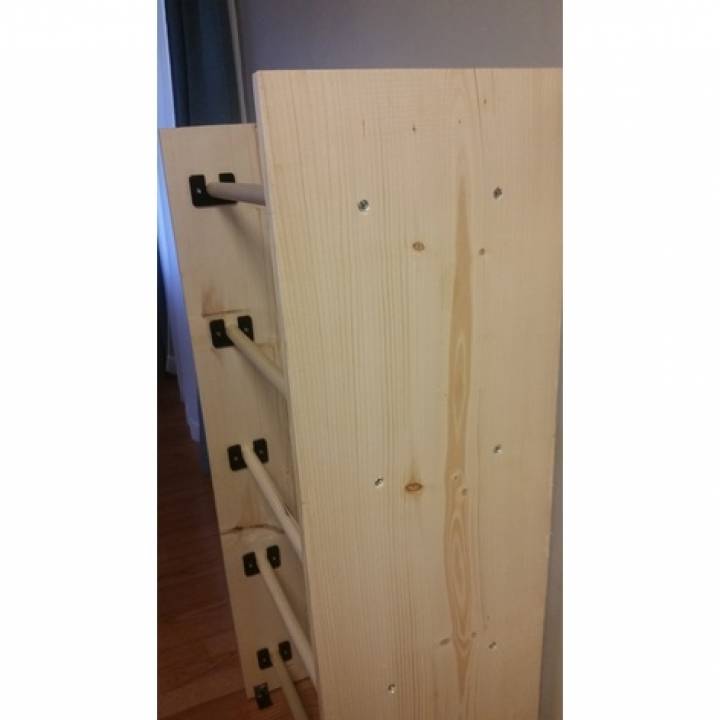
7. Using a 3D printed Dowel Mount, line up the Dowel Mount on the inside face of the boards so that the mount is centered along the horizontal tier lines and dowel center point marks you made in the last step. Use the square to make sure the mount is level and trace/mark the mount's screw holes for reference in the next step. The Dowel Mount screw holes should be centered along the horizontal tier line. Do this for all 20 mount positions.
8. Use the drill and the 3/4 inch wood screws to mount the Dowel Mounts in their designated positions on the inside face of each board. Do this for all 20 Dowel Mounts.
9. Slide the 4 Shelf Feet onto the bottom of each board (2 each). Depending on slight variation in wood thickness, you can use a little duct tape to thicken up the inside of the Shelf Feet to get the perfect grip.
10. Stand both boards up with the inside faces facing each other, about 24 inches apart. Slide the first two dowel rods into the two bottom dowel mounts and push the boards together so that they are snug/flush against the dowel rods.
11. Using the drill and the #10 1-1/4 inch wood screws, screw the dowel rods in from the outside faces of both boards using the center point marks you made that show where the center of each dowel rod is.
12. Repeat Steps #10-#11 for the remaining rods moving from the bottom up.
13. Stock with your favorite filament!


300 microns
40% infill
3 shells/outlines
No rafts
No supports
| Date published | 07/03/2017 |
| Technology | FDM |
| Complexity | Medium |