Skip to content

RAINBOW ROLLER-COASTER - KINETIC CIRCLE SCULPTURE

Advertising
Advertising
?
Creation quality: 4.7/5 (12 votes)
Evaluation of members on the printability, utility, level of detail, etc.

  • 80.7k views
  • 676 likes
  • 195 downloads
  • 3 collections
  • 25 comments
  • 3 makes

License
3D design format
STL and ZIP Folder details Close
  • RAINBOW ROLLER-COASTER by Dominik Cisar_Blade gear - half.stl
  • RAINBOW ROLLER-COASTER by Dominik Cisar_Blade.stl
  • RAINBOW ROLLER-COASTER by Dominik Cisar_Circle A.stl
  • RAINBOW ROLLER-COASTER by Dominik Cisar_Circle B.stl
  • RAINBOW ROLLER-COASTER by Dominik Cisar_Mechanics.stl
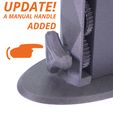
  • RAINBOW ROLLER-COASTER by Dominik Cisar_Mechanics_Manual.stl
  • RAINBOW ROLLER-COASTER by Dominik Cisar_Stand cover.stl
  • RAINBOW ROLLER-COASTER by Dominik Cisar_Stand cover_manual.stl
  • RAINBOW ROLLER-COASTER by Dominik Cisar_Stand.stl
  • RAINBOW ROLLER-COASTER by Dominik Cisar_Start gear.stl
  • Rainbow_Einsy.zip

Learn more about the formats

Last update 2019-06-07 at 10:13
Publication date 2018-10-24 at 22:29
Design number 35492

3D printer file info

3D model description

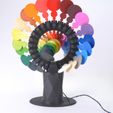
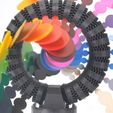
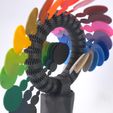
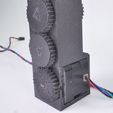
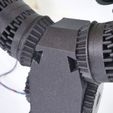
Light up your bleak autumn days with this kinetic sculpture. RAINBOW ROLLER-COASTER is an addiction making matter. You will not be able to tear your eyes off! Smooth movement is ensured by one motor and the whole assembly is very easy!

You will need to print:

Circle A - 1x
Circle B - 1x
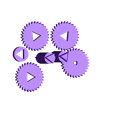
Start gears - 2x
Blade gear - half - 42x (so get 21 Blade gears after gluing)
Mechanics - 1x (use supports)
Blade - 42x
Stand cover - 1x
Stand - 1x (use supports)

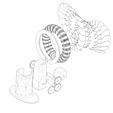
Assembly instructions:
1) Glue the two circles together.
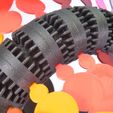
2) Prepare the gears, glue them together by the flat sides. Make sure, the slots for the blades are matching.
3) Slide the gears onto the circles one by one. You will have to incline them a bit.
4) When clustering the gears, make sure every next one is rotated by one teeth.
5) Last two gears are the start gears. The big circle is ready for now.
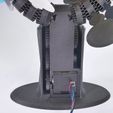
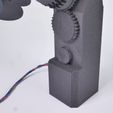
6) Take the Stand and slide in the mechanism, it is a series of gears and shaft. Slide in the Stepper motor and place the motor gear on the shaft.
7) Carefully slide the big Circle with the gears into the Stand (to the top rails) You do not have to go fully in. The gears must move freely. So once the gear from the stand connects the gears from the Circle, stop sliding in.
8) Place the stand onto the Stand cover.
9) Now you are ready to install the Color Blades. Perhaps you will have to secure them with glue.

10) Plug the stepper motors into the x-motor plug on Einsy Rambo, connect it to the PSU and flash the Rambo with eclosed code.

Controlling the stepper speed with Arduino:
Use the "code examples" already prepared in the Arduino program. https://www.arduino.cc/en/Main/Software

Or try one of these manuals:
https://www.instructables.com/id/Controlling-a-Stepper-Motor-with-an-Arduino/

https://howtomechatronics.com/tutorials/arduino/how-to-control-stepper-motor-with-a4988-driver-and-arduino/

Good luck! Tell me how it went;)


➜ Check out the newest creative project:
http://www.paragami.com
TEMPLATES for 3D HANDMADE PAPER WALL ART

3D printing settings

Use supports when needed.

Advertising


Issue with this design? Report a problem.

Would you like to support Cults?

You like Cults and you want to help us continue the adventure independently? Please note that we are a small team of 3 people, therefore it is very simple to support us to maintain the activity and create future developments. Here are 4 solutions accessible to all:

  • ADVERTISING: Disable your banner blocker (AdBlock, …) and click on our banner ads.

  • AFFILIATION: Make your purchases online by clicking on our affiliate links here Amazon.

  • DONATE: If you want, you can make a donation via Ko-Fi πŸ’œ.

  • WORD OF MOUTH: Invite your friends to come, discover the platform and the magnificent 3D files shared by the community!


Sharing and downloading on Cults3D guarantees that designs remain in makers community hands! And not in the hands of the 3D printing or software giants who own the competing platforms and exploit the designs for their own commercial interests.

Cults3D is an independent, self-financed site that is not accountable to any investor or brand. Almost all of the site's revenues are paid back to the platform's makers. The content published on the site serves only the interests of its authors and not those of 3D printer brands who also wish to control the 3D modeling market.

100% secure payment by credit card, PayPal, Apple Pay, Google Pay, etc.
View all payment options.