Skip to content

Shapeoko 2 Altocraft Rotary Tool Spindle Mount

Advertising
Advertising
?
Creation quality: 5.0/5 (1 vote)
Evaluation of members on the printability, utility, level of detail, etc.

  • 4.5k views
  • 12 likes
  • 142 downloads

License
3D design format
STL Folder details Close
  • Shapeoko2AltoCraftSpindleMount0_4_LowerClamp.STL
  • Shapeoko2AltoCraftSpindleMount0_4_LowerFixed.STL
  • Shapeoko2AltoCraftSpindleMount0_4_Upper_clamp.STL
  • Shapeoko2AltoCraftSpindleMount0_4_Upper_fixed.STL
  • Shapeoko2AltoCraftSpindleMount0_5_Upper_fixed.STL

Learn more about the formats

Publication date 2018-10-25 at 12:51
Design number 35522

3D printer file info

3D model description

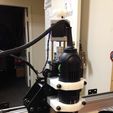
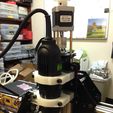
This is an augmented spindle mount for the (stock) rotary tool that comes with the Shapeoko 2. Assembled as designed, the Z axis travel was severely limited due to the top of the rotary tool running into the Z axis thrust bearing plate/motor mount. These inserts fit inside the stock metal mounts and bolt together using the stock 5mm bolts. No additional hardware is necessary. Best of all, this maximizes Z travel: With these mounts I've got 3.25 inches of Z travel (assuming you use a 1/2 inch or longer end mill). This is with the Z-axis makerslide flush with the bottom of the Z carriage. I had significantly less travel with the stock configuration or the other printed spindle holders.

3D printing settings

I used a fairly "solid" infill and printed in ABS. It took about 1.5 hours to print all four pieces.

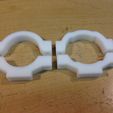
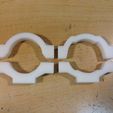
Print out the four pieces:

"Lower Fixed" fits into the metal block on the bottom of the Z axis carrage and "Lower Clamp" holds the Altocraft spindle in place using the stock bolts. The lower clamps are positioned just below the tapered section.

"Upper Fixed" fits into the metal block on the top of the Z axis carrage and "Upper Clamp" holds the Altocraft spindle in place using the stock bolts. The upper clamps are position above the motor brush access screws and below the switch, making sure to leave the cooling vents uncovered. I've found that placing the brush access screws in contact with the underside of the upper clamp works well.

Don't over-tighten. As designed there is a 2mm gap between the pieces. This gap goes to 1mm when tight. I cracked mine by over-tightening it, but it is still working.

Note: I've altered the "Upper clamp" because I see some stress lines developing on the version 0_4. Nothing big, but it will help a little. 0_5 is the new version.

Advertising


Issue with this design? Report a problem.

Would you like to support Cults?

You like Cults and you want to help us continue the adventure independently? Please note that we are a small team of 3 people, therefore it is very simple to support us to maintain the activity and create future developments. Here are 4 solutions accessible to all:

  • ADVERTISING: Disable your banner blocker (AdBlock, …) and click on our banner ads.

  • AFFILIATION: Make your purchases online by clicking on our affiliate links here Amazon.

  • DONATE: If you want, you can make a donation via Ko-Fi πŸ’œ.

  • WORD OF MOUTH: Invite your friends to come, discover the platform and the magnificent 3D files shared by the community!


Sharing and downloading on Cults3D guarantees that designs remain in makers community hands! And not in the hands of the 3D printing or software giants who own the competing platforms and exploit the designs for their own commercial interests.

Cults3D is an independent, self-financed site that is not accountable to any investor or brand. Almost all of the site's revenues are paid back to the platform's makers. The content published on the site serves only the interests of its authors and not those of 3D printer brands who also wish to control the 3D modeling market.

100% secure payment by credit card, PayPal, Apple Pay, Google Pay, etc.
View all payment options.