Skip to content

Aurora Monitor V1

Advertising
Advertising
?
Creation quality: 5.0/5 (1 vote)
Evaluation of members on the printability, utility, level of detail, etc.

  • 1.3k views
  • 1 like
  • 13 downloads
  • 1 make

License
3D design format
STL Folder details Close
  • EthStandHolder.stl
  • EthStandTop.stl
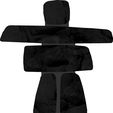
  • Inukshuk.stl
  • WifiStandHolder.stl
  • WifiStandTop.stl

Learn more about the formats

Publication date 2018-11-16 at 14:22
?
Published to Thingiverse on: 2012-06-29 at 04:09
Design number 37697

3D printer file info

3D model description

It's that time. We're approaching Solar Maximum and chances of seeing the Aurora Borealis / Northern Lights are increasing worldwide.

Seeing the aurora is usually difficult, due to a lack of accurate information specific for your location. Add poor locations, light polluted skies, clouds and sometimes only a 30 min window of opportunity..., it can be like finding a needle in a haystack.

Many think Auroras are limited to the Arctic. But, unless you live at the equator (and it's even seen there occasionally), you too can see it if you're in the right place at the right time.

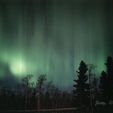
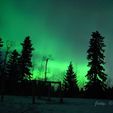
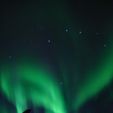
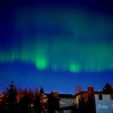
The aurora monitor is a technology I've been using for a long time to take photographs of the aurora (attached). I've updated this technology for Thingiverse and made it a stand alone Arduino based unit which you setup for your location.

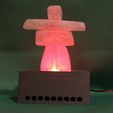
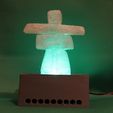
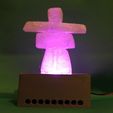
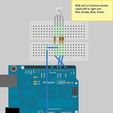
An RGB Led indicates if there's an aurora active for your location with 30-60min advance warning. The strength of the storm is indicated by the auroral color of the Led. Accuracy is around 95%.

Detailed information can be Tweeted too. Here's the feed for my location: https://twitter.com/AuroraAdec)

3D printing settings

This project is a very easy build, requiring only basic soldering skills, network setup and arduino skills.

You need:

  1. Arduino capable of Wifi or Ethernet, these ones I've tested:
    http://www.robotshop.com/productinfo.aspx?pc=RB-Lin-40&lang=en-US
    http://arduino.cc/en/Main/ArduinoBoardEthernet/

  2. 10mm RGB Common Anode LED, I used this:
    http://evilmadscience.com/productsmenu/partsmenu/329

  3. Resistor x 3, if using the above LED, then 100 Ohm x 2, 150 Ohm (for red)

  4. Miscellaneous: A strip of header pins, wire, heat shrink or tape

  5. 9V (12V Max) Power supply for your Arduino (also a USB can be used for power)

Source code can be found here: https://github.com/jetty840/AuroraMonitor

Viewing tips for the Aurora can be found in the attached instructions.

Advertising


Issue with this design? Report a problem.

Would you like to support Cults?

You like Cults and you want to help us continue the adventure independently? Please note that we are a small team of 3 people, therefore it is very simple to support us to maintain the activity and create future developments. Here are 4 solutions accessible to all:

  • ADVERTISING: Disable your banner blocker (AdBlock, …) and click on our banner ads.

  • AFFILIATION: Make your purchases online by clicking on our affiliate links here Amazon.

  • DONATE: If you want, you can make a donation via Ko-Fi πŸ’œ.

  • WORD OF MOUTH: Invite your friends to come, discover the platform and the magnificent 3D files shared by the community!


Sharing and downloading on Cults3D guarantees that designs remain in makers community hands! And not in the hands of the 3D printing or software giants who own the competing platforms and exploit the designs for their own commercial interests.

Cults3D is an independent, self-financed site that is not accountable to any investor or brand. Almost all of the site's revenues are paid back to the platform's makers. The content published on the site serves only the interests of its authors and not those of 3D printer brands who also wish to control the 3D modeling market.

100% secure payment by credit card, PayPal, Apple Pay, Google Pay, etc.
View all payment options.