Skip to content

iPhone Gear Case

Advertising
Advertising
?
Creation quality: 5.0/5 (1 vote)
Evaluation of members on the printability, utility, level of detail, etc.

  • 3.8k views
  • 7 likes
  • 88 downloads

License
3D design format
STL Folder details Close
  • Gear_11T_1.stl
  • Gear_16T-1_1.stl
  • Gear_16T-2_2.stl
  • Gear_19T-1_1.stl
  • Gear_19T-2_1.stl
  • Gear_40T_1.stl
  • Gear_Plate.stl
  • Main_Case.stl
  • Rivet_1_1.stl
  • Rivet_2_2.stl
  • Rivet_3_4.stl
  • Rivet_4_1.stl
  • Rivet_Plate.stl

Learn more about the formats

Publication date 2018-11-14 at 14:34
?
Published to Thingiverse on: 2013-01-04 at 02:07
Design number 37388

3D printer file info

3D model description

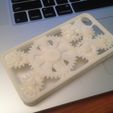
This is an iPhone 4/4s case with moving gears on the back. It clips onto my phone perfectly with no wiggle room, and is still pretty easy to take off.

I altered the original rivets to make them easier to print, and scaled the main case a little bit for a better fit. Other than that, only part orientations have been changed.

The source files can be found at the following links.

http://www.instructables.com/id/IPhone-Cover-for-Engineers/

http://grabcad.com/library/iphone-cover-for-engineers

3D printing settings

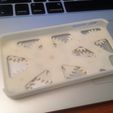
  1. Print the main case, using support. I believe I used 1.5 mm spaced honeycomb support. I printed 0.175 mm layers with solid fill to give extra strength.

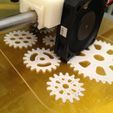
  2. Print the gears. The first number in each gear name is the number of teeth, and the final number is how many you need. Use whichever layer height works best for your printer, but I recommend single walls so that there is room for some fill, making the gears stronger. I printed them with three walls the first time and it left many spaces between the perimeters that were too small to fill.

  3. Print the rivets. I recommend using single walls, and low layer heights to give extra strength. I would also print slowly with z lift.

  4. Clean up all of the parts with an sharp knife, and some 220 grit sandpaper. Test fit all of the gears. When you're satisfied with the fit push the rivet in place.

  5. After you are completely happy with the case, make sure the rivets are pushed in securely, then flip the case over so you can see the holes for the rivets. Put a dab of thick CA glue on each rivet to make sure they don't fall out. Thinner glue may leak through and lock the gears in place.

  6. Wait for the glue to dry, then snap your phone in place and enjoy!

You need to shave a little bit of material away around the silencing slider if you have the iPhone 4s

Advertising


Issue with this design? Report a problem.

Would you like to support Cults?

You like Cults and you want to help us continue the adventure independently? Please note that we are a small team of 3 people, therefore it is very simple to support us to maintain the activity and create future developments. Here are 4 solutions accessible to all:

  • ADVERTISING: Disable your banner blocker (AdBlock, …) and click on our banner ads.

  • AFFILIATION: Make your purchases online by clicking on our affiliate links here Amazon.

  • DONATE: If you want, you can make a donation via Ko-Fi πŸ’œ.

  • WORD OF MOUTH: Invite your friends to come, discover the platform and the magnificent 3D files shared by the community!


Sharing and downloading on Cults3D guarantees that designs remain in makers community hands! And not in the hands of the 3D printing or software giants who own the competing platforms and exploit the designs for their own commercial interests.

Cults3D is an independent, self-financed site that is not accountable to any investor or brand. Almost all of the site's revenues are paid back to the platform's makers. The content published on the site serves only the interests of its authors and not those of 3D printer brands who also wish to control the 3D modeling market.

100% secure payment by credit card, PayPal, Apple Pay, Google Pay, etc.
View all payment options.