Skip to content

Unit Vec A Dot B = Cos Theta

Advertising
Advertising
?
Creation quality: 5.0/5 (2 votes)
Evaluation of members on the printability, utility, level of detail, etc.

  • 2.7k views
  • 10 likes
  • 52 downloads

License
3D design format
STL Folder details Close
  • Unit_Vec_Dot_Cos_1.stl
  • Unit_Vec_Dot_Cos_2.stl
  • Unit_Vec_Dot_Cos_3.stl
  • Unit_Vec_Dot_Cos_4.stl
  • Unit_Vec_Dot_Cos_5.stl

Learn more about the formats

Publication date 2018-11-23 at 15:41
?
Published to Thingiverse on: 2013-11-19 at 05:48
Design number 38562

3D printer file info

3D model description

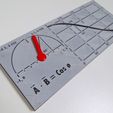
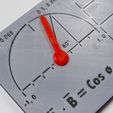
So math was one of my favourite subjects at school thanks to some truly wonderful teachers. However I always found the way I was taught trigonometry was rather obtuse. This device can be used with students who are familiar with some basic concepts from geometry and algebra to visualise how the cosine values used in trigonometry can be computed using a unit vector dot product. The interesting thing is that when one of the vectors is [1,0] the cosine is simply the x value.

Here is a quick youtube video that explains it...

http://youtu.be/AQ0t7twdW-M

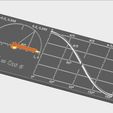
In the example provided we have an angle of 60° which is π/3 radians, so the unit vectors are A[0.5, 0.866] and B[1,0]. The dot product formula is Ax∙™Bx+Ay∙™By=Cos ø, however because By is zero, the result is 0.5. Now if we compute the dot product of another two points that we know are 60° apart, namely A[-0.5, 0.866] and B[0.5, 0.866] we get -0.25 + 0.75 for the x and y values, arriving at the same answer, 0.5. If we turn the dial π€/3 radians (or 60°) we see the same value in the cosine plot.

See instructions for information on how to print and construct this device...

3D printing settings

You need to print one of each stl object in order to recreate this device. I used multiple layer colours for Object #1 pausing at 0.5 and 1.0mm and two layer colours for Object #4 pausing at 2.1mm.

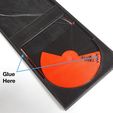
Best to sand the channel and sand and debar the rails that slide inside them. Clean thoroughly afterwards, and grease the channel with a bit of synthetic PTFE grease. The parts were glued together with super glue.

Advertising


Issue with this design? Report a problem.

Would you like to support Cults?

You like Cults and you want to help us continue the adventure independently? Please note that we are a small team of 3 people, therefore it is very simple to support us to maintain the activity and create future developments. Here are 4 solutions accessible to all:

  • ADVERTISING: Disable your banner blocker (AdBlock, …) and click on our banner ads.

  • AFFILIATION: Make your purchases online by clicking on our affiliate links here Amazon.

  • DONATE: If you want, you can make a donation via Ko-Fi 💜.

  • WORD OF MOUTH: Invite your friends to come, discover the platform and the magnificent 3D files shared by the community!


Sharing and downloading on Cults3D guarantees that designs remain in makers community hands! And not in the hands of the 3D printing or software giants who own the competing platforms and exploit the designs for their own commercial interests.

Cults3D is an independent, self-financed site that is not accountable to any investor or brand. Almost all of the site's revenues are paid back to the platform's makers. The content published on the site serves only the interests of its authors and not those of 3D printer brands who also wish to control the 3D modeling market.

100% secure payment by credit card, PayPal, Apple Pay, Google Pay, etc.
View all payment options.