Skip to content

Spinning Toy: Starfish, Sawfish, Shellfish

Advertising
Advertising
?
Creation quality: 5.0/5 (3 votes)
Evaluation of members on the printability, utility, level of detail, etc.

  • 7.8k views
  • 36 likes
  • 474 downloads
  • 1 make

License
3D design format
STL Folder details Close
  • Puller.stl
  • Sawfish.stl
  • Shellfish.stl
  • Starfish.stl

Learn more about the formats

Publication date 2018-12-04 at 16:17
Design number 39811

3D printer file info

3D model description

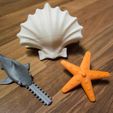
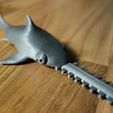
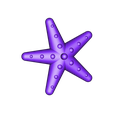
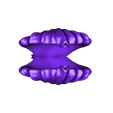
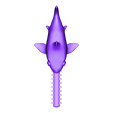
This is a little spinning toy I made for my nephew. It consists of three very different kinds of fish: Sawfish, Starfish and Shellfish. When it is turned upside down, the starfish doubles as a spinning top. Put it in the scallop and use the nose of the sawfish to spin the starfish in the shellfish. See the instructions and the video for more information.

3D printing settings

How to spin the starfish:

  1. Take the scallop in one hand with the opening facing upward.
  2. Place the starfish in the bearings on the scallop's edge with the gear facing towards you.
  3. Take the sawfish in your other hand and place the nose at the gear of the starfish.
  4. Hold the scallop parallel to the ground.
  5. Pull the fish back and send the starfish spinning!

Check out the the video for how it's done: http://youtu.be/OXPx3ca7Yj0

Tips & Tricks:

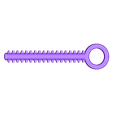
Playing with this thing will send hard plastic parts spinning through your room, so be careful! It will take a bit of practice until you get it spinning properly. Try holding the rack parallel to the gear and pull in a straight line. I also added a puller that should be a bit more effective. Use it instead of the sawfish if you want a bit more spinning action and less of the fish.

How this thing was made:

The body of the sawfish and the scallop were both created in Sculptris. It was the first time I tried this program so I'm quite happy with the results. The starfish, the sawfish-nose and the puller were made in OpenSCAD. I used Leemon Baird's public domain gear library for the gear and racks. The final composition was done in Blender.

Printing instructions:

The models printed well for me in the provided orientation, some support structures will be necessary. The gear is faced down and may need a bit more cleaning, depending on your support structures.

Advertising


Issue with this design? Report a problem.

Would you like to support Cults?

You like Cults and you want to help us continue the adventure independently? Please note that we are a small team of 3 people, therefore it is very simple to support us to maintain the activity and create future developments. Here are 4 solutions accessible to all:

  • ADVERTISING: Disable your banner blocker (AdBlock, …) and click on our banner ads.

  • AFFILIATION: Make your purchases online by clicking on our affiliate links here Amazon.

  • DONATE: If you want, you can make a donation via Ko-Fi πŸ’œ.

  • WORD OF MOUTH: Invite your friends to come, discover the platform and the magnificent 3D files shared by the community!


Sharing and downloading on Cults3D guarantees that designs remain in makers community hands! And not in the hands of the 3D printing or software giants who own the competing platforms and exploit the designs for their own commercial interests.

Cults3D is an independent, self-financed site that is not accountable to any investor or brand. Almost all of the site's revenues are paid back to the platform's makers. The content published on the site serves only the interests of its authors and not those of 3D printer brands who also wish to control the 3D modeling market.

100% secure payment by credit card, PayPal, Apple Pay, Google Pay, etc.
View all payment options.