Skip to content

Modified Vertical Axis Wind Turbine (1/4" Motor Shaft)

Advertising
Advertising
?
Creation quality: 5.0/5 (2 votes)
Evaluation of members on the printability, utility, level of detail, etc.

  • 14.4k views
  • 30 likes
  • 305 downloads
  • 1 collection

License
3D design format
STL Folder details Close
  • CVAWT-ArmV6.STL
  • CVAWT-ArmV7.STL
  • CVAWT-FrontMotorMountV6.STL
  • CVAWT-FrontMotorMountV7.STL
  • CVAWT-HubTopV7.STL
  • CVAWT-HubV6.STL
  • CVAWT-MainHubExtenderV7.STL
  • CVAWT-MainHubV7.STL
  • CVAWT-MountPollsV6.STL
  • CVAWT-MountPollsV7.STL
  • CVAWT-RainCoverV6.STL
  • CVAWT-RearMotorMountV6.STL
  • CVAWT-RearMotorMountV7.STL

Learn more about the formats

Publication date 2018-12-04 at 15:15
?
Published to Thingiverse on: 2013-05-26 at 04:17
Design number 39740

3D printer file info

3D model description

Intro

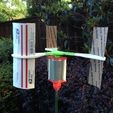
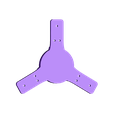
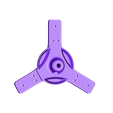
I have a motor that I wanted to test with Hooptey's Vertical Axis Wind Turbine. He was kind enough to post the SLDPART's so I went to work and modified both the hub and the arms.

The changes are:

  • Attachment screws changed to 3.12mm locking Torx screws (http://www.mcmaster.com/#99397A626) on both arms and hub
  • Hub gear removed and modified to have 1/2" shaft instead. Shaft locked in by 1/4"-20 x 1/4" coarse thumbscrew.
  • Rain protection built into hub, and optional rain cover
  • Motor mount added
    ___

Testing

Testing began with the finishing of version 6. It was a massive failure. Not only was wind not very strong, but I did not have blades required (the blinds). Instead I cut out cardboard blades.

When tested with a leaf blower it became clear that there is a specific angle that must be caught. The arms will have to be changed.

Another issue could be I need gearing to turn the motor, but there is so little force needed it might not be needed.

After a little research, it would make sense to do longer blinds, and possibly more arms.


Parts List

  • 3.12mm locking Torx screws (http://www.mcmaster.com/#99397A626) NOTE: These are what I have on hand, and this might change!
  • Motor:
    • 2Ò€ body diameter x 3-3/4Ò€ long
    • 1/4Ò€ shaft diameter
    • 140 volt 3700 RPM
  • Four (4) x 1/4"-20 x 1/4" coarse thumbscrew

Change List

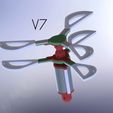
  • v7
    • Rain cover eliminated
    • Second tier added, held together by 1/2" garden poll / screw
    • Rear Motor Mount changed slightly
    • Hub Top added. Used for second tier.
    • Main Hub Extender added.
  • v6: Mount added to Rear Motor Mount
  • v5:
    • Rain cover added
    • Hole diameter for motor mounts modified
    • Mount polls made circular, one screw eliminated
    • Rear Motor Mount wire hole added
  • v4:
    • Motor mounts added
    • Minor mods to thumbscrew hole diameter
  • v3 (optional): Hub rain cover added
  • v2:
    • Hub strengthened in middle
    • Thumb screw changed to 1/4"-20x1/4"
    • Arm and hub attachement holes resized for 3.12mm screws (now wider!)
    • Shaft widened a bit to counter ABS shrinkage
    • Infill recommendation changed to 50%
  • v1: Initial release, unprinted

3D printing settings

Printing

50% infil, 1 shell

  • 1 x Main Hub
  • 1 x Top Hub
  • 2 x Hub Extender
  • 6 x Arms
  • 1 x Front Motor Mount
  • 1 x Rear Motor Mount

100% infill, 1 shell

  • 2 x Mount Polls

Assembly

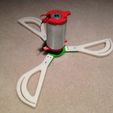
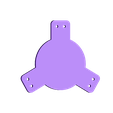
Each arm can be attached to the hub by 3 x 3.12mm Torx self threading screws. Make sure to first place the hub extenders in line with the outer two arm screws on each arm. The hub extenders allow you to add layers. You can add as many layers are you want! Alternately, the holes can be widened slightly and standard M3 hardware (10mm screw, M3 bolt) may be used.

Motor should be enclosed in the motor mount pieces. Place the front motor mount in place and attach with included motor machine screws. Next attach the polls to the Front Motor Mount. 1 x 3.12mm Torx self threading screw needs to be used. Finally attach the Rear Motor Mount and attach in the same way you did the front. The same type of thumbscrew used to attach the shaft to the hub can be used to attach a gardening pole (1/2") to the Rear Motor Mount.

Advertising


Issue with this design? Report a problem.

Would you like to support Cults?

You like Cults and you want to help us continue the adventure independently? Please note that we are a small team of 3 people, therefore it is very simple to support us to maintain the activity and create future developments. Here are 4 solutions accessible to all:

  • ADVERTISING: Disable your banner blocker (AdBlock, …) and click on our banner ads.

  • AFFILIATION: Make your purchases online by clicking on our affiliate links here Amazon.

  • DONATE: If you want, you can make a donation via Ko-Fi πŸ’œ.

  • WORD OF MOUTH: Invite your friends to come, discover the platform and the magnificent 3D files shared by the community!


Sharing and downloading on Cults3D guarantees that designs remain in makers community hands! And not in the hands of the 3D printing or software giants who own the competing platforms and exploit the designs for their own commercial interests.

Cults3D is an independent, self-financed site that is not accountable to any investor or brand. Almost all of the site's revenues are paid back to the platform's makers. The content published on the site serves only the interests of its authors and not those of 3D printer brands who also wish to control the 3D modeling market.

100% secure payment by credit card, PayPal, Apple Pay, Google Pay, etc.
View all payment options.