Skip to content

PCB Rig on Rails

Advertising
Advertising
?
Creation quality: 5.0/5 (2 votes)
Evaluation of members on the printability, utility, level of detail, etc.

  • 7.4k views
  • 19 likes
  • 153 downloads
  • 1 collection

License
3D design format
STL Folder details Close
  • 2rodconn.stl
  • clamp_arm.stl
  • clamp_base.stl
  • rail_clamp.stl
  • snap_basic.stl
  • snap_hose.stl
  • snap_rod.stl

Learn more about the formats

Publication date 2018-12-14 at 14:25
Design number 40655

3D printer file info

3D model description

Awhile ago I started messing around with arduino and I made a testing rig with one camera articulated arm to hold my prop while i wire it up to the breadboard. It worked out well but now Im getting ready to start doing a little soldering which lead me to look up third hand/helping hand type things on amazon.

Didn't like what I saw, then look at thingiverse for ideas and found lots of great projects that inspired me to making something for myself. I really wanted to play around with rails to see how well they work and this was a good project to try it out.

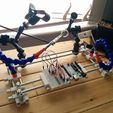
So here is my evolved Arduino testing rig, now its a full on pcb work station. Using 1/4 inch rods (really wish there was metric rods at homedepot) i created rails that can be connect together easily. So i can make my rig any size I want. I went for 12x6 inch design since its a good size for me, but I can always buy more rods and just make it bigger down the road. Its not that hard to cut the rods, i spent 8 bucks on this little hand saw and walla, i was cutting rods like no one's business.

So list of features

1. Rail design, each side can attach together. You can be creative on how you might want to create you're rig's base and build vertically if you get some long 1/4 inch bolts or threaded rods to make a multi level rig.

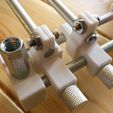
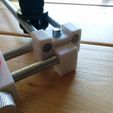
  1. With rails I tried to have snap on parts that can slide around and be locked into position with thumb screws. It works, but not as good as I hoped because tightening with the thumb screws causes the plastic to push out since there is no bottom support.

  2. Beyond the standard two rod connectors there is single rod connectors. This allows to create snap on bits that are longer then the side rails. Allows more customization for me in the long term.

  3. Using the single rails, i created vice walls that can be stacked one after another. There are PCB grooves cut into it so you can hold boards. There is quite a bit of space so the under leads on the board does not touch the rails. I didn't want to ruin my boards or give myself a shock.

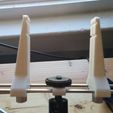
  4. On one magic arm I put together a pcb vice. In case I want to hold boards in some other manner then just being on the base vice. Besides, it looks pretty bad ass connected to the arm.

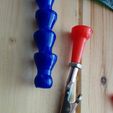
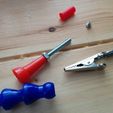
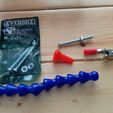
  5. Snap on slider bit that you can easily screw on flexible water pipes onto. No point in 3d printing this since you can get 6 arms for $7 bucks on amazon. Using a 1 1/2 inch #8 screw, I was able to attach alligator clips onto it. Works pretty well. On top of that, you can run wire through the hose and out of the bottom of the rig if you wanted to make some arms do things beyond just holding bits.

So its a work in progress. When new needs arises I'm sure to create new bits and post them here. I really wish I can get some really long stainless steel rods in metric that I can cut to size but so far I've only been able to get up to 300mm length stuff on amazon. So when I get myself some good rods I might redo this in metric. so far only the pcb vice on the arm uses metric rods.

3D printing settings

How Each Item is Built

Since the whole point was to create a custom workstation, I'm only going to write down what you need to create each piece. So for the double rails, if you're going to make 3, just triple the parts. You can build 4 and make a big square. Its all up to you. Don't forget, you can build vertically using 1/4 bolts if you have a interesting design. So happy building and please post photos, I'd love to see how everyones custom workstation looks like.

Double Rail

2 x 1/4 Inch Rods (Cut to whatever length you want)

2 x 1/4 in x 1/2 Bolt and nuts. (I used couplers instead of nuts, but you dont have to)

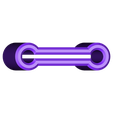
2 x 2rodconn.stl

Single Rail

1 x 1/4 Inch Rods (Cut to whatever length you want)

2 x 6-32 x 1/2 in. Screws to clamp the rod. I used hex socket cap ones for looks, you can use flat/philips to save some cash.

4 x 6-32 nuts

2 x 6-32 thumb screws (you can use normal screws instead)

2 x snap_rod.stl

2 x snap_basic.stl

Rail Vice

1 x 6-32 nut

1 x 6-32 thumb screw, socket caps are good or can use flat/philips head.

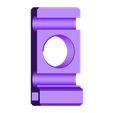
1 x rail_clamp.stl

Arm Vice

2 x 3mm Rods ( Any length you want )

2 x 6-32 nuts

2 x 6-32 Thumb screws

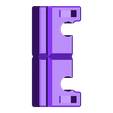
1 x clamp_base.stl

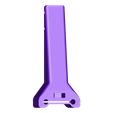
2 x clamp_arm.stl

Flexible Arm

1 x Flexible Pipe Hose

1 x 6-32 nut

1 x 6-32 thumb screws

1 x Alligator Clip

1 x 8-32, 2 in. flat head screw (Must be flat head) and a nut

1 x snap_hose.stl

Items

Camera Arm

http://www.amazon.com/gp/product/B008KYEOFA

Thumb Screws

http://www.amazon.com/gp/product/B00BGZ2AME

Flexible Pipe Hose

http://www.amazon.com/gp/product/B008O14864

Alligator Clip Set

http://www.amazon.com/gp/product/B002X4CG3A

1/4 Inch Rod

http://www.homedepot.com/p/Crown-Bolt-1-4-in-x-36-in-Zinc-Plated-Round-Rod-16840/202183514

3mm Rods

http://www.amazon.com/10Pcs-Stainless-Steel-Cylinder-Linear/dp/B00JR56KI0

Junior Hacksaw - Used for cutting the rods

http://www.homedepot.com/p/Husky-6-in-Junior-Hacksaw-122JHSC/204748808

Advertising


Issue with this design? Report a problem.

Would you like to support Cults?

You like Cults and you want to help us continue the adventure independently? Please note that we are a small team of 3 people, therefore it is very simple to support us to maintain the activity and create future developments. Here are 4 solutions accessible to all:

  • ADVERTISING: Disable your banner blocker (AdBlock, …) and click on our banner ads.

  • AFFILIATION: Make your purchases online by clicking on our affiliate links here Amazon.

  • DONATE: If you want, you can make a donation via Ko-Fi πŸ’œ.

  • WORD OF MOUTH: Invite your friends to come, discover the platform and the magnificent 3D files shared by the community!


Sharing and downloading on Cults3D guarantees that designs remain in makers community hands! And not in the hands of the 3D printing or software giants who own the competing platforms and exploit the designs for their own commercial interests.

Cults3D is an independent, self-financed site that is not accountable to any investor or brand. Almost all of the site's revenues are paid back to the platform's makers. The content published on the site serves only the interests of its authors and not those of 3D printer brands who also wish to control the 3D modeling market.

100% secure payment by credit card, PayPal, Apple Pay, Google Pay, etc.
View all payment options.