Skip to content

Ornithopter

Advertising
Advertising
?
Creation quality: 5.0/5 (1 vote)
Evaluation of members on the printability, utility, level of detail, etc.

  • 19k views
  • 38 likes
  • 469 downloads

License
3D design format
STL Folder details Close
  • front2.stl
  • link3.stl
  • tail.stl
  • tailclip.stl

Learn more about the formats

Publication date 2018-12-21 at 10:57
?
Published to Thingiverse on: 2015-07-30 at 06:17
Design number 41379

3D printer file info

3D model description

It's a bird, It's a plane, No! It's...well...um both?!

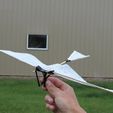
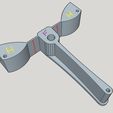
An ornithoter is a flying machine that acquires lift by flapping a pair of wings. It converts rotational energy into linear (flapping) movement with a crankshaft at the front. Way back when, smart people, like da Vinci, believed this was the easiest way to give man powered flight. We know that this assumption was clearly wrong. Experiment launching this device at different angles ,relative to the wind, to get the best flight possible. (The wind may also assist in some crazy acrobatics!) All you need to do now is print/assemble your Ornithopter and get ready to take to the skies! https://youtu.be/W-_lnUAN0RA

3D printing settings

MATERIALS

-1/32" dia wire(I used welding wire)

-tape

-bamboo skewers

-tissue paper

-elastic band

-super glue or epoxy

-wood glue

-hot glue

TOOLS

-scissors

-drill

-needle nosed pliers

-hobby knife

-pencil

CUT LIST

(for bamboo skewers)

-two 7" wing spars

-two 5" tail pieces

-one 6" fuselage

(wire)

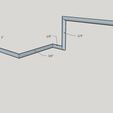
-one 2 3/4" crankshaft

-two 5/8" hinge pins

PRINTING:

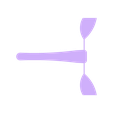
it's pretty standard... I just printed with default settings on slicer, no support needed. The tail file needs to be flipped 180* so it looks like an n

ASSEMBLY:

1- put a piece of wire in the drill and drill out all of the small holes. (the piece should spin freely on the wire afterwards)

2-bend the crankshaft as shown on the pictures above and insert into the bottom hole of the front piece. once inserted bend the back of the crankshaft up to create a hook

3-reffering to the picture of the front (the one with the purple F for front and yellow H for hinges) cut along the red line. Next, attach tape to this segment to create a flexible hinge. (I had to redesign this many times in order to get a low friction hinge mechanism)

4-insert hinge pins into hinge holes and attach the connecting rods to the crankshaft and hinge pins (see featured pic for accurate placement) Then bend hinge pins up to keep connecting rods in place.

5-super glue spars into hinges and body into front piece (see featured pic)

6-hot glue tail and tail clip together then superglue bamboo tail pieces onto tail. Next, glue entire tail assembly onto fuselage

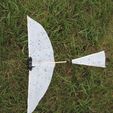
7-flip ornithopter over and trace a wing design onto the spars and tail. cut wing and tail skin out of tissue paper

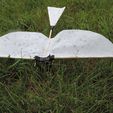
8- using wood glue, glue wing skin onto spars and the center of the wing onto the fuselage. ENSURE THE WINGS ARE IN THE DOWN POSITION WHEN GLUEING.

9- glue on tail skin

10- glue an elastic band to the rear of the fuselage and hook it onto the crankshaft hook

11- lubricate elastic band (prevents wear) and wind er up!

12- release at 20* and hopefully she flies.

Advertising


Issue with this design? Report a problem.

Would you like to support Cults?

You like Cults and you want to help us continue the adventure independently? Please note that we are a small team of 3 people, therefore it is very simple to support us to maintain the activity and create future developments. Here are 4 solutions accessible to all:

  • ADVERTISING: Disable your banner blocker (AdBlock, …) and click on our banner ads.

  • AFFILIATION: Make your purchases online by clicking on our affiliate links here Amazon.

  • DONATE: If you want, you can make a donation via Ko-Fi πŸ’œ.

  • WORD OF MOUTH: Invite your friends to come, discover the platform and the magnificent 3D files shared by the community!


Sharing and downloading on Cults3D guarantees that designs remain in makers community hands! And not in the hands of the 3D printing or software giants who own the competing platforms and exploit the designs for their own commercial interests.

Cults3D is an independent, self-financed site that is not accountable to any investor or brand. Almost all of the site's revenues are paid back to the platform's makers. The content published on the site serves only the interests of its authors and not those of 3D printer brands who also wish to control the 3D modeling market.

100% secure payment by credit card, PayPal, Apple Pay, Google Pay, etc.
View all payment options.