Hello, first a shout out to a few important folks:
JULEZ_NZ: For his original mini-face hugger
ANGRYCHANO: For adding the original ball joint concept
DAZZADAZZADAZZADAZZA: For creating a remix of this that has solid pieces. If you have a dual-extruder that can print dissolvable, or you just want to go for printing with supports, check out his remix of my model!
OTHER PROJECTS:
Another day, another project. If you like Space RTS games, check out our latest project on STEAM. This is a game I've been working on with a partner for going on 2 years.
http://store.steampowered.com/app/662930/Dominari_Tournament/
August 2018 - "180 Makes Celebration!"
180+ people have now successfully printed this "monster" of a print job. Congratulations! In celebration, I want to point you to the REMIXS. There is an excellent new remix with the pieces standing upright if you have a tall enough printer. It's a different way of printing it if the original does not work out for you, or you may pick and choose the pieces. Choices are the spice of life!
WANT AN EGG?
EntityUnknown has created a full-scale complimentary Alien Egg that houses this monstrosity if you are up to the challenge.
Visit it at: https://www.thingiverse.com/thing:2302809
WANT A COOL WEYLAND YUTANI CORP STAND?
Djkirkdenall designed a fantastic Weyland Yutani Corp stand for this model.
Check out his make at https://www.thingiverse.com/make:358419#comment-1425033
Think you are up to printing this bad boy?
Pics or it didn't happen!
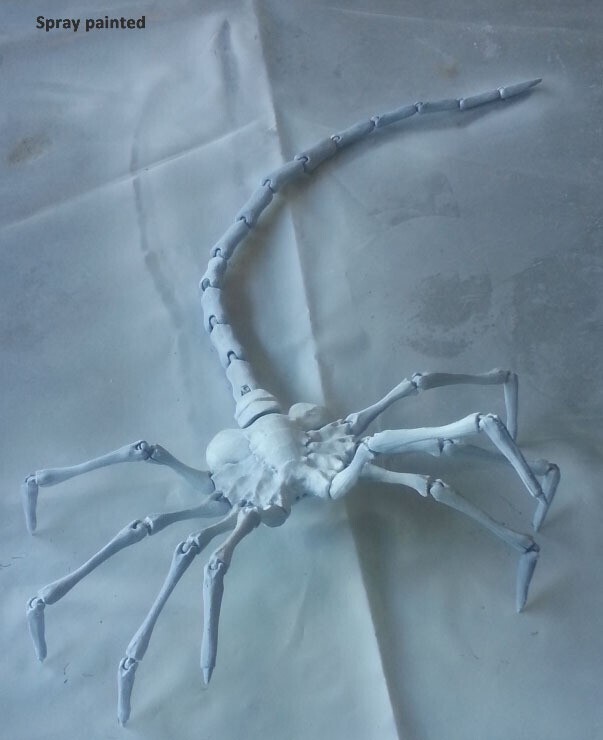
Hudson came by to say, "Stop your grinnin' and drop your linen! This is a LIFE-SIZE ALIEN FACEHUGGER, coming in at 40in x 23in!
It's big.
It's bad.
It wants to wrap around your neck and clutch your civi face.
No hollering game over man, game over until you finish that print job! You will need nukes, knives, and sharp sticks to fend this sucker off. Now go warm that hotbed!"
-That said, about 90% of the original Mini-Face Hugger model has been completely remodeled with:
1) All new joints that are much tighter
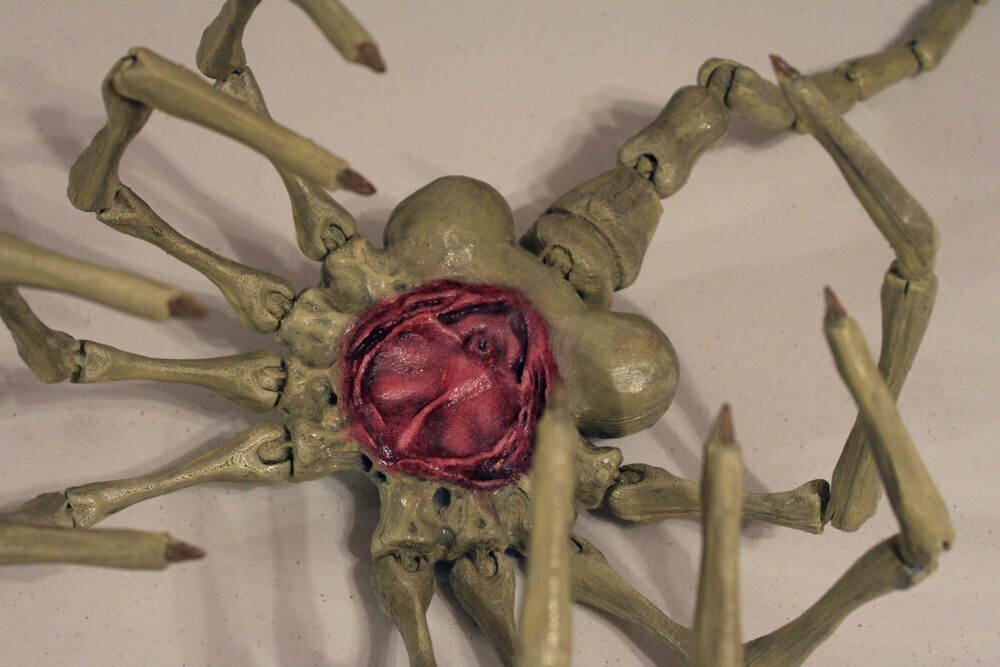
2) All pieces are no longer flat but are now fully formed skeletal structures with tendons.
3) The "face" bottom part was modeled.
5) Completely new tail from the ground up!
6) Plating and other effects to skeletal structure added.
I taught myself blender and spent about 3 weeks modeling this and printing the pieces over and over again until I got them just right. That said, it's NOT absolutely perfect, but it did scare the bajeezus out of our cat. I twitched it at her while she was sniffing it and she did a backward somersault, (It was immensely satisfying), so that is saying something about how it turned out.
Update (2/2017)
I want to send a huge "thank you" to all of you that finished the project and shared your pictures. I thoroughly enjoy the pictures you post with our faceHugger friend attacking you, your children, your dog, especially your cats, computers, and oddly frequent, your 3D printer. I'm not sure why Facehuggers attack 3D printers, but it appears they have an affinity to that particular form of non-living matter. Anyway, it is has made all the time and effort spent modeling/printing it totally worth it. Have a great 2017, and happy printing!
EXTRA BONUS! I have replaced the body STLs with the Netfabb repaired images, courtesy of rodrifra. The download should now solve the mesh issues a few people have run into. Thanks rodrifra!
.
========[ HOW TO PUT IT TOGETHER ]=========
You will need an adhesive!
If using PLA: Super Glue and sand paper!
If using ABS: Superglue will work, but I STRONGLY recommend making an ABS slurry (Dissolve ABS scraps in a pickle jar with acetone poured in until it's gooey/soupy...just be very careful of the vapors. They are both explosive AND dangerous!)
*For certain printers, you may need to turn on "Unstick Protection Geometry"!
A) You should print the body with as little infill as you can get away with (like 15%-20% if possible). The lighter it is, the easier it will stand up on its own!
B) I used 0.15mm per layer with 4 count perimeter. This is important because the outer layer of the joints need to be THICK and STURDY. This keeps them from splitting when putting the ball joints together which can require quite a bit of pressure.
C) Print it a bit hotter than usual to get a really good bond between layers.
D) I used WHITE PLA, but I think ABS will do a lot better because it has a little flex to it. That is very good for the joints because PLA is pretty stiff stuff and not to forgiving. You may be best served printing the body in PLA, and the legs/tail in ABS unless you put mouse-ears on the body.
E) Sand down the flat parts of the joints with rough sand paper to make them scratched up before using the super glue to get a really strong bond. If you are using ABS, I STRONGLY recommend making ABS slurry glue (ABS leftovers + Acetone in a pickle jar...mix until a medium-thick syrup). It will FUSE the components and you won't ever have a split happen. It's much stronger than super glue with PLA.
F) When printing the Tail grouping files, the order of the tail pieces is left to right, top to bottom. I provided a STL with two legs you can print at once if you have a large enough bed. If not, use the OneLeg_PLA.stl
G) In the first Tail Grouping, the big part that attaches to the body should be glued so it does not bend. It was not meant to be tight since it's still technically a non-flexible part of the body. But, you may decide to leave it bendable. That is up to you!.
H) In case just a part of your leg print fails (which sometimes happens with multiple pieces in a print), I've supplied the individual leg piece STLs.
I) LAST BUT NOT LEAST! If the joints are WAY too tight, you are probably suffering from over-extrusion. Back off the extrusion a bit until they fit right. The joints are supposed to be tight so that you can pose it, (especially on one of the cool stands our friends shared at the top of this description), but if you do over-extrude, they will not fit together right no matter how hard you try to snap them together.
Enjoy!
:format(webp)/https://fbi.cults3d.com/uploaders/13906345/illustration-file/1e1d49b7-2ba1-405d-afcd-98e4cacdc960/FaceHugger1_display_large.jpg)


/https://preview3d-images.cults3d.com/8xsrfk226khgvlqbxpkl2y23dupd)
/https://preview3d-images.cults3d.com/8tz2wrl6nrkusxpb3jw2u9309831)
/https://preview3d-images.cults3d.com/vzma27ciph2gbk67973i1in81le9)
/https://preview3d-images.cults3d.com/3ujti2g9cw5wm4krrwbuwm884pni)
/https://preview3d-images.cults3d.com/8ci177js71v3jx7d1k6rikczy6t9)
/https://preview3d-images.cults3d.com/dix1bamwlevox69is3aqob66fayd)
/https://preview3d-images.cults3d.com/ie6vujilgo3ddk9sp2drwv1z23ml)
/https://preview3d-images.cults3d.com/f7prqmg6c8hv5dtbl1orrwqp1dzx)
/https://preview3d-images.cults3d.com/0vcle7r8rzkt4fvhntj0abs8e1dg)
/https://preview3d-images.cults3d.com/8odd16tlnxdak3ofsinvoa1eb09i)


