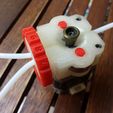
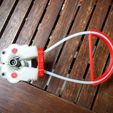
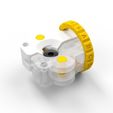
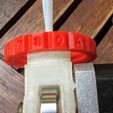
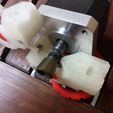
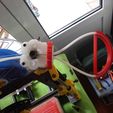
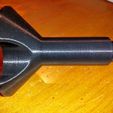
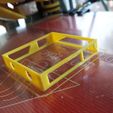
This is an original design of an extruder that has the following features:
- Symmetrical load on stepper axis;
- Adjustable filament pressure without spring;
- Simple & open design (easy to see what's happening inside);
- No need for a geared reducer, direct drive;
- Support flexible filament (anti-buckling support on both extrusion and retraction);
- Best bang for your buck;
Bill of Material:
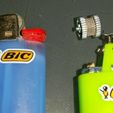
- 1 flint from either mini bic or clipper lighter;
- PTFE liner 40 cm for the loop + your regular bowden line;
- 2 608 bearings;
- 2 screws M3 20 mm length;
- 3 M4 nuts to secure the PTFE line;
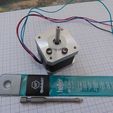
- 1 stepper motor NEMA 1.7A (or even lower);
- 4 shims / inner diameter >5 mm (I used rolls from a used bicycle chain;
- 1 screw M3 5 mm length
See it in action:
* https://youtu.be/F3HcuB7CWsA
Files for modification are publicly available and with a free Onshape account here:
* https://cad.onshape.com/documents/5c209690b10748338481382a/w/6d6638f54420d7c76fe7949d/e/2d47f4694787414fab59244e
Successfully printed in PLA, ABS or PETG (2 shells and 20% infill is enough... But your milage may vary).
For details about fitting the coil on the stepper motor, you can find them by looking for #bicgear
, #saintflint
or #flintfeeder
on Google Plus.
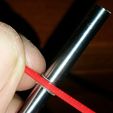
For fixing of the coil, the trickiest part of this build, having it only glued on the stepper shaft is not enough, it must be compressed axially, otherwise, it will "uncoil" and break on pushing or retracting the filament (depending on the direction of the filament vs the direction of the coil) and this will happen:
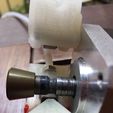
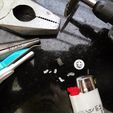
Some alternatives were available (Clipper lighter with solid flint wheel and internal 5 mm diameter), but more recent models have smaller holes and drilling this stuff is REALLY hard (You need to get a drill made for ceramic or glass as shown in one of the picture. Better to be good quality if you intend to make several, otherwise you can cheap but it probably won't last 1 or 2). To secure it, the best is to tap the axle with an M3 thread and use wasted bicycle chain rolls as spacers (ask them to your local bike shop, they should give them for free) and stack them.
Steps to tap the shaft of the stepper motor:
Imobilize the axle with the tool used to secure the thread maker (which means you may need another one);
Drill a hole 2.5 mm diameter 10 mm deep into the shaft;
Form the thread with a 3 steps M3 forming tool, since the hole is blind (not going through) this is required;
You can also put some strong Loctite or Super Glue to help secure the coil (watch out not to cover the curled part);
You should be good to go... Hope it helps. Like I said, not your mother's extruder! But it worth every cent...
2015-09-03 Due to popular demand, I've just uploaded an MK8 edition.
2015-09-08 Adding the following postscript GCODE in your slicer will ease the change of material (will retract enough filament making it easy to empty the Bowden by hand). In my case 16 mm seems a good length for the E3DV6:
G92 E0; zero the extruded length
G1 F250 E-16; Retract filament from barrel
G92 E0; zero the extruded length again
Note: Add the reverse action at the beginning of a print to pull the correct length before starting. If you interrupt a print, remember that you won't have an empty extruder...
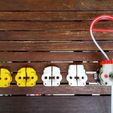
2015-09-13 Added Casino Chip
Print (x4) and insert in the bearing place BEFORE putting the bearings and the axles in place. Center and glue to the external race of the bearing on each side. Help if the color has a good contrast with the body of the extruder.
2015-09-29 Corrected diameter of drilling for tapping the step motor
The corrected diameter before forming the thread is 2.5 mm. 2 mm is possible (I did it), but it's way easier to go with 2.5 mm. Thanks Shauki B. for the note.
2015-10-20 Added 3 mm version.
2015-11-09 After some experiment, I wouldn't recommend the 3 mm version for the following reasons:
* Due to the layout and the compact size of the extruder, in order to fit, the path has to be curved (otherwise the M6 nuts won't fit). This is adding substantial friction.
* The ratio of surface contact vs radius of the gear doesn't play in favor of the 3 mm version. Grinding is much likely to happen;
* The 3 mm filament is much less flexible and more prone to break in the curves than the 1.75 mm;
For all the above reason, I think it's better to stick with Wade's or other derivatives that privilege a straight path... Sorry guy, I tried!
(Note: I still enthusiastically recommend it for 1.75 mm. It never let me down...)
01-10-2016 Added MK7 version.

/https://fbi.cults3d.com/uploaders/13906371/illustration-file/7ed46e95-0ffb-475f-adb0-907d9196e1d7/IMG_20150810_120716_display_large.jpg)
