Skip to content

Qui gon jin's Lightsaber

Advertising
Advertising
?
Creation quality: 5.0/5 (1 vote)
Evaluation of members on the printability, utility, level of detail, etc.

  • 14.9k views
  • 59 likes
  • 672 downloads
  • 3 collections
  • 1 comment

License
3D design format
ZIP Folder details Close
  • lightsaber_2.zip
    • lightsaber2 body ring.stl
    • lightsaber2 body.stl
    • lightsaber2 bottom.stl
    • lightsaber2 sheath.stl

Learn more about the formats

Publication date 2019-03-22 at 14:54
?
Published to Thingiverse on: 2012-12-22 at 00:19
Design number 51665

3D printer file info

3D model description

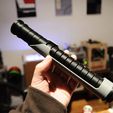
Another lightsaber mega project. This one is a likeness (though not an accurate one) of Qui gon jin's lightsaber that Kenobi used to slice Darth Maul in two! I incorporated a BlinkM into it so I can choose the colour.

3D printing settings

Print each component in the zip file once but when setting up your slicing profile, use multiply to create 3 rows of four columns to generate twelve body rings. (print two to tweak your profile so they fit well)
All parts will print without support and I left a tolerance of .2mm for all intersecting parts.
I used my own slicing profile not the Replicator accelerated defaults; the parts come out over size and wont fit well.
I used .2mm layer height, 2 extra shells and 20% infill. The parts are thin and will print very nicely and be smooth and solid.
Assembly is as follows,
Stack all 12 of the body rings to make the handle body then put the top section on, glue them as you go and make sure they are straight.
I used acetone to put the outer sheath together from the inside so it didn't leave a mess,
I took a piece of 1 inch acrylic rod, sanded it down and polished one end to make the light blade.
Using a BlinkM RGB programable light to change the colour, I taped it with electrical tape to seal it on the end of the blade inside the 'saber. You could make the program look like the blade is shorting in and out.
I wired up 2x 3V button cell batteries on a removable wire and there it glows!
I wrapped electrical tape as a spacer to fit the saber to the blade nicely and easily. It makes a good light seal also.
Then put the sheath on the bottom components post,
Slide the body section together.
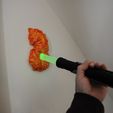
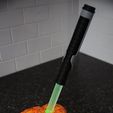
I went a step further and used spray foam and some paint to mimic the blade melting through a wall or door. I used a bright orange base with red and yellow highlights.
It makes a great light or table decoration! A real conversation starter too!
The republic awaits!

Advertising


Issue with this design? Report a problem.

Would you like to support Cults?

You like Cults and you want to help us continue the adventure independently? Please note that we are a small team of 3 people, therefore it is very simple to support us to maintain the activity and create future developments. Here are 4 solutions accessible to all:

  • ADVERTISING: Disable your banner blocker (AdBlock, …) and click on our banner ads.

  • AFFILIATION: Make your purchases online by clicking on our affiliate links here Amazon.

  • DONATE: If you want, you can make a donation via Ko-Fi πŸ’œ.

  • WORD OF MOUTH: Invite your friends to come, discover the platform and the magnificent 3D files shared by the community!


Sharing and downloading on Cults3D guarantees that designs remain in makers community hands! And not in the hands of the 3D printing or software giants who own the competing platforms and exploit the designs for their own commercial interests.

Cults3D is an independent, self-financed site that is not accountable to any investor or brand. Almost all of the site's revenues are paid back to the platform's makers. The content published on the site serves only the interests of its authors and not those of 3D printer brands who also wish to control the 3D modeling market.
100% secure payment by credit card, PayPal, Apple Pay, Google Pay, etc.
View all payment options.