Skip to content

X Belt Tension System for Max Micron (and some other Prusa i3)

Advertising
Advertising
?
Creation quality: 5.0/5 (1 vote)
Evaluation of members on the printability, utility, level of detail, etc.

  • 3.2k views
  • 6 likes
  • 116 downloads

License
3D design format
STL Folder details Close
  • Carriage.stl
  • EditFor20Tooth.stl
  • EndCap.stl
  • InsetEndCap.stl
  • ShortTensioner.stl
  • X-beltSlideAdjuster.stl

Learn more about the formats

Publication date 2019-03-27 at 15:55
?
Published to Thingiverse on: 2016-07-26 at 01:31
Design number 52396

Thomllama

3D printer file info

3D model description

Currently very much a work in progress!!
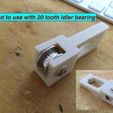
August 3rd, 2016 - added an edited adjuster to accept 20 tooth idler bearings

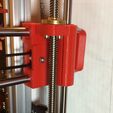
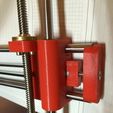
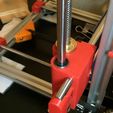
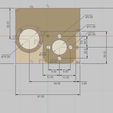
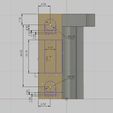
This is a Z axis carriage for a Max Micron and other Prusa i3 printers that have the lead screw and rod off set, not in a straight line with the X axis rods.. I included images with dimensions so you can check against your printer (I hear the Hictop and a few other use the same layout) I may design and upload a templet that can be used to determine if this will correctly fit your printer, but for now you'll have to measure.

Also My current printer has the X rods sticking out about 20-25mm past the carriage. I know some the rods aren't as long and will need modification to get the whole thing to work as this design is based on using that extra rod length. I'm hoping I can get to designing one for flush rods soon.

There are many other X belt tensioning Z carriages but they all have the lead screw and stabilization rod inline parallel to the X rods. this would mean rebuilding and modifying the complete Z carriage system both top and bottom on both sides to get it all to line up properly. This is better, easier and faster if you have this printer setup currently.

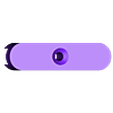
there are 3 parts,
β€’ The Z Carriage
β€’ The Adjuster Bar
β€’ The End Cap

You'll need to add one M4 nut and 25-30mm flat head screw.

I HIGHLY recommend using at least a 1.6 to a 2.0 shell (with a 0.4 nozzle) to achieve proper strength.

Also printing at 0.1 or better as the fit is tight and you may still even need to sand/file a little to get everything to fit and move properly.

Do not over tighten!! if you over stress the belt I've kinda made this so it will break the tensioner so as not to damage the rest of the printer.

Advertising


Issue with this design? Report a problem.

Would you like to support Cults?

You like Cults and you want to help us continue the adventure independently? Please note that we are a small team of 3 people, therefore it is very simple to support us to maintain the activity and create future developments. Here are 4 solutions accessible to all:

  • ADVERTISING: Disable your banner blocker (AdBlock, …) and click on our banner ads.

  • AFFILIATION: Make your purchases online by clicking on our affiliate links here Amazon.

  • DONATE: If you want, you can make a donation via Ko-Fi πŸ’œ.

  • WORD OF MOUTH: Invite your friends to come, discover the platform and the magnificent 3D files shared by the community!


Sharing and downloading on Cults3D guarantees that designs remain in makers community hands! And not in the hands of the 3D printing or software giants who own the competing platforms and exploit the designs for their own commercial interests.

Cults3D is an independent, self-financed site that is not accountable to any investor or brand. Almost all of the site's revenues are paid back to the platform's makers. The content published on the site serves only the interests of its authors and not those of 3D printer brands who also wish to control the 3D modeling market.

100% secure payment by credit card, PayPal, Apple Pay, Google Pay, etc.
View all payment options.