Skip to content

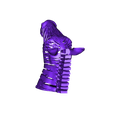
Zebra Stripes

Advertising
Advertising
?
Creation quality: 5.0/5 (3 votes)
Evaluation of members on the printability, utility, level of detail, etc.

  • 8.9k views
  • 70 likes
  • 591 downloads

License
3D design format
STL Folder details Close
  • Dr FemPop Zebra Updated.stl
  • Dr FemPop Zebra.stl

Learn more about the formats

Last update 2020-01-23 at 22:48
Publication date 2019-06-05 at 23:51
Design number 59416

3D printer file info

3D model description

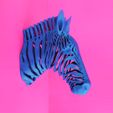
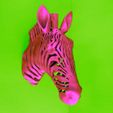
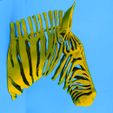
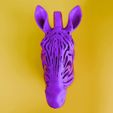
Hey everyone! Enjoy this modern faux taxidermy Zebra head mount. Designed by me, this is an 'expert' level print, so long as you follow the instructions, this is a smooth print that comes off the supports easily with no noticeable stringing or other parts that might need sanding. Please enjoy!!

** Update 01/23/2020. I have revised the model, there are some fixes on the ears, stripe reinforcement, and the eyes are better defined. I've attached the Updated version.

3D printing settings

To get a clean print, in Cura, you need to use TREE supports. Also, DONT CHANGE the model orientation for the print! The ears should be pointed at the ceiling, the muzzle should be touching the bed, the flat part of the model should NOT be on the printer bed.

To activate this:
1. go to the top of the window and click on Preferences.
2. Then click on Settings.
3. Either scroll down to "experimental" or type in "tree" in the search bar.
4. Click on "tree support" and "tree support branch angle".
5. Save your new settings
6. Then, load your model the way you normally do, but instead of using your regular supports, use the tree supports instead. Make sure your tree support branch angle is set to 45 degrees.
7. You will also want to make sure under regular supports that "Touching Buildplate" is clicked off at a degree of 60 for overhang. do NOT generate support here, but this does control the settings for the tree supports.
8. Lastly, make sure you have your Built Plate Adhesion type set to BRIM, otherwise the tree supports don't stick well to the plate.

I personally used 35% infill, speed of 60, layer height 0.2.

My last piece of advice is that this print looks best the larger it is, I would recommend keeping it +/- 20% above or below its current size (resize 80 to 120%). Any less than 80 is doable but the stripes aren't as stable, so print at your own risk.

Advertising


Issue with this design? Report a problem.

Would you like to support Cults?

You like Cults and you want to help us continue the adventure independently? Please note that we are a small team of 3 people, therefore it is very simple to support us to maintain the activity and create future developments. Here are 4 solutions accessible to all:

  • ADVERTISING: Disable your banner blocker (AdBlock, …) and click on our banner ads.

  • AFFILIATION: Make your purchases online by clicking on our affiliate links here Amazon.

  • DONATE: If you want, you can make a donation via Ko-Fi πŸ’œ.

  • WORD OF MOUTH: Invite your friends to come, discover the platform and the magnificent 3D files shared by the community!


Sharing and downloading on Cults3D guarantees that designs remain in makers community hands! And not in the hands of the 3D printing or software giants who own the competing platforms and exploit the designs for their own commercial interests.

Cults3D is an independent, self-financed site that is not accountable to any investor or brand. Almost all of the site's revenues are paid back to the platform's makers. The content published on the site serves only the interests of its authors and not those of 3D printer brands who also wish to control the 3D modeling market.

100% secure payment by credit card, PayPal, Apple Pay, Google Pay, etc.
View all payment options.