3D model description
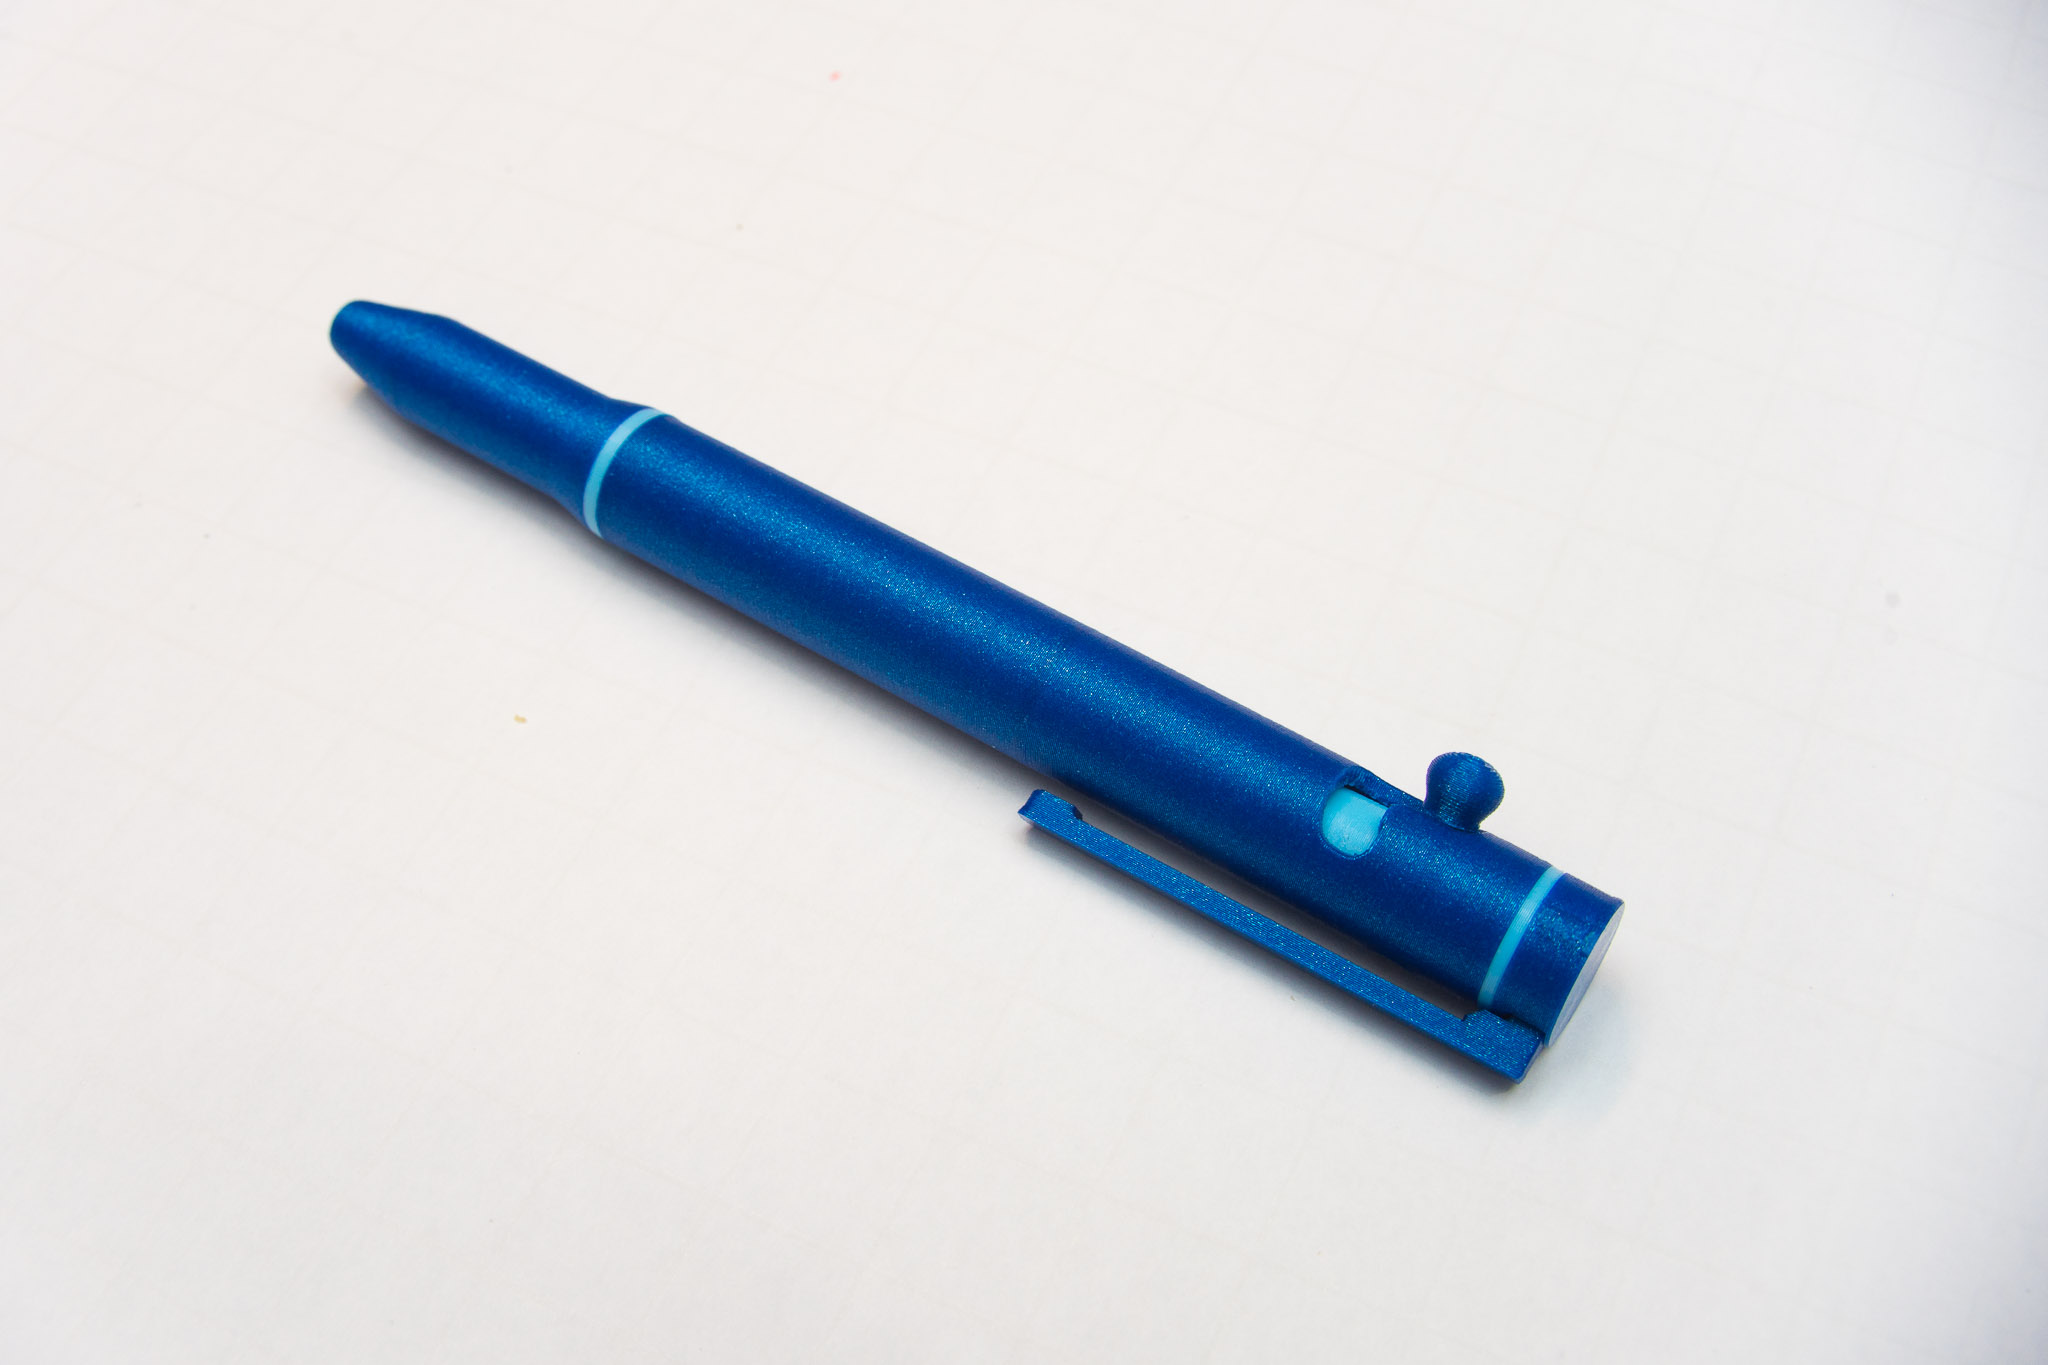
3D Printable Bolt Action Retractable Rollerball Pen that is compatible with Pilot G2 springs and refills. Make your own pen to suite your style in any color filament you have on hand. This is a great use of filament samples or spool remainders as it doesn't take a lot of plastic. I've been refining these designs over the past couple months and am very happy with the result, I use these pens every day at work!
3D printing settings
Required Components:
3D Printed parts
M3 8mm Socket Head Bolt (see photo of parts for an example) Pilot G2 Compatible Refill Pilot
G2 Compatible Spring
- I’ve not been able to find these springs outside the pens so assume you’ll have to buy a pen to acquire a spring and ink refill.
Tools:
Hex key/wrench for an M3 bolt
M3 Tap (optional)
Printing Instructions:
All the files should be oriented for optimal printing, with the only supports needed in two small places on the G2BoltMainBody file, at the bolt action cutout and at the circle cutout on the opposite side (with adequate cooling the circle’s supports aren’t required). I’ve included two modeled support structures that should cut away pretty cleanly, or if you have a slicer capable of manual supports you can do your own thing. Once the prints are finished the only area that may need a touch up is that rounded lobe over the support, you want that to be clean to let the M3 bolt smoothly slide along. Bed adhesion for the nozzle is critical and a raft or brim can be used to help, I’ve had plenty of success without those helpers though, but I’d recommend printing the nozzle by itself to help minimize the chance of it getting knocked off the bed during movements as the surface area is pretty small. After printing, double check the tip of the ink refill can pass in and out of the nozzle tip, if you have an elephant foot on the inner diameter here you’ll want to clean that out. Print with plenty of perimeters for the body and nozzle, I use 4 to ensure a strong part. Also take care of where your seams are, as you may want to align them opposite the bolt mechanism since thats usually facing up in your hand and visible. These have all been designed with a 0.2mm printing tolerance in mind.
Assembly Instructions:
Assembly is pretty straightforward, the trickiest part will be threading the bolt through the hole of the body into the G2BoltRefillCarriage. This bolt will be the lever for the bolt action and will also hold the BoltKob. I use an M3 8mm hex head which seems to be a perfect length. Also pre-tap the carriage component to make assembly easier, best case is to use an M3 tap, but it is possible to tap with a bolt also, just go slow as the carriage is weakest at that point. Also it’d be a good idea to test thread the nozzle to the body as over extrusion or low tolerance can make these hard to mate. If they’re not wanting to turn, lightly going back and forth with firm pressure will heat up the PLA enough to let the threads work past each other, I’ve also had luck with a low heat heat gun over the nozzle’s threads to allow them to thread more easily (don’t get them too soft!) Go slow, they’ll fit eventually. Insert the carriage into the body so that the pocket for the hex head is facing the round hole in the main body, it helps to use a thin screwdriver or even the ink refill to hold it in place. Then thread your M3 bolt through the hole all the way so the hex head is seated in the pocket and the remainder of the bold is through the other side of the body.
Next screw whichever ClipCap component you plan to use, one has a cutout around the threads to accommodate an accent ring. You need to do this before inserting the Clip into the pocket since it can’t be rotated with the bolt in place. The rest is easy, drop your G2 Pilot spring into the nozzle, and your G2NozzleCollar down around the threads of the nozzle. Then the body with the ink refill inside can be inserted into the nozzle and tightened, sandwiching the NozzleCollar. Next you can insert the clip into the ClipCap, depending on your print this may need some taps from a hammer to really drive in there, or alternatively a drop of superglue to hold it in place. Look for elephants foot on the clip if your having a lot of trouble here. I’ve also included versions of the “cap” that don’t have a cutout for a clip, if you swing that way. Finally the knob can be pre-threaded just like the carriage to make the fit easier or just thread right onto the bolt to complete your pen.