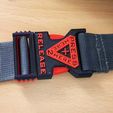
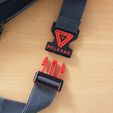
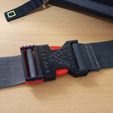
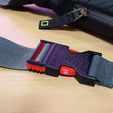
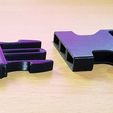
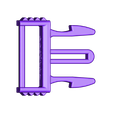
The buckle of my fanny pack broke after falling from a third floor window and I needed a replacement. It was the perfect excuse to design a thing to 3D print! After looking at buckles here in Thingiverse and reading the respective comments sections I decided to set some objectives for the project:
- Must print without supports,
- the buckle has to look like the one it's replacing,
- it has to be as strong as the original,
- opening and closing should work like the original (no jamming),
- can be used with already stitched webbing,
- has a double loop on one side for strap adjustment.
After many iterations I ended up with a very solid and practical replacement. I have been using it for about two weeks and is as good as the original part.
I was looking for a name for this thing with more charm than "replacement buckle" and while showing it to a friend she mentioned "it came out perfect!", therefore "The Perfect Buckle".
This buckle is is meant for a strap 36mm / 1.42inch wide. You should be able to scale it up or down to fit other widths, but I haven't yet tried it myself. Expect some more friction if you scale it down though, since the gap between the parts will also decrease.
How to print
Print without supports. Use PETG filament for best results. ABS works well too but it may warp a bit, making the insertion and release less smooth. I haven't tried PLA because I'm not sure it will be strong enough for this application (but if you try please share your results!).
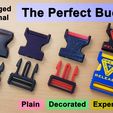
The buckles shown in the photos have been printed on a PRUSA I3 MK3 using 0.2mm layers, 3 perimeters and 30% infill. Black and red parts are PETG and blue and yellow parts are ABS.
What files to print
If you are in a hurry (but still were able to read up to this point, thank you) print thePerfectBuckle.stl (https://www.thingiverse.com/download:6800219) file, which includes all you need in a convenient package.
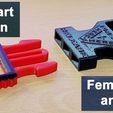
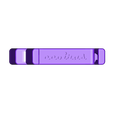
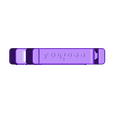
I did some experiments adding decorations to the female part of the buckle, which is tricky since it has to be printed vertically. I tried a few designs until I settled for the one in the photos, inspired by the DANGER EJECTION SEAT stickers found in aircraft. If you want the decorated version use the buckleFemale--decorated.stl (https://www.thingiverse.com/download:6800224) file.
Much nicer decorations would be possible if the female part of the buckle printed horizontally, which would of course require some sort of support. In this configuration the bridging capability of the printer can be exploited, meaning the supports are only needed at the side openings, so I decided to add some detachable supports there. To print this version go for the experimental--buckleFemale_decorated_with_supports.stl (https://www.thingiverse.com/download:6800225) file and print it without supports since they are already included in the file. After printing detach the side supports and that's it.
Printing this horizontal version using filaments of different colors makes for a very nice looking buckle, but keep in mind that insertion and release may not be as smooth as in the vertically printed version (because the bridges will hang down a little, increasing friction).
BTW, if you come up with a nicer decoration for the buckle please share your make! I uploaded the Fusion360 files for you to play with them; the decoration is in Sketch14.
How to assemble the parts
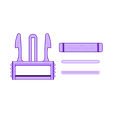
If your webbing is already stitched in place like mine, pass the male pin through its strap and then set it in place in the male part of the buckle. Do the same for the female part.
If your webbing is not yet stitched, set the male pin in place and then pass the webbing through the loops. The female part requires its strap to be stitched anyway, so you can add the pin and then sew the strap or the other way around.
Enjoy!

/https://fbi.cults3d.com/uploaders/13422772/illustration-file/8424b7e2-6d7b-4f39-81eb-90fbda93839f/3a628b505e9c953dc9592ba78ccdd06f_display_large.jpg)


