Skip to content

badBrick - Buzz Box, Complete Kit.

Advertising
Advertising
?
Creation quality: 5.0/5 (2 votes)
Evaluation of members on the printability, utility, level of detail, etc.

  • 4.3k views
  • 5 likes
  • 69 downloads
  • 1 collection

License
3D design format
STL Folder details Close
  • bbBB29vCaseBase.stl
  • bbBBAUR3PIRTop.stl
  • bbBBAUR3PLXPIRBase.stl

Learn more about the formats

Publication date 2019-07-31 at 15:07
Design number 66411

3D printer file info

3D model description

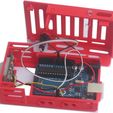
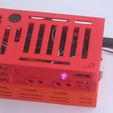
The Buzz Box is a complete kit. Its awesome for learning the basics to program and play with an Arduino UNO R3.

"Like US" https://www.facebook.com/badbrick

The "kit" is fully assembled and works as a basic motion detector unit. If you want to learn programming, or get your kids excited about what a computer and electronics can do, this is a great way to start. This kit requires it all. You need to get all the Arduino IDE set up, all the electronics connected. You need to write the code, compile it, upload it, and waaaaala. Magic happens.

http://www.badbrick.com/content/badbrick-buzz-box-complete-kit

For the most part its pretty simple if you know what you're doing.. For kids, its using a computer, having fun, and make something move. They learn a ton of stuff in the process without realizing it. They will want to know more.

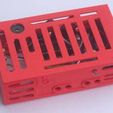
If you want to make one yourself. Print the files. Our Kit includes:

1. Arduino UNO R3

2. Parallax PIR sensor, with extension wires.

3. Piezo buzzer, with extension wires.

4. LED

5. (2) 9 Volt batteries wired in parallel, with the Arduino Power plug adapter. This is the Power Pack for the Buzz Box.

6. A pre loaded basic motion sensing sketch and the downloadable source code.

3D printing settings

In MakerWare, I modify the "Medium" settings:

Quality: Layer Height = 0.18

Infill: 15%

Shells: 2

For the battery base box, Arduino + Sensor Mount base, and top cover.

All other defaults are the same.

Building the Buzz Box.

Print all the parts..

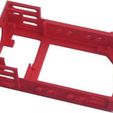
Wiring up the Echo Box is pretty easy. The Arduino just sits in the base mount. The PIR Sensor just mounts in the end. I solider on some short solid jumper wires to the PIR, pins and plug them in.

The Piezo buzzer, with extension wires mounts in the small hole at the top. The LED plugs in the sides, its wires should extend right down to pin 13

Hopefully that explained it all. Some of the pictures above also show the assembly. If you have any questions or suggestions please feel free to comment.

Advertising


Issue with this design? Report a problem.

Would you like to support Cults?

You like Cults and you want to help us continue the adventure independently? Please note that we are a small team of 3 people, therefore it is very simple to support us to maintain the activity and create future developments. Here are 4 solutions accessible to all:

  • ADVERTISING: Disable your banner blocker (AdBlock, …) and click on our banner ads.

  • AFFILIATION: Make your purchases online by clicking on our affiliate links here Amazon.

  • DONATE: If you want, you can make a donation via Ko-Fi πŸ’œ.

  • WORD OF MOUTH: Invite your friends to come, discover the platform and the magnificent 3D files shared by the community!


Sharing and downloading on Cults3D guarantees that designs remain in makers community hands! And not in the hands of the 3D printing or software giants who own the competing platforms and exploit the designs for their own commercial interests.

Cults3D is an independent, self-financed site that is not accountable to any investor or brand. Almost all of the site's revenues are paid back to the platform's makers. The content published on the site serves only the interests of its authors and not those of 3D printer brands who also wish to control the 3D modeling market.

100% secure payment by credit card, PayPal, Apple Pay, Google Pay, etc.
View all payment options.