Skip to content

NerfTank

Advertising
Advertising
?
Creation quality: 5.0/5 (1 vote)
Evaluation of members on the printability, utility, level of detail, etc.

  • 11.2k views
  • 38 likes
  • 262 downloads
  • 1 collection

License
3D design format
STL and ZIP Folder details Close
  • 8021-A01_Tread_Assembly.STL
  • 8021-G01-P01_Input_Sun_Gear.STL
  • 8021-G01-P02_Stepped_Planet_Gear.STL
  • 8021-G01-P03_Output_Ring.STL
  • 8021-G01-P04A_Fixed_Ring_With_Body.STL
  • 8021-G01-P04B_Inside_Body_-_Print.STL
  • 8021-G01-P05_Planet_Holder_Outside.STL
  • 8021-G01-P06_Planet_Holder_Inside.STL
  • 8021-P02_Idler_wheel_-_with_sprocket.STL
  • 8021_Nerftank.zip
    • 8021-A01 Tread Assembly.SLDASM
    • 8021-C01 Bearings.SLDPRT
    • 8021-G01-P01 Input Sun Gear.sldprt
    • 8021-G01-P02 Stepped Planet Gear.sldprt
    • 8021-G01-P03 Output Ring.SLDPRT
    • 8021-G01-P04 Fixed Ring.SLDPRT
    • 8021-G01-P04A Fixed Ring With Body.sldprt
    • 8021-G01-P04B Front Body.sldprt
    • 8021-G01-P04C Back Body.sldprt
    • 8021-G01-P05 Planet Holder Outside.SLDPRT
    • 8021-G01-P06 Planet Holder Inside.SLDPRT
    • 8021-P01 Tread.SLDPRT
    • 8021-P01 x1.SLDASM
    • 8021-P02 Idler wheel - with sprocket.SLDPRT
    • 8021-P03 Smaller idler wheel.SLDPRT
  • 8021_Nerftank_STLs.zip
    • 8021-G01-P01 Input Sun Gear.STL
    • 8021-G01-P02 Stepped Planet Gear.STL
    • 8021-G01-P03 Output Ring.STL
    • 8021-G01-P04 Fixed Ring.STL
    • 8021-G01-P04A Fixed Ring With Body.STL
    • 8021-G01-P04B Front Body.STL
    • 8021-G01-P04C Back Body.STL
    • 8021-G01-P05 Planet Holder Outside.STL
    • 8021-G01-P06 Planet Holder Inside.STL
    • 8021-P01 Tread.STL
    • 8021-P02 Idler wheel - with sprocket.STL

Learn more about the formats

Publication date 2019-08-06 at 14:07
?
Published to Thingiverse on: 2012-12-01 at 10:55
Design number 67360

3D printer file info

3D model description

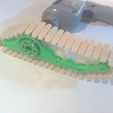
This is a work in progress of an RC nerf tank I'm working on. It uses some advanced gear designs, printed tracks, mainly printed components overall, will look cool and should be very functional.

This was printed on Tiny, my overly large 3d printer. More info available at https://ottersoft.ca/

Oh, and the gear is supposed to run backwards to push the treads forwards. That is by design... I think it looks cooler that way.

I've got a video on it running now thanks to Marginally Clever (Dan) at Vancouver Hackspace - https://www.youtube.com/watch?v=JJc0kGrgPCs

3D printing settings

I use a numbering system with the format so I'll be referring to everything by number.

What you will need (so far):

M4x30mm bolts - socket head x6

M5x25mm bolts - socket head x14

624ZZ bearings - 13ODx4IDx5mm x12

2 sections of treads (http://www.thingiverse.com/thing:35668)

 - you'll need 84 links in total  

Print (please note that some parts may need to be rotated or flipped):

8021-P02 x8 (note that these are different from my other release sprockets)

8021-G01-P01 x2*

8021-G01-P02 x6*

8021-G01-P03 x2*

8021-G01-P04A x2 (mirror one)

8021-G01-P04B x2 (mirror one) - Updated Dec 9th

8021-G01-P05 x2

8021-G01-P06 x2

  • means they can optionally be printed half mirrored but if one is mirrored, all must be (herringbone gears)

Assembly is a bit of a pain but can be done. Make sure all parts are free of stuff first.

To assemble the planetary gear:

1) screw the bearings onto the narrow (straight toothed) end of the planets

2) start with the planets loose with the sun and output ring (the one that engages the track)

3) Place the ring smooth side down and hold the sun around the center of it but up a little

4) angle the planets in so they match up with the centers of both the sun and ring

5) press down so they go flat

6) check against the planet holder, if the teeth are off adjust by twisting needle nose pliers so one point is grabbing the sun and the other the planet that's off (yes, it's a little annoying)

7) Place the bearings into the inside planet holder

8) press the planet holders in on both sides using a flat vice if necessary

9) screw planet holder together

10) Slide gear assembly onto the outside fixed ring with body

The drive may require some wear-in using a drill or other high torque motor.

Assemble the tracks, you'll need 42 links per side.

Advertising


Issue with this design? Report a problem.

Would you like to support Cults?

You like Cults and you want to help us continue the adventure independently? Please note that we are a small team of 3 people, therefore it is very simple to support us to maintain the activity and create future developments. Here are 4 solutions accessible to all:

  • ADVERTISING: Disable your banner blocker (AdBlock, …) and click on our banner ads.

  • AFFILIATION: Make your purchases online by clicking on our affiliate links here Amazon.

  • DONATE: If you want, you can make a donation via Ko-Fi πŸ’œ.

  • WORD OF MOUTH: Invite your friends to come, discover the platform and the magnificent 3D files shared by the community!


Sharing and downloading on Cults3D guarantees that designs remain in makers community hands! And not in the hands of the 3D printing or software giants who own the competing platforms and exploit the designs for their own commercial interests.

Cults3D is an independent, self-financed site that is not accountable to any investor or brand. Almost all of the site's revenues are paid back to the platform's makers. The content published on the site serves only the interests of its authors and not those of 3D printer brands who also wish to control the 3D modeling market.

100% secure payment by credit card, PayPal, Apple Pay, Google Pay, etc.
View all payment options.