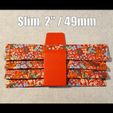
Video instructions and demonstration: https://youtu.be/cL9JP6YUnBA
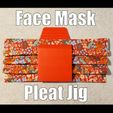
The trickiest part in sewing face mask patterns such as the Deaconess and Pocket Mask is the pleats. This tool helps you fold them.
How to use:
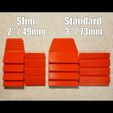
Decide if you want STANDARD (73mm / 3 inches wide)) or SLIM (49mm / 2 inches wide) and download the appropriate STL.
Refer to Print Settings for recommended print settings.
This video explains it better than words do: https://youtu.be/cL9JP6YUnBA
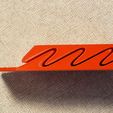
Place the part with the measure lines on a sewing table, with the measuring lines furthest from you. Lay down your fabric and line the top edge with one of the lines. You'll need to experiment to discover which line works best for your pattern.
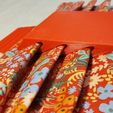
Place the other jig on top. Align the fins. Use your fingers to hold the bottom jig on the top corners and use your thumbs to push the top jig in, creating folds in the fabric. If the folds are too high or too low, try a different measuring line.
At this point, I use my hands to straighten the folds a little. Then I scoot both layers of the jig to one side of the fabric while I iron the other side. Then I repeat on the other side. You can either keep the fabric in the jig while you sew it, remove the jig and pin/clip the folds, or remove the jig, press the fabric with the iron, and sew without pins or clips. I usually do the third option.
This is a rebuilt-from-the-ground-up remix of Jonathan Wigger's pleat maker, which is available here: https://www.thingiverse.com/thing:4259706
Previous updates:
Update (May 12, 2020) the new fin design is working great, so I am deprecating the old version. I am also deprecating the widest version, since the extra width is unnecessary, takes longer to print, and just makes it harder to iron. The SLIM version is now STANDARD and the ULTRASLIM is now SLIM. All of the files now have the new fin design.
Update (May 11, 2020): I added an experimental Ultra Slim version (49 mm wide) with deeper-angled fins. I haven't had a chance to test it thoroughly, but most likely, this will be the best version. If you are printing lots of these, this is probably the one you want. If there's anyone who has the capacity to help test these, I would be much appreciative. If all works as planned, I will replace the other versions with the deeper-angled fins of this one.
Update (May 7, 2020): I made the standard version a little less wide and removed the "face up" and "face down" lettering. The measuring lines on the down side make it pretty easy to orient the pieces without the lettering, and it saved some printing time. I also changed the spacing between waves from 0.8mm to 1mm to allow for slightly-thicker double fabric. I also made a few other minor ease-of-use updates.
The STANDARD version is now 95mm wide (3.75 inches).
I also made an experimental SLIM version that should print much faster. That version is 75mm wide (2.95 inches).
Update (April 20, 2020): I completely overhauled this thing. It now prints in one piece* without supports. (*Well, two pieces since there are two jigs in a set.)
The "wave" shape of the new version leaves more space for two layers of fabric and just works better.

/https://fbi.cults3d.com/uploaders/14936297/illustration-file/409dc03b-afda-4e0e-8c4c-6958d3ab77b1/PleatedFaceMask16by9NewCults.jpg)
