Video: https://youtu.be/2Y6TB94vhrs
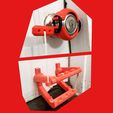
Sometimes your hands are full, and you need to open a door! Sometimes there's a deadly pandemic knocking about, and you're afraid of germs. That's where the Foot Door Opener comes in.
Use this device to open doors with your feet. This works best in your home, not a workplace where heavy duty use could lead it breakage. Also not recommended for homes with small children.
You will need:
- 8 feet of 1/8" rope.
- Qty 8 of #8 or #10 screws, 3/4" long.
- Gel superglue. I use Loctite brand.
- 2 large rubber bands.
- 4 zip ties, 6 inches or longer
- Gorilla tape or duct tape
Instructions:
Is your door knob Round-Style or Lever-Style? If Round, print the file 1of1DoorKnobHandle. If Lever-Style, you won't need this file.
Print the files 1of2FootMechanism and 2of2FootMechanism.
If you already have a lever style door handle, skip the following paragraph:
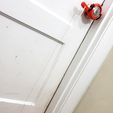
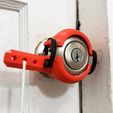
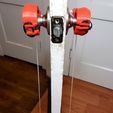
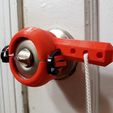
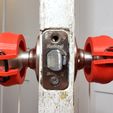
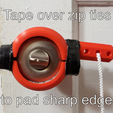
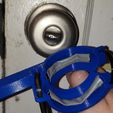
Gather the two halves of the Knob Lever. Line the inside the halves with rolled-up Gorilla tape (to help reduce sliding) and place over your door knob. Depending on your door, the lever half may be on top or bottom. Secure each side with a zip tie. The tie slides through the holes. Refer to pictures. I slid my excess tie length back through the holes to prevent a sharp cut edge. If you like, you can tape over the ties to make the edges less sharp.
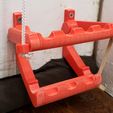
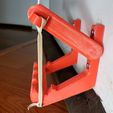
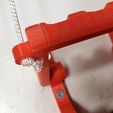
Gather the parts for the Foot Mechanism. Refer to Assembly guide and glue parts together. Don't accidentally glue the round pegs where they need to turn.
Affix the Foot Mechanism to close to the bottom of your door with the screws. Refer to video for placement ideas.
Take your rope and tie one end through one of the holes on the foot mechanism. I just passed it through the top of the hole and tied a knot to keep it from slipping through. See pictures.
Pass the other end of the rope through one of the holes on the Knob-Lever. I recommend trying the middle one first. Before you tie it off, turn the lever down as far as it will go. While holding it down, also hold down the Foot Mechanism as far as it will go. This is the length you want. Mark the rope and tie off the top. It may take several tries to get the tension just right. If you are using a Lever style door handle, you can just tie the rope around the lever and tape it.
Turn the knob on the other side of the door both directions. Make sure the Foot Mechanism goes up and down and does not prevent the door from opening when someone turns the other knob upward. If that happens, try a different hole in the Knob Lever.
Use the hole in the other side of the foot mechanism to tie a rubber band. Pass the other side of the rubber band through the small hole in the bottom of the mechanism. You want the tension to keep the sliding mechanism in its resting middle position. The rubber band prevents the mechanism from getting stuck at the top of its arc.
Press your foot down on the mechanism to open the door. To close the door, place your foot on the bottom part of the mechanism (not on the rotating part.)
Please let me know if you have any questions or if any of this is confusing.
#NoTouchChallenge

/https://fbi.cults3d.com/uploaders/14936297/illustration-file/0870618f-d4db-409e-94dc-5437f0389f55/20200609_210532.jpg)
