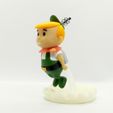
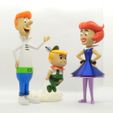
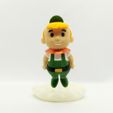
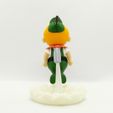
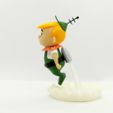
Elroy Jetson, from the comic strip The Jetsons, by Hanna-Barbera.
Elroy is a six-and-a-half-year-old boy and is the only son and youngest child of George and Jane Jetson. He is highly intelligent and an expert in all space sciences. He weighs about 62 pounds and his favorite food is noodles with butter in it and is fond of anything that involves gadgets and robotics.
No supports are required. If you have the proper filament colors, no painting is needed.
The assembled model is 170mm tall.
Enjoy!
(updated head_with_supports on 11/2/2020 to correct a minor issue when slicing at .1mm layer height)
...........................................................................................................
Print Instructions:
Supports: No
Resolution: .2mm
Infill: 10%
Notes:**
One part has built-in supports.
The exhaust part should be printed with no infill
Refer to the notes below for a few helpful printing and assembly instructions.
...........................................................................................................
Building the model
Colors
Skin: (Paramount3D PLA - Universal Beige)
head (if you use this part, only the ears need support)
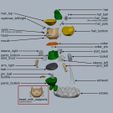
head_with_supports (optional part with built-in support for the ears)
arm_right
arm_left
..
Black: (Paramount3D PLA - Black)
eyes (contains two pieces)
eyebrow_left
eyebrow_right
hat_rings (contians two pieces)
hat_pole
hat_ball
belt
..
Yellow: (Paramount3D PLA - Egg Yolk Yellow)
hair_top
hair_bottom
..
White: (Paramount3D PLA - White)
shirt_front
shirt_back
sleeve_left
sleeve_right
mouth
..
Green: (Paramount3D PLA - St Andrews Green)
pants_top
pant_bottom
hat
..
Silver: (Polyalchemy Elixir - Silver)
rocket
..
Orange: (Polyalchemy Elixir - Orange)
collar
..
Gold: (unknown PLA - silky gold)
buckle
..
Transparent/Clear: (unknown PLA - transparent)
exhaust (should be printed with no infill)
..
Natural: (Esun ABS - Natural)
smoke
..
Any color: (hidden piece)
pin_belt
pint_collar
...........................................................................................................
Printing and assembly tips
Printing tips
1-No supports are required. The head_with_supports part has built-in supports for the ears. If you prefer to use your own supports, there is an optional piece, head, that does not contain the built-in supports.
2-There are some pieces that may need brims.
3-The exhaust should be printed with no infill.
4-I used a natural color for the smoke instead of white to prevent the smoke from 'over powering' the rest of the model. A natural color is similar to white, but just not as strong.
..
Assembly tips:
1-Take your time gluing the model together and enjoy the process.
2-I used E6000 sticky craft glue to put this model together. The sticky glue allows more time to position the parts than a fast drying superglue. This is especially helpful for small parts.
3-The hat_pole has bumps to help position the rings. Push one ring down from the top of the pole until it stops at the bump and push the other ring up from the bottom until it hits the other bump. The rings are a snug fit and I did not glue them. The ball goes on the top of the pole, which is the shorter end.
4-The rocket part attaches to the indent in the belt (noted here since it is not obvious in the assembly diagram).
5-The hair/hat/head assembly could seem like a puzzle. Simply align the pieces as per the diagram and they will fall into place. I only mention this because when I was test fitting the parts I kept putting in the hair backwards!
6-Refer to the assembly diagram in the pictures section as well as the uploaded pictures for putting the model together. The model is meant to be glued.
Do not hesitate to ask questions, feedback is essential to making better models.

/https://fbi.cults3d.com/uploaders/12888752/illustration-file/34e6ada2-c267-4ee0-b0e5-cbe3e7611629/elroy%20angle1.jpg)
