[ Edit Feb 27 2018: See also the recent (and still more thorough)
"Even More Reliable Filament Runout Sensor and Spool Holder" --
https://www.thingiverse.com/thing:2809260 ]
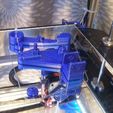
Here is my design for a more reliable filament runout sensor, designed for mounting on and below a 2020 bar. I'm using it on a Folgertech FT-5, with the filament spool above it, but it should be usable with other printers with similar bars for mounting.
Background
I've been trying to install a reliable sensor for some time (tried like about six different designs including several variations of some of those!) but always seemed to run into problems. My issues might be from the type of printing I've been doing -- large objects printed with a wide nozzle so that filament gets used quickly (which is why there is urgent need for a sensor!) and the filament usually moves through the system quickly causing vibration and significant tension changes.
Sensors that depend on filament directly pushing a microswitch closed, while seemingly simple, turned out to be a balancing act between having the switch tight enough against the filament that it causes a drag on the extruder and shuttle, or the switch causing too many false alarms to be of much use. They're also a pain to feed filament through.
Basic optical based sensors failed because the opto-interrupters they depend on use IR light, which many filament types -- and seemingly all PETG ones -- are transparent to. The alignment of the beam in the interruptor is also very critical when it needs to be blocked with skinny 1.75mm wide filament, so false alarms were still a problem even when printing with just black PLA.
Other runout sensor types included motion sensing (the range of motion to be handled varies a lot from using a 1mm nozzle or with a 0.2mm nozzle) and spool weight sensing (vibration results in unacceptably poor accuracy).
So, anyway, how does this new one work?
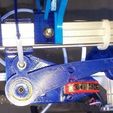
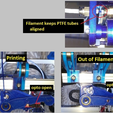
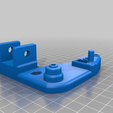
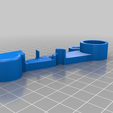
It uses an optical sensor, but the sensor isn't triggered directly by the filament but instead by a flag that breaks the beam. When the filament runs out it causes a lever to drop which makes a flag fall into the beam . The lever is otherwise held up by filament that runs between two in-line pieces of PTFE tubing; the filament can't bend sharply enough to allow the flag low enough to break the beam. The teflon tubing causes very little drag on the filament flow and the sensor state is immune to vibration or erratic movement of the filament. See illustration.
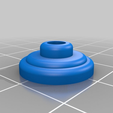
The assembly uses just three printed parts and: a 608 bearing (of fidget-spinner fame); quantity 3 of M3x30 (or #4x1.25") screws and nuts; two PC4-M10 Bowden tube connectors; about a half meter of 4mmOD PTFE tube; and a standard cheap optical end-stop board. The assembly mounts to the 2020 bar using the usual screws and T-Nuts (M4 or M5, one or two).
IMPORTANT
This design uses an optical IR interrupter sensor, so it can not directly "see" the flag if that part is made with some types of filament. I used blue PETG for mine and put a small piece of black heat-shrink tubing over the little flag to make it opaque to IR light. A small piece of black duct tape also works. Things that DON'T work: black magic marker; masking tape; electrical tape. Black paper taped on will probably work, as will just printing from most solid dark PLA or ABS filament. You can tell if the flag is blocking IR as the red indicator LED on the opto sensor board will go out completely when the beam is successfully blocked.
Be careful, the printed flag is thin and fragile and easy to break (or to melt if you are using heat-shrink tubing). Go carefully if you need to attach an opaque cover to the little flag, and make sure that the flag can still easily fall into the gap in the opto-interruptor! The mounting holes for the opto board are slightly oversized to allow you to fine-adjust the flag to fit within its gap.
Note that operation of nearly any type of runout sensor depends on the filament freely leaving its spool when it runs out. Don't use filament brands that tape the end to the unreachable inside part of the spool (!) and make sure to clip off any bit of filament that may snag the spool at the end (you can usually reach the inside end of the filament through the hole in the center of the spool).
Notes:
Push the 608 bearing all the way into the provided opening in the lever arm, until it seats inside the opening -- the bearing should end about flush with the end of the opening. Using a vice is an easy way to accomplish this if you can't do it by hand.
Arrange the PC4-M10 connectors so that the plastic push-cap faces away from the spool on the line of filament travel, so the print head can't pull the PTFE tube out of position. The PC4-M10 type connectors were used because 4mm PTFE tube can be pushed all the way through them if fed from the push-cap end. Make sure to put a short section of PTFE tube in the connector on the "lever arm" piece before assembling the lever arm onto the mount, because you wont be able to get it to go through feeding it from the metal end of the connector.
The PC4-M10 that screws into the "mount" piece could have only a short piece of PTFE tube in it if you want to use it like a filament guide (with loose filament going from there to the extruder). But -- it is much better to run a longer PTFE tube from the "mount" to the extruder (this is called a "Reverse Bowden" arrangement). That way, the length of filament between the extruder and the mount (and spool) is always constant, flow of filament from spool to extruder runs more smoothly, and any tendencies for filament to spill over the edges of the spool will go away. A better way, overall! The extra weight from a longer PTFE tube is really negligible.
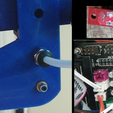
Wiring: the cable and connectors provided with the opto endstop boards probably aren't long enough to reach to the controller board, so you'll have to extend them (using any gauge wire available). A wiring diagram for an MKS gen 1.4 board is shown in the illustrations. Code modifications for Marlin are provided in an attached file.
Links for example parts:
PC4-M10 connectors: https://www.amazon.com/gp/product/B01KHN1HWY/ref=oh_aui_detailpage_o03_s00?ie=UTF8&psc=1
Opto end-stop boards: https://www.amazon.com/BIQU-Optical-Endstop-Control-Printer/dp/B01FLSA47O/ref=sr_1_2?ie=UTF8&qid=1502728465&sr=8-2&keywords=optical+limit+switch

/https://fbi.cults3d.com/uploaders/15489249/illustration-file/9f1ff37a-def4-4247-84f7-67ae46b5ded8/Installed.jpg)
