FRANÇAIS
Hi there,
This project is, for me, one of the biggest, as it combines 3D printing and electronics.
See presentation video here: https://youtu.be/9TGAw4c0tHE
As i was on the road, going to my favourite mountain bike spot, a car passed really too close to me (approx a few 20 centimeters...). I was scared.
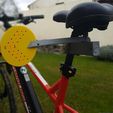
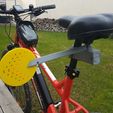
So i decided to design this warning sign. The first idea was just a yellow sign, with a red arrow printed.
But in fact, I thought that it was not sufficient. So i design this warning to be lighted. The arrow is made of 30 red leds, animated with a right to left movement.
In the project, you will find all you need to make it at home.
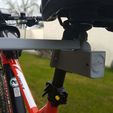
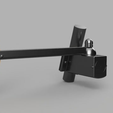
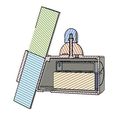
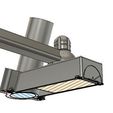
This warning sign is designed to be attached to the stem of the saddle. The angle is for me 19.6° to vertical.
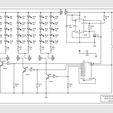
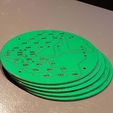
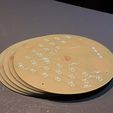
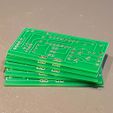
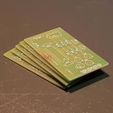
There are 2 PCB (printed circuit board), one for the red arrow, one for the control.
Don't worry, if you're interrested, i can sell you (at real cost price, no benefit) these PCBs. At this time, I have 4 of each in stock. If needed, I'll order more. These PCBs are professional quality, made by JLCPCB (https://jlcpcb.com/).
PRINTING THE PARTS:
To make the whole project you'll have to print 9 parts
AV ring (no support material)
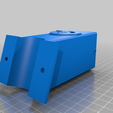
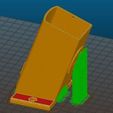
Support (with a lot of support material...)
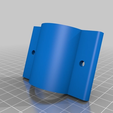
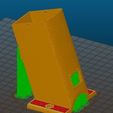
Arm (with support material), see Note: 1
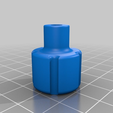
Button w-nut inclusion (no support material) , optional see Note: 2
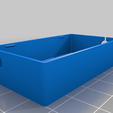
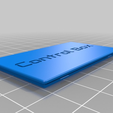
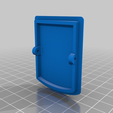
Control box (no support material)
Lid control (no support material)
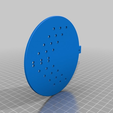
Arrow (no support material)
Cover arrow (no support material)
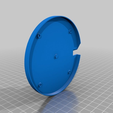
Rear cover (no support material)
For information, i used Slic3r "Prusa Edition" to generate support material where i wanted, and of course, to generate gcodes.
Rating:1
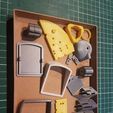
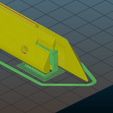
For "Bras" you just need to add a little bit if material support at the end of the part, see photo of the support material i added for my print.
Note: 2
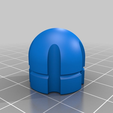
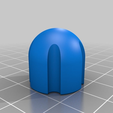
For "Button" you have 2 options, The threaded M4 version, where the thread is printed. Print the part called "Button Threaded M4""
As i do not have good results with printed threads in small diameters, i designed a knob in wich i include a standard M4 nut during the print. For that i added a M600 command in your Gcode, at Z=6.40 mm or layer N°32 if you print at 0.2mm resolution. AT this height, the printer pauses, i put the nut in the hole, and i restart. That's all !!!, really easy. I'll add a video of that.
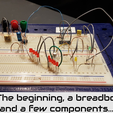
DURING THE PRINTER IS PRINTING... LET'S MAKE ELECTRONICS..:
Better than a long discussion, you have a tutorial video and some photos.
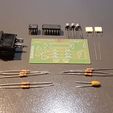
Here is the BOM (Bill of material) for the electronics:
1 x Round PCB for the arrow (See Note: 3)
1 x Square PCB for control card (See Note: 3)
1 x Lipo Battery 3S - 850 mAh for example: https://hobbyking.com/fr_fr/turnigy-nano-tech-850mah-3s-30c-lipo-pack-jst.html
1 x Switch like this one: https://www.gotronic.fr/art-interrupteur-r1933a-4211.htm
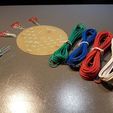
4 x about 50 cm of colored wire like this : https://www.gotronic.fr/art-bobine-10-m-de-cablage-fc14v-23884.htm
2 x JST Female connectors, wired, like: https://hobbyking.com/fr_fr/female-jst-battery-pigtail-10cm-length-10pcs-bag.html
1 x JST Male connnectors wired, like: https://hobbyking.com/fr_fr/male-jst-battery-pigtail-12cm-length-10pcs-bag.html
And the following electronic components,
Category,Quantity,Reference,Value:
Resistors,6, "R1-R6",120 ohms,
Resistors,3, "R7-R9",1Kohms,
Resistors,4,"R10-R13",10kohms,
Resistors,1, "R14",33kohms,
Capacitors,1,"C1","4,7uF/33V",
Capacitors,2,"C2,C3",100nF,
Integrated Circuits,1, "U1",CD4017 DIL16,
Integrated Circuits,1, "U2",NE555 DIL8,
Transistors,3,"Q1-Q3",2N2222,
Diodes,30, "D1-D30",Red Led, High luminosity, Vref= 2.0V, I= 20mA
Optional; 1 DIL 8 support and 1 DIL 16 support
Note: 3
At the beginning of this summary, i said that i can provide PCB's. That's true and want to precise that i do that just for sharing. At this time, I don't know if you'll be a lot to want this pcb's. I have 4 pairs in stock. If necessary, I'll reorder more. The price will be my all inclusive cost, no more. For more info, message me or better, leave comments.
BOM of screws, nuts, etc..:
4 x CHC Screws M2.5 x 8
1 x Screw CHC M2.5 x 17
1 x Nut M2.5 Nylstop
1 x Bolt M4 x 30
1 x Nut M4 (to be included in the part "Button w-Nut inclusion")
2 x CHC Screws M4 x 14
2 x M4 Spacers
2 x M4 Nuts Nylstop
EDIT 2019-01-08: Added a knob to be used to thighten the support on the stem. You'll need 2 parts and 2 bolts M4x25 (instead of the CHC screws M4x14)
FRENCH
Hey, everybody,
This project is one of the biggest for me because it combines 3D printing and electronics.
While I was on the road and on my way to my favorite place to go mountain biking, a car passed very (too) close to me (about 20 centimeters ...). I thought I was going to die...
So I decided to design this warning sign. The first idea was just a yellow sign with a red arrow printed on it.
But actually, I didn't think it was enough. So I designed this warning to be on. The arrow consists of 30 red leds, moving from right to left.
In the project, you will find everything you need to do it at home.
This warning sign is designed to be attached to the seat post. The angle for me is 19.6° from vertical.
There are 2 circuit boards, one for the red arrow and one for the control.
Don't worry, if you are interested, I can sell you (at cost price, no advantage) these PCBs. At the moment I have 4 of each in stock. If needed, I will order more. These PCBs are professional quality, manufactured by JLCPCB (https://jlcpcb.com/).
PRINTING OF THE PIECES:
To complete the entire project, you need to print 9 pieces.
AV ring (no support)
Support (with a lot of support material ...)
Arms (with support equipment), see Note: 1
Knob with nut included (no support material), optional, see Note: 2
Control box (no support)
Lid control
Arrow (no support equipment)
Cover arrow (no support)
Rear cover (no support)
For information, I used Slic3r "Prusa Edition" to generate support material where I wanted and, of course, to generate gcodes
Note 1
For "Arm", you just have to add some material support at the end of the part, see the picture of the support I added for my print.
Note 2
For "Knob" you have 2 options, The M4 threaded version, where the thread is printed. Print the section entitled "M4 Threaded Knob".
As I don't have good results with small diameter printed threads, I designed a button in which I include a standard M4 nut when printing. For this, I added a M600 command in the Gcode, at Z = 6.40 mm or at layer No. 32 if you print at a resolution of 0.2 mm. At this height, the printer pauses, I put the nut in the hole and restart. That's it!!!, really easy.
WHILE THE PRINTER IS PRINTING... Let's do electronics ...:
Better than a long discussion, you have a video tutorial and some pictures.
Here's the nomenclature for electronics:
1 x Round arrow PCB (see note: 3)
1 x square printed circuit board for control board (see note: 3)
1 x Lipo battery 3S - 850 mAh e.g.: https://hobbyking.com/fr_fr/turnigy-nano-tech-850mah-3s-30c-lipo-pack-jst.html
1 x Switch like this: https://www.gotronic.fr/art-interrupteur-r1933a-4211.htm
4 x approx. 50 cm coloured thread like this: https://www.gotronic.fr/art-bobine-10-m-de-cablage-fc14v-23884.htm
2 JST female connectors, wired, type: https://hobbyking.com/fr_fr/female-jst-battery-pigtail-10cm-length-10pcs-bag.html
1 x wired JST connectors, such as: https://hobbyking.com/fr_fr/male-jst-battery-pigtail-12cm-length-10pcs-bag.html
And the following electronic components,
Category, quantity, reference, value:
Resistors,6, "R1-R6",120 ohms,
Resistors,3, "R7-R9",1Kohms,
Resistors,4,"R10-R13",10kohms,
Resistors,1, "R14",33kohms,
Capacitors,1,"C1","4,7uF/33V",
Capacitors,2,"C2,C3",100nF,
Integrated Circuits,1, "U1",CD4017 DIL16,
Integrated Circuits,1, "U2",NE555 DIL8,
Transistors,3,"Q1-Q3",2N2222,
Diodes,30, "D1-D30",Red Led, High luminosity, Vref= 2.0V, I= 20mA
Optional; 1 DIL 8 holder and 1 DIL 16 holder
Note: 3
At the beginning of this summary, I said that I could supply PCBs. This is true and I want to make it clear that I only do this for sharing. Right now, I don't know if many of you will want these PCBs. I have 4 pairs in stock. If necessary, I would have them rebuilt. The price will be my all-inclusive cost, no more. For more information, send me a message or better yet, leave comments.
Hardware Nomenclature :
4 x CHC M2.5 x 8 screws
1 x CHC screw M2.5 x 17
1 x M2.5 Nylstop Nut
1 x Bolt M4 x 30
1 x M4 Nut (to be included in the "w-Nut Inclusion" part)
2 x CHC Screws M4 x 14
2 x M4 washers
2 x M4 Nylstop nuts

/https://fbi.cults3d.com/uploaders/15685019/illustration-file/896cb1c1-2b69-4c2d-9121-4b5dd3c00e89/Balise_sur_velo_3.jpg)
