30-12-17 IMPORTANT SAFETY TIP - I HAVE NOW ON TWO OCCASIONS HAD THIS PRINTER TIP OVER, ITS TALL AND NARROW. PLEASE SECURE THE PRINTER TO THE BATTERY UNIT WITH THE SCREWS. PLEASE ALSO CONSIDER SOME OTHER FORM OF RESTRAINT. IT SEEMS TO BE THE WEIGHT OF THE SPOOL WHEN FULL ON TOP. I WILL DESIGN A NEW SPOOL HOLDER.
Update 17-09-17 - Modified the box and lid to fit together with countersunk m3 screws. There are also blocks which will fit into the base of the DemonDeltaMicro printer. I have also put screw holes through and updated the listing for the printer base on its thingiverse page.
Update: So first few prints, managed a car shaped cookie cutter (PLA with heated bed), around half of a 75% scale benchy, which came off the bed after I turned the heater off partway through, and then around 80% of a 75% scale benchy with no heat, on a PEI surface instead. BMS cut the pack off when the cells got down to 3.0v so it didn't complete. But that's around 3 hours of printing time with a fully charged pack, no issues with the prints themselves, in fact, the high voltage speeds up the heaters and makes the motors quieter. Some serious testing both with/without heating to see how long the pack lasts yet to be done.
Okay so want a really portable printer?
https://youtu.be/WxNGG_h4XqM
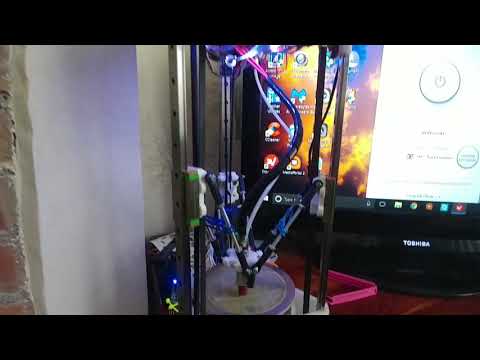
This add-on module for the DemonDeltaMicro printer gives you a battery pack that could run the machine for 2-4 hours (depending on heated bed usage).
DISCLAIMER - Lithium Polymer/Lithium-Ion batteries are dangerous if improperly handled, shorted, overcharged, over-discharged, soaked in water or generally treated with a lack of respect. I accept no responsibility for fires/shorts/burns or any other battery-related incident. Handle them correctly and they are very useful.
BOM - For this, you will need
-DemonDeltaMicro Printer https://www.thingiverse.com/thing:1874766
-Printed Lipo Module and printed lid PETG recommended.
-12 lipo batteries (unprotected type) approx 2200mAh (genuine capacity) or greater
(ideally already soldered into a 16.8v pack)
-Battery management board (I used a 578800 20A module from ebay for a 4S pack)
-Large super cool missile fire switch - eBay 10A, double pole, single throw
-Lipo battery monitor (not 100% essential but I want to ensure the BMS is doing its job) -
eBay
-LED voltmeter/ammeter combined unit (10A type not 50A type)
-Anderson Powerpole 15A connectors with plate to make socket - eBay (any other high current RC connector will do)
-Wire/solder
General guidance on Assembly (not comprehensive you need to know what you're doing with lipo packs).
The printed case has space for a 4S3P lipo pack, that's 4 sets in series of 3 parallel cells. This gives 16.8v max. If you can get a ready-made pack in a 6x2 row arrangement (often used for alarm systems) then get one. Ensure cells are the unprotected type, as we will be pulling fairly high current from them.
The BMS is soldered solidly to the battery + and -, and to each of the smaller leads which run from the joins between each set of 3 cells, these are the balancing leads and are there to ensure the BMS keeps all the cells at the same voltage. Use wire rated for at least 10A, 15A even better.
The lipo monitor needs to be connected so that the pins labelled 1,2,3,4 go to balance lead 1 (between 1st and 2nd set of cells), 2 (between 2nd and 3rd set of cells), 3 (you get it yeah), and 4 to the last set which is effective the + for the pack. The first pin labelled - or GND needs to be connected to the negative output of the DPDT switch, so this only turns on when the pack is on.
The P- and P+ (pack + & -) are then routed via the DPDT switch (again 10A+ rated).
The voltmeter/ammeter unit has thin red, yellow, and black wires. Connect red and yellow to the positive output of the DPDT switch, black to the negative output of the switch. The thick red and black wires need to go in series with the negative output from this unit, i.e the current return from the printer flows through the ammeter (which has an internal shunt so it doesn't melt). Ensure Red come from the switch in the battery pack positive output (again heavy duty solder here) and then black goes to the output from the pack.
Use some heavy duty RC car connectors to create an output for the pack, use the corresponding connectors on the printer.
The printer mains adaptor was an Xbox unit, I now have the RC car power connectors on its output and have disabled the PS-ON feature which enabled the printer controller to turn the PSU on and off, as the battery pack does not have an always-on 5v rail to use.
Once everything is connected, attach the lid by drilling some 3.2mm countersunk holes in the lid, and 2.8mm holes in the battery box, a little adhesive doesn't hurt. Use lots of tape to hold wires down, and ensure nothing is going to short/rub etc..
This module can then be connected to the printer, by sitting it on top and drilling some similar 3.2/2.8mm holes through the side of the base triangle of the printer.
Either use the battery unit, which can be charged with a lipo charger capable of charging 4S pack, or use the mains adaptor. At this time there is no way to connect both at the same time and effectively create a UPS unit, maybe this will come later.
The printer seems quite happy at this high voltage and bed heating and nozzle heating is faster, motors are quieter. The regulator on the arduino mega should be able to run from 16.8v rather than 12, but keep an eye on it and keep the arduino well cooled.
:format(webp)/https://fbi.cults3d.com/uploaders/15715760/illustration-file/d84e585b-777f-4fbc-a8b9-5c76c1039412/20170915_161147_HDR.jpg)


/https://preview3d-images.cults3d.com/variants/gquk14puukemain75wo6ea38ooe4/848ec152657411c3fb217bef17c5a518f412feacc875ce6f22e14239149a46cd)
/https://preview3d-images.cults3d.com/variants/ylf333ja5dxixiwp8hdw9w61mz3j/848ec152657411c3fb217bef17c5a518f412feacc875ce6f22e14239149a46cd)


