3D model description
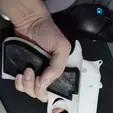
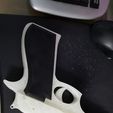
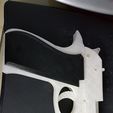
So I saw some DIY videos online and decided I could do what the pros do. Well I was in for a rude awakening BUT I did manage to get this baby designed. For all the roughness it does however do what I intended of it. This is hopefully a simple print which requires no support (except a little bit on 'Mid' part) prints rather quickly, provides a satisfying (at least to me) recoil feeling with sound and is nice to look at (.... kind of..... from a distance maybe?). If you do print this please share a make.
So how do you make this you ask ?? Well let me tell you then :
Print all parts at your preferred settings and I guess you can rescale the parts without causing too much tolerance issues. At the current scale I found it was a bit too large especially the grip.
Starting: Print the part 'Mid' first with supports only on the hook (small section on 'Mid' part at end of the barrel thing)
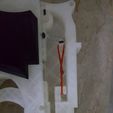
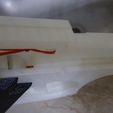
Assemble the slide: Print the 2 'SlideSides' (there is a recess on 1 side of these parts and supports are optional as it is a small bridge section. Make your decision based on YOUR printer abilities) and the 'Fittings' parts. Use the rectangular piece from 'Fittings' and glue it into 1 of the recesses on one of the slides. Use the thinner pin from 'Fittings' and insert it into the upper hole (below the sight) of the slide to which you attached the rectangular piece. From the 'trigger+rearSight' parts use the rear sight piece (the longer part) and glue it to the slide piece aligning it with the top and back curve of the slide part. Slot this slide piece into the 'Mid' part with the rectangular part able to slide freely in the top gap (just below the barrel like thing of 'Mid'). Attach a small piece of rubber band to the hook of 'Mid' and that pin of the slide you just fit. Use your preferred rubber band depending on the type of response you would like from the slide jumping back. Pull the slide part back slightly and let it go to test it. In the larger hole on the slide, insert one of the thicker pins from 'Fittings' and fit the smaller part (the one that is at the top and looks kind of like a Comma) from 'triggerAssy' with the round part of the hole facing the top of the slide, I call this the "slide puller" as it pulls the slide along with it (creative ..... I know..).
In the hole at the top of the slide puller put a small ball point spring and see if it clears the thinner pin at the top of the slide as it must not collide with that pin or there will be weird behavior of the slide instead of a blowback. If the spring collides with the pin you will have to adjust the spring to stay clear of the pin by bending it or u might have to glue it out of the fitting hole on the face of the puller away from the pin.
'Triggered' yet ? No ? (sorry......)Then here is what you do:
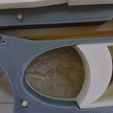
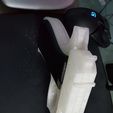
Glue the appropriate 'SidePanels' (based on the side of slide you did all the work above on) to the 'Mid Part aligning the edges. Place the trigger from 'trigger+rearSight' part in the oval slot of the 'Mid' part and see if it moves easily and does not jam or flops around too much sand its ends if it does. Insert the remaining thicker pin into the hole (at its mid on the Grip area... yea sadly no magazines on this model) on the glued side panel. Fit the 'slide pusher' (The other, longer part in 'TriggerAssy' ....yup I'm calling it that because..... u know) with the bridged part towards the trigger (the pointy end faces the slide pusher). Pass a rubber band through the hole in the bridged part and attach it to the 2 pronged ... thing, claw.... at the middle of the 'Mid' Part. You can just loop around the rubber band but it will get blocked or limited by the side panel BUT will work, so you are free to use your own way to do this. HOW I DID IT is that I made a loop of the rubber band and put a tiny pin, made with a cut paper clip, in the loop and pulled it forward to the claw area and slotted it into that slanted area at the front of it. The band tension keeps the pin in place and also prevents the band from slipping.... I will try to upload a clear image of this to help you. If everything worked out test the trigger if it works. Fit the other 'slideSide' to the rest of the model aligning the pins and rectangular piece making sure the slide sits down properly and parallel to the other slide piece. Press the trigger to see if it is moving and also causing the slide to move or not and keep pushing it till the slide snaps back to the original position, if there is any resistance you might need to sand the appropriate parts. If it works as intended glue the slide sides to the pins. Glue the other sidePanel to the 'Mid' Part and attach the gripcovers to their respective side panel. You can also print and glue the parts in 'Extras' to the body of the pistol if you want by using the small holes in the side panels. However the holes are not properly aligned and will not allow the extras to be attached aligned perfectly with the holes so you will have to use them as a reference and attach the parts slightly away from the slide(sorry.. I will maybe try to fix this but seems unnecessary as they are just decorative).
Whew! That was too long and unnecessary. Hopefully in the future I will just use some easy pics and maybe a vid .... but that is in the future for now fellow maker. I hope you understood my rambli....err instructions and can make this thing. Good luck! do share your makes and you can ask if there was any trouble with the printing or assembly of the parts in the comments and do check back soon I have a bunch of other things better (or maybe worse) than this that I will upload and I am sure you will like ..... one of them hopefully.....
Thank You
3D printing settings
Except for grips which were printed in TPU rest of the model can be printed in PLA. These are the settings I used for my print.
Layer Height = 0.2,
Top Layers= 5
Bottom Layers = 4
Perimeters= 2
Supports only on the hook (small section on 'Mid' part at end of the barrel thing)

