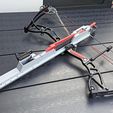
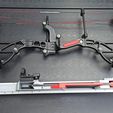
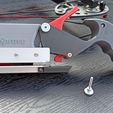
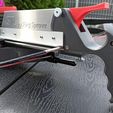
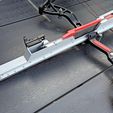
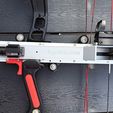
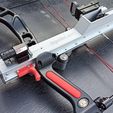
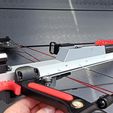
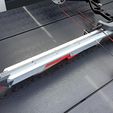
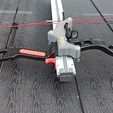
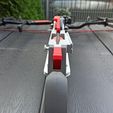
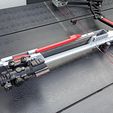
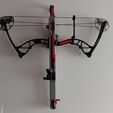
This project is based on the invention of Jörg Sprave from The Slingshot Channel named "Sliding Instant Legolas", commercially available under the name "The Fenris".
I put his name on the back part of the magazine with his permission, to appreciate this great invention.
How it works? Watch this video:
https://www.youtube.com/watch?v=a91zx70AqUc
or Jörg's video:
https://www.youtube.com/watch?v=7Qylkkqh7EY&t=893
Before you start building, make sure that this type device is legal in your country.
I am not responsible for the consequences of building, possession and using this repeating bow.
You build it on your own responsibility.
As "The Fenris" is CNC machined in Austria and very expensive, I decided to make my own cheaper DIY version.
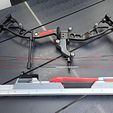
I present my vision of Jörg's invention, with some of my proprietary solutions, optimized to be made with 3D printed parts and other easily available materials. SIL hybrid was designed to the EK Archery Assassin / Exterminator compound bow only, but after designing a dedicated adapter, it can also be mounted on other compound bows. List of compatible bows and available adapters you will find here:
https://legolini.com/sil_compatible_bows.php
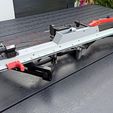
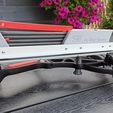
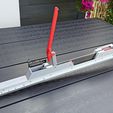
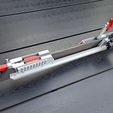
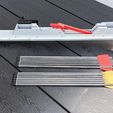
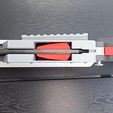
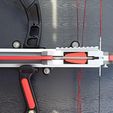
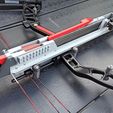
SIL hybrid is pump-action repeating bow with integrated quiver (magazine) for 7 arrows (bolts) and thumb triggered release. Standard 15 inch long bolts (carbon bolts for EK Archery Cobra R9 / Cold Steel Cheap Shot 130 crossbows) can be loaded manually or automatically with additional SIL Ammo Clip, after deflecting the magazine spring lever.
If you want to shoot really fast you need also SIL Ammo Clip (Speed loader):
https://cults3d.com/en/3d-model/various/sil-ammo-clip-speed-loader-for-sil-hybrid-repeating-bow
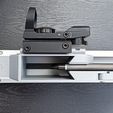
Aiming is carried out using a laser sight (up to 15-20 m distance) or red dot sight (up to 30-40 m distance). Possible installation of a short 4x32 ACOG type scope and shooting at longer distances. The magazine is easy to assemble and disassemble on the bow, because the rear handle is tilted away after unscrewing one thumb screw.
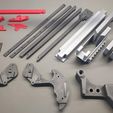
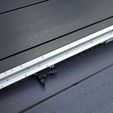
SIL magazine is a hybrid of 4 aluminum profiles (20x10x2 mm angles 700 mm long - from a DIY store) and a dozen or so printed parts on a 3D printer. The aluminum profiles ensure rigidity, while the 3D printed elements merge everything into one with M3 screws. As you can see in the pictures, the construction is quite simple. I used cheap rollers and thumb screws from the 3D printer and some different screws, nuts and springs. The cost of materials is around 40-50 euros. The most difficult is to drill so many holes in the profiles in the right places, but with the prepared templates it can be done relatively easily. The assembly of the whole is not difficult afterwards.
You can find detailed information and instructions at: https://legolini.com/files/SIL_hybrid_bow.pdf
Please read the above file carefully before doing anything.
For more information also visit:
https://legolini.com/sil_hybrid_bow.php
In the ZIP package with STL files there is also a folder "For advanced DIY" where you will find some STEP files and additional STL files. These files are included to make it easier for advanced users to adapt the design to other compound bows (also for left-handed).
How to assemble? Read PDF manual and watch this video:
https://www.youtube.com/watch?v=AESVeXgr3a8
Updates:
2021.02.17
New adapter for Sanlida Archery Dragon X8 Compound Bow. For this adapter you need 2 pieces M5x55 mm screw and 1 piece M5x29 mm
(you can cut M5x30 mm screw to right length or use 1 mm shim from outer side of the wheel).
First cut internal support in the hole for top rear M5 screw. Then put M5 nut into place and screw top rear wheel with eccentric spacer to the adapter.
Install the remaining screws and wheels as normal.
Note - adjustment of the pressure of the upper wheels to SIL angles is possible only in 2 positions - put both eccentric spacers in right direction.
If you want to hang this SIL bow on the wall, the spacing between the mounting holes is 27 cm.
One user reported that they have an unusual version of the Junxing M125 bow with a straight rod that pulls back the bow cables.
I have prepared a special version of the adapter that should fit a bow with a straight rod. Check the file "bow_adapter_junxing_m125_straight_rod.stl".
2021.01.17
New adapter for Junxing M125 Compound Bow. This inexpensive powerfull compound bow is also known as the "Predator Archery Raptor", "Spot On Rogue" and "Greyback".
There is also the first available adapter for left-handers - "Greyback" left-hand version compound bow.
Instead of the standard 3 M5x50 mm screws you need 3 M5x55 mm screws for this adapter.
STEP files have been added for each of my bow adapters.
2020.11.23
Small change to "magazine_part2" - now it has 2 mm longer room for fletching (the vanes on some cheap Chinese arrows are glued a little further from the nock).
Added surface to the outside of "magazine_part1" to improve bed adhesion.
Added STEP file "aluminum_angles" to easy drill holes on CNC machines.
2020.11.09
New adapter for EK Archery (POE LANG) Rex Compound Bow

